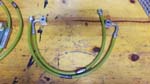
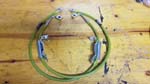
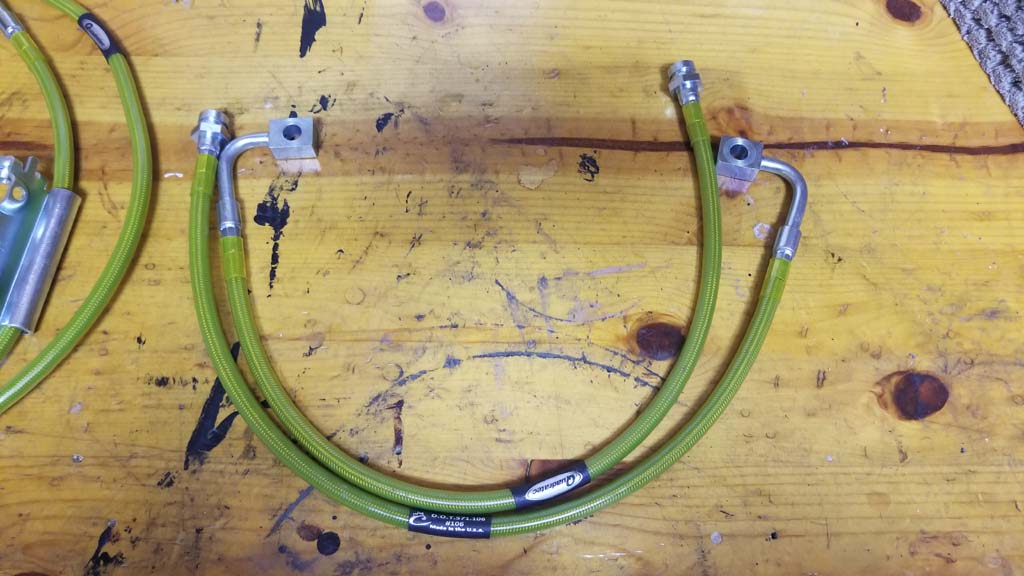
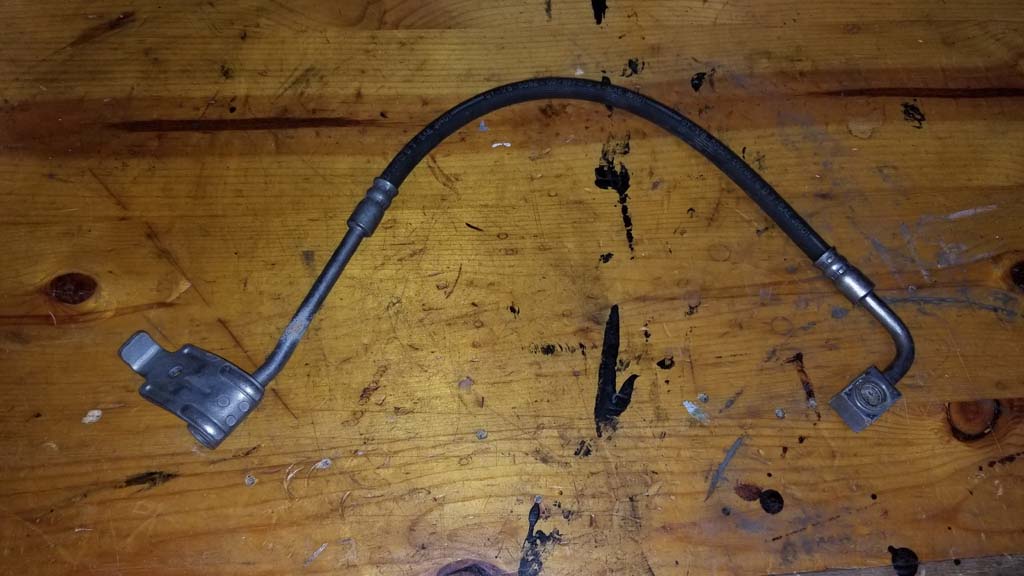
Many years ago I had removed the front brake lines from thier factory axle bracket to gain the extra length when I installed the 2.5" Rock Krawler springs. I had also installed a set of front brake lines on the back of the Jeep to gain the same extra length back there. This was a quick cheap fix for many years. While I was installing the new PowerStop Brake rotors I noticed that the front brake lines had the rubber outer layer worn away even though I had the Teraflex brake line brackets installed to help prevent this. There was just enough flex at full lock turn to cause the brake line to rub against the tire. I looked around at a few different extended brake lines to install on the JK. The one thing that stood out about the crown brake lines was that they used the factory axle bracket on the front to route the line out of the way of the spring, shock and tire. I actually liked this setup. From what information I could find, the crown brake lines had a stronger and more protective construction than the others. The smooth outer coating actually allows them to be wiped clean after we run through the water puddle at the mall.
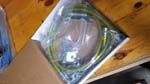
| Parts: |
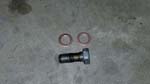
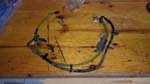
| The kit comes with extended length front and rear brake lines, new frame brackets, retention clips and new crush washers for the banjo bolts. Many of the brake line kits don't come with the new brass crush washers forcing you to purchase them from the local auto parts store. This is a nice touch. The one thing I critize about new brake line kits is that they all seem to use the same frame side brackets that are all exactly the same. You have to flip one side upside down from the other side. i.e. on one side the bracket would be up and on the other it would be down. This makes it a pain to aline the hard line with the new flexible brake line at the bracket. I decided to pick up a set of Yellow brake lines, though to me they look more green than yellow. |
 |
 |
 |
 |
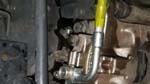
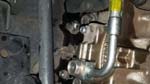
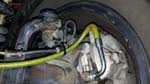
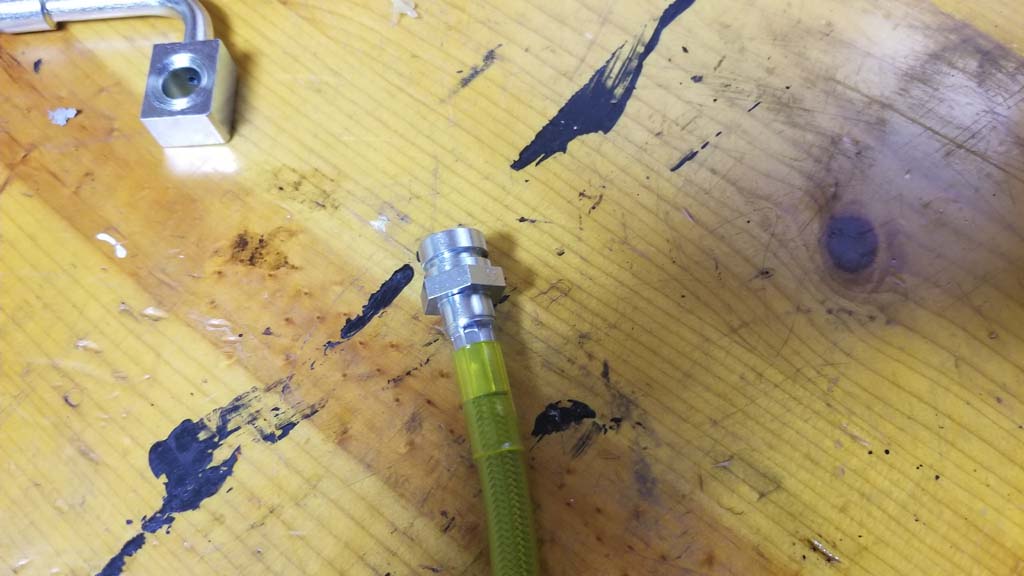
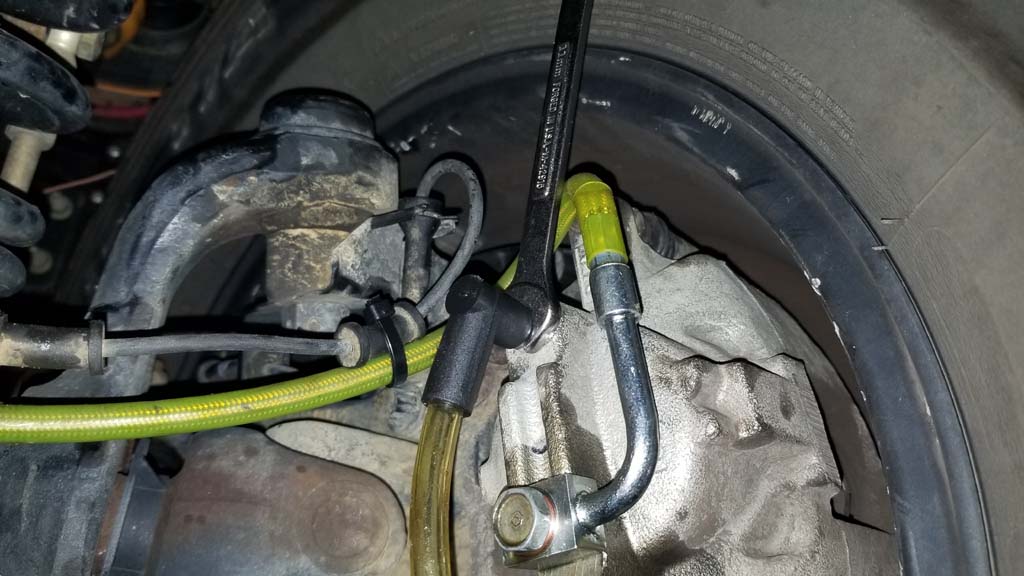
| I liked the OEM quality of the connection points for both the hardline and caliper connections. The factory bracket on the front brake lines allows the brake line to be routed in the original location. This helps to protect the brake line from getting pinched or rubbed when the axle flexes over obstacles. The bracket does allow the line to slide inside of it, so it's not a bind point for the line. |
 |
 |
 |
| |
| Rear Installation: |
| 1. Chock the front tires. Jack up the rear axle and support it on jack stands. Remove both tires. You could also just do one side at a time, just remember to support the axle on that side with a jack stand. I recommend you use a good pair of vinyl gloves (with extras) when working with the brake fluid. I have some 9mil gloves and I ripped a few while working with the parts. One of my friends gets a skin irritation from brake fluid, so use some caution. |
 |
| You will be disconnecting the upper hard line from the end of the flexible brake line. Removing the banjo bolt and crush washers from the brake caliper and removing the upper brake line bracket from the frame. This will make a mess and you want to be careful to wipe off/up and brake fluid because it will eat into some paints if left on the surface. |
 |
 |
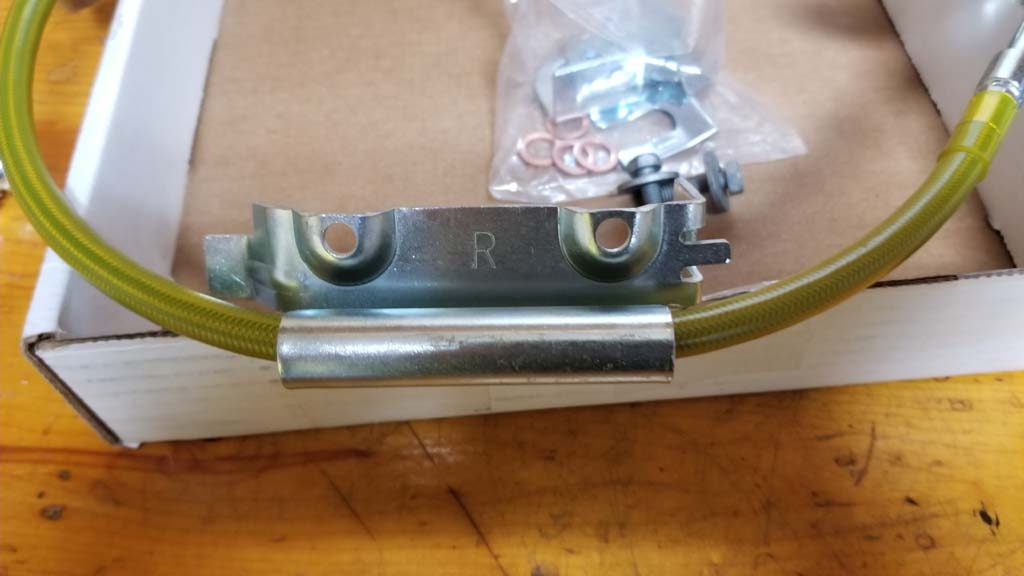
| You will need the rear brake lines, 2 frame brackets, 2 retention clips and 4 brass crush washers for the banjo bolt. |
 |
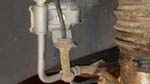
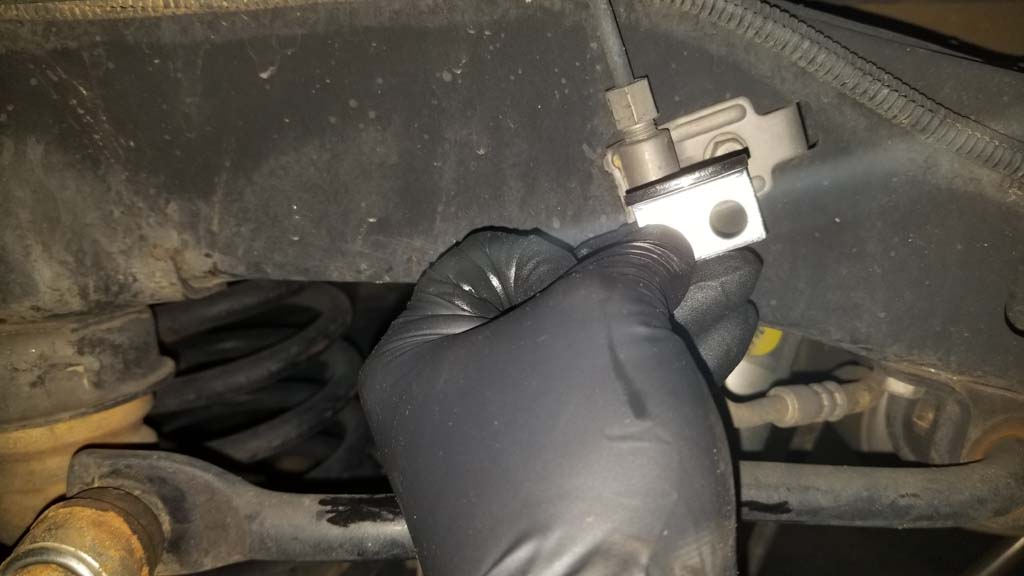
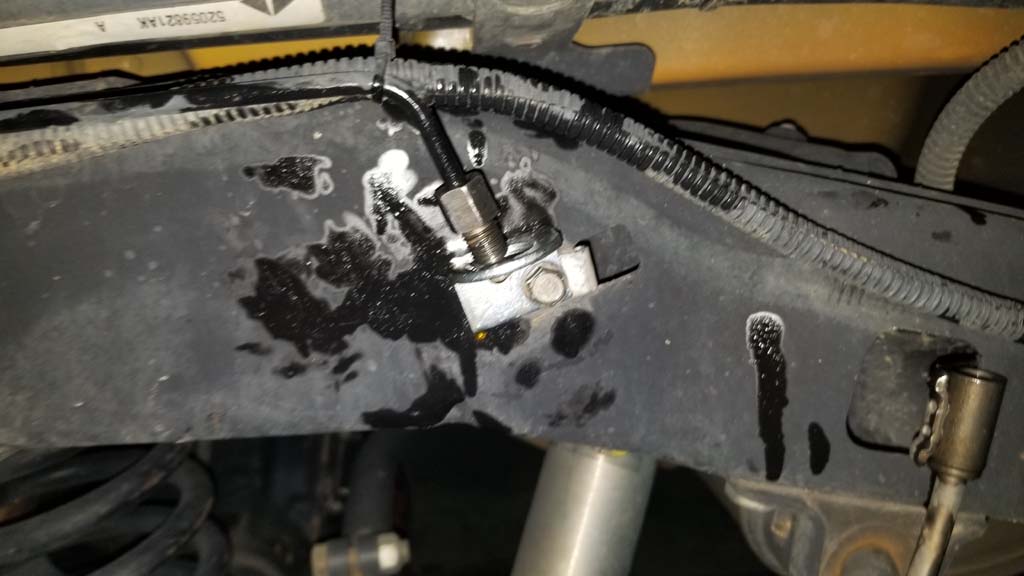
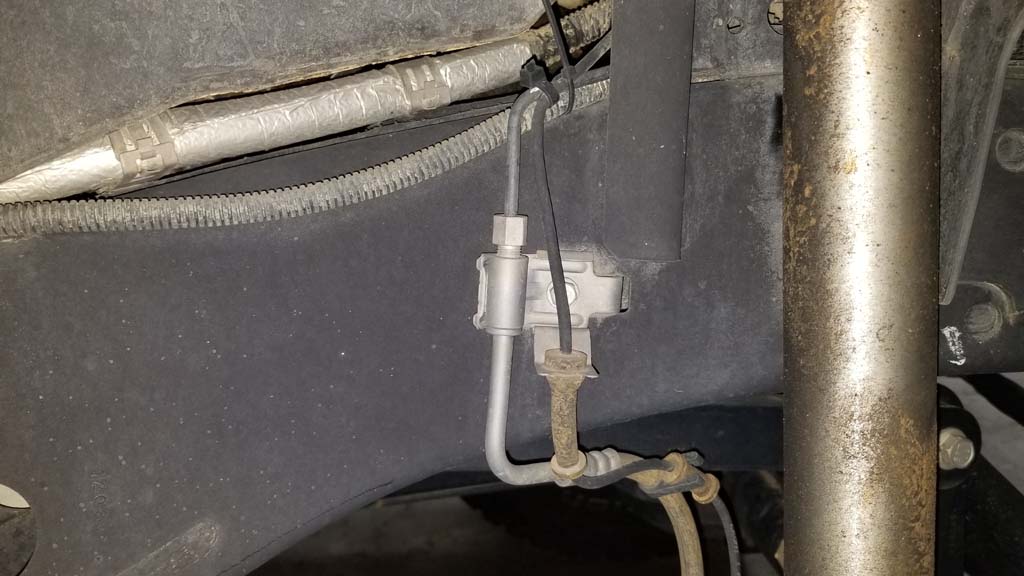
| This is a picture of the new frame bracket. On the driver side (first picture) you can see that the mounting point for the new brake line will be up, while on the passenger side (second picture) it is down. You will need to adjust the had line to make this work. It does slide in it's mounting brackets along the frame. Alternately you could drill an additional hole in the bracket so that they are both on the up side. Passenger side would need to be drilled. |
 |
 |
 |
| 2. This is where it gets messy. Remove the upper hard line from the mounting bracket. You will need a 12mm combo wrench. Remove the mounting bracket with a 10mm socket or 10mm combo wrench |
 |
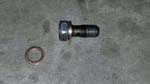
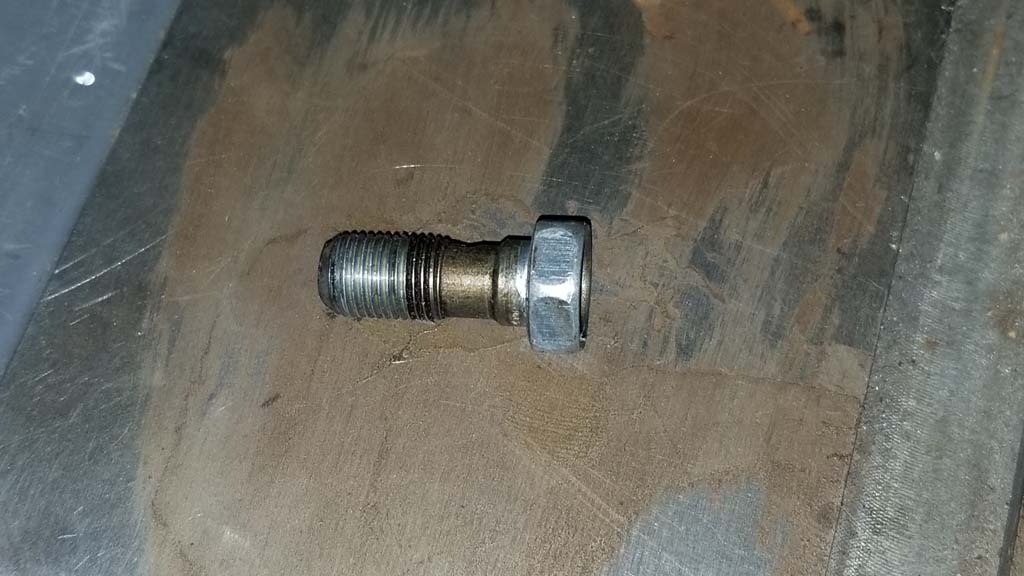
| 3. Remove the banjo bolt with a 15mm combo wrench. |
 |
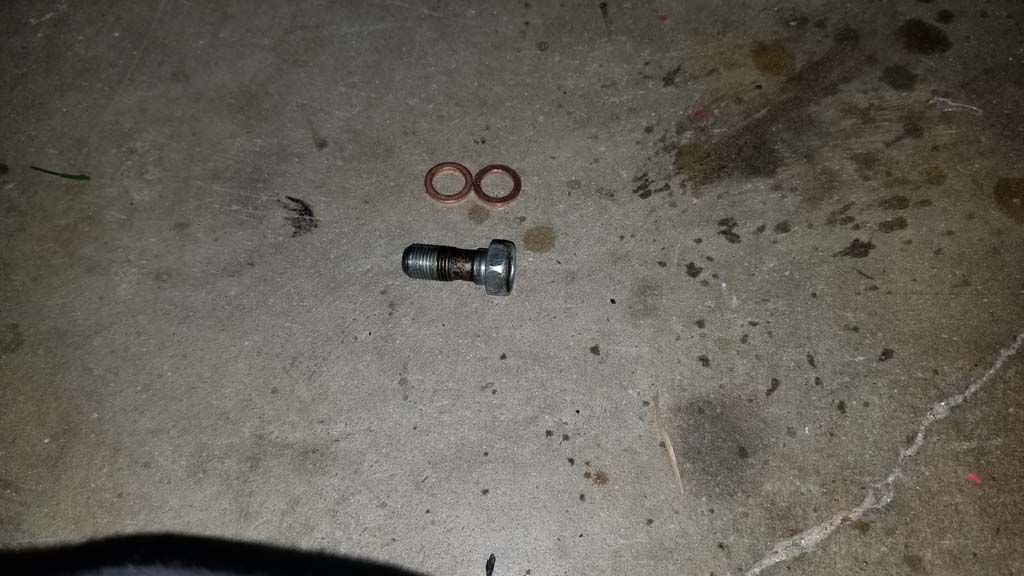
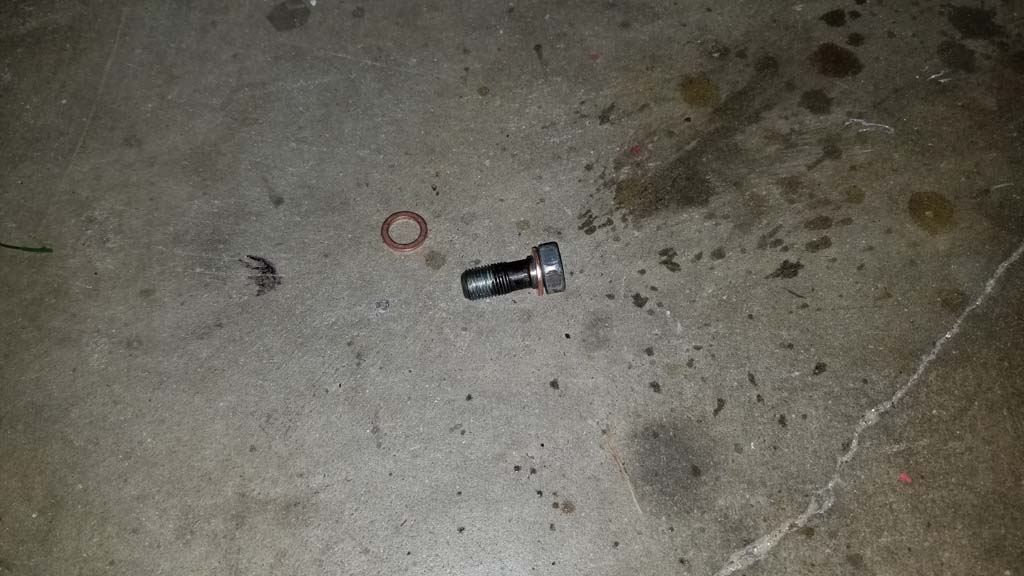
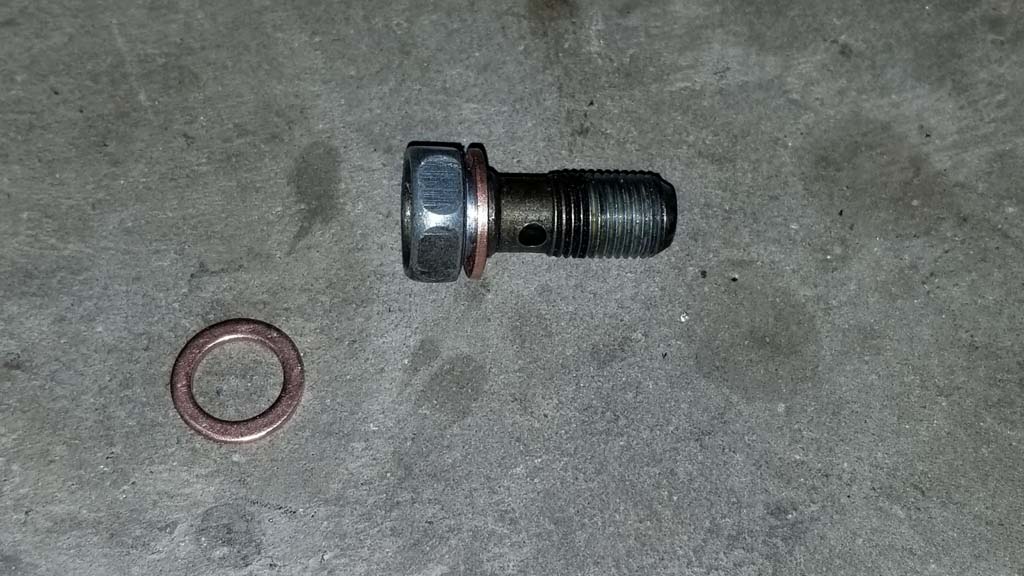
| 4. Make sure the brass crush washer is removed from the caliper. Remove the banjo bolt from the old brake line and remove the brass crush washer from the banjo bolt. This can be a little difficult because it is a crush washer and may be tight around the bolt shaft. I took a moment to wipe off the bolt and check the threads for any debris and damage. |
 |
 |
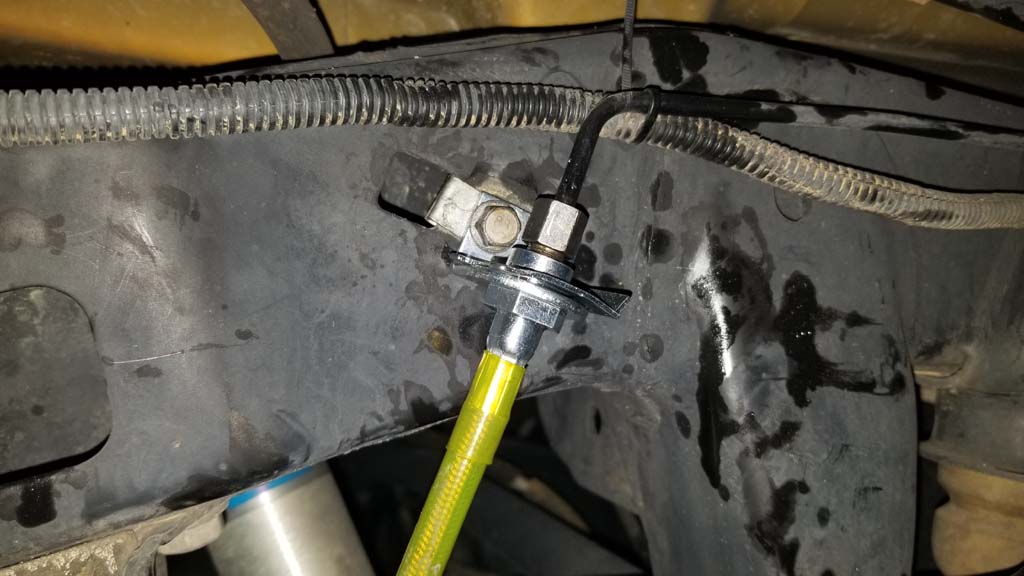
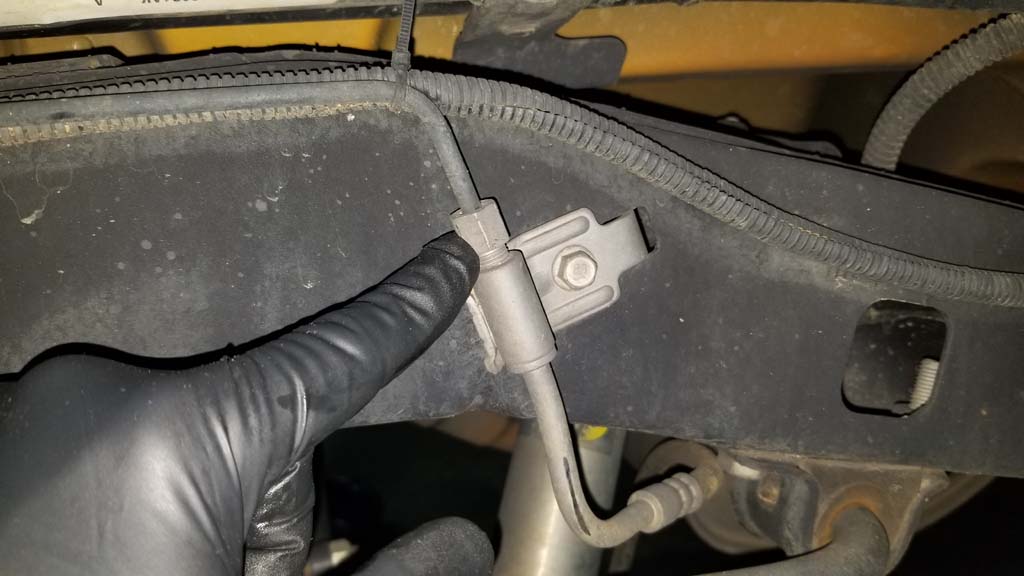
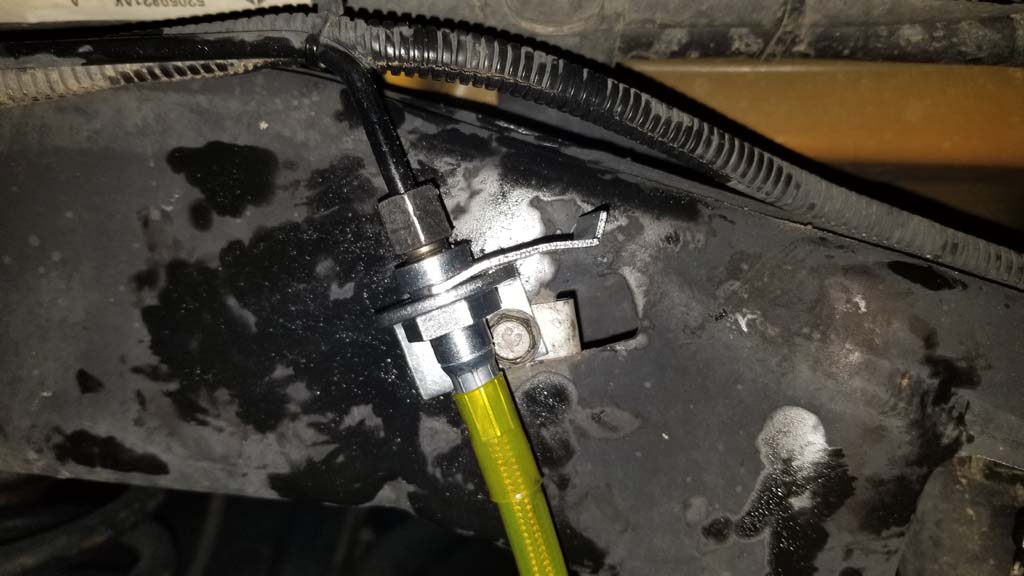
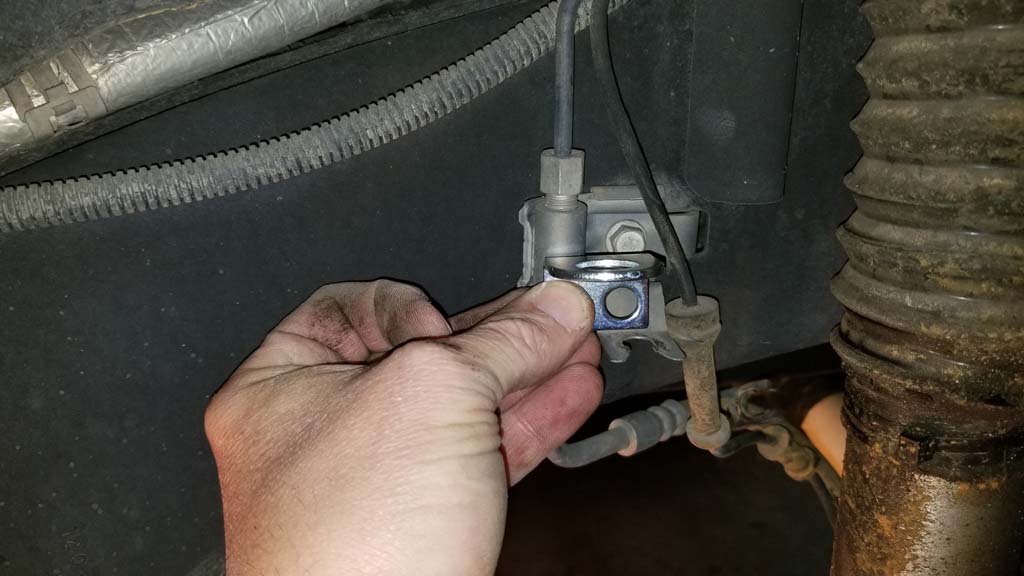
| 5. Bolt the new bracket to the frame with the factory bolt you just removed. Do not tighten competely, you will need to move the bracket around a little. You will need a 10mm socket or combo wrench. |
 |
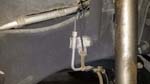
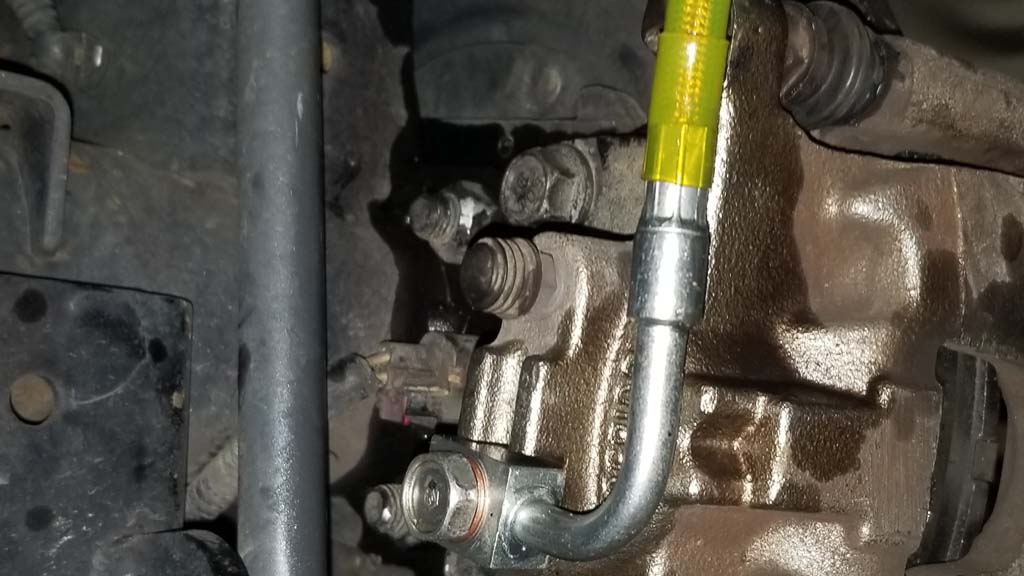
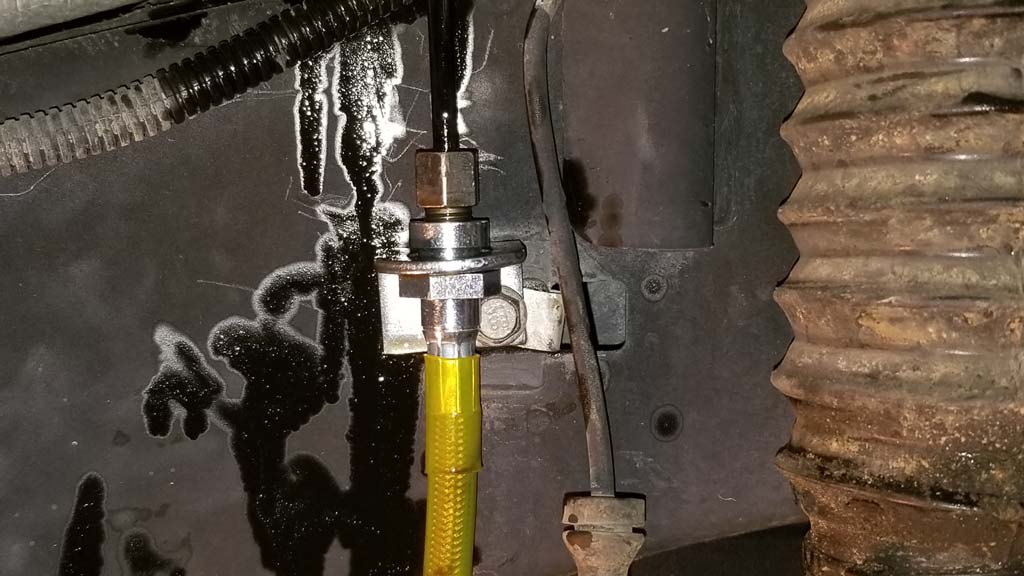
6. Insert the end of the new brake line up into the bracket and screw the end of the hard line into it. You will need to adjust the hard line as needed to get it into position and straight into the new brake line. It should thread in fairly easy once you get it aligned. Use a 12mm combo wrench and 17mm combo wrench to tighten the connection.
WARNING: YOU DO NOT WANT TO CROSS THREAD THIS CONNECTION! |
 |
|
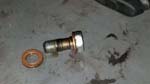
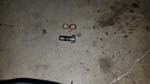
| 7. Slide one brass crush washer over the end of the banjo bolt. |
 |
 |
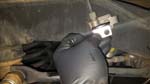
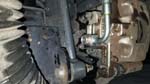
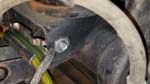
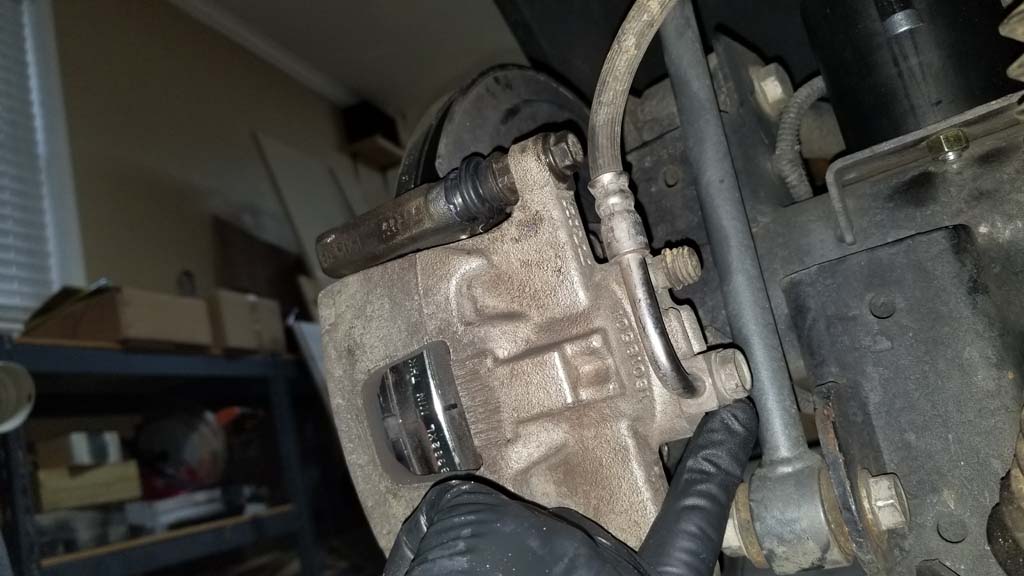
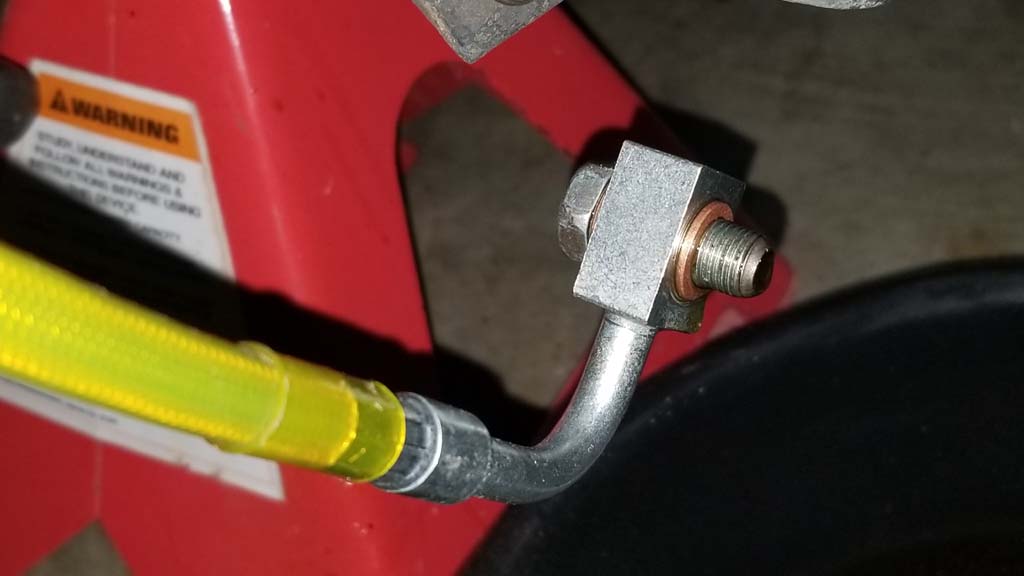
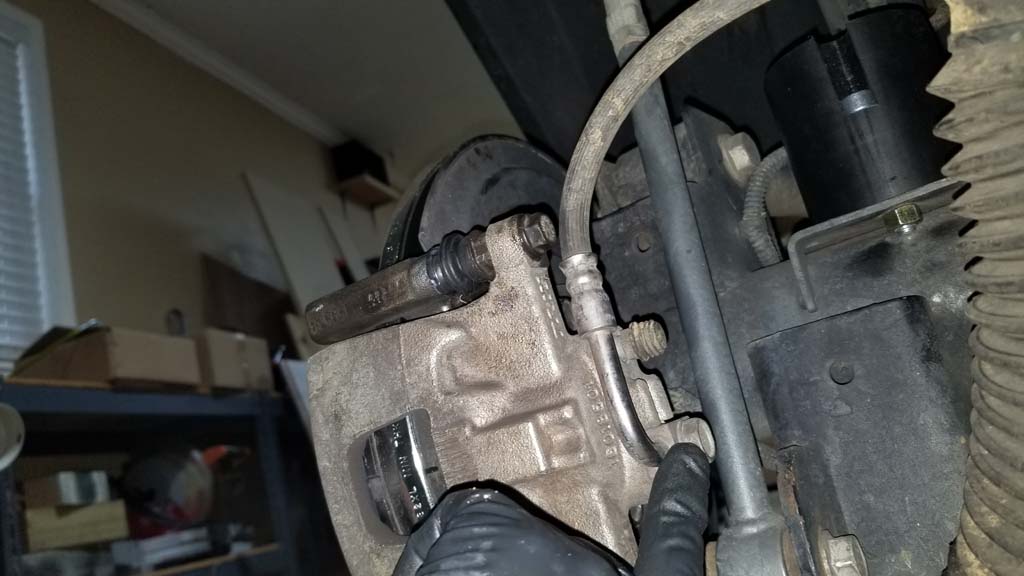
| 8. Insert the banjo bolt through the end of the caliper side brake line and then place a brass crush washer over the end. Install the banjo bolt back into the caliper. The brake line block should aligned so that the hard line from it goes straight back before turning up as in the picture. The caliper does have a tab on it to help with alignment and keep the block from turning when you tighten the banjo bolt. You will need a 15mm combo wrench. |
 |
 |
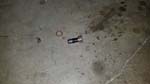
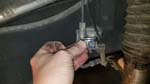
| 9. Install the retention clip into the slot on the brake line end. The retention clip goes above the brake line bracket with the tab at the end facing up. Use a channel lock pliers to squeeze the clip into place. Tighten the bolt holding the bracket to the frame. Use a 10mm combo wrench. |
 |
 |
| Finished installation |
 |
| Wipe off any brake fluid from the frame, axle, shocks, brake caliper, brake rotor, floor, tools, etc. |
 |
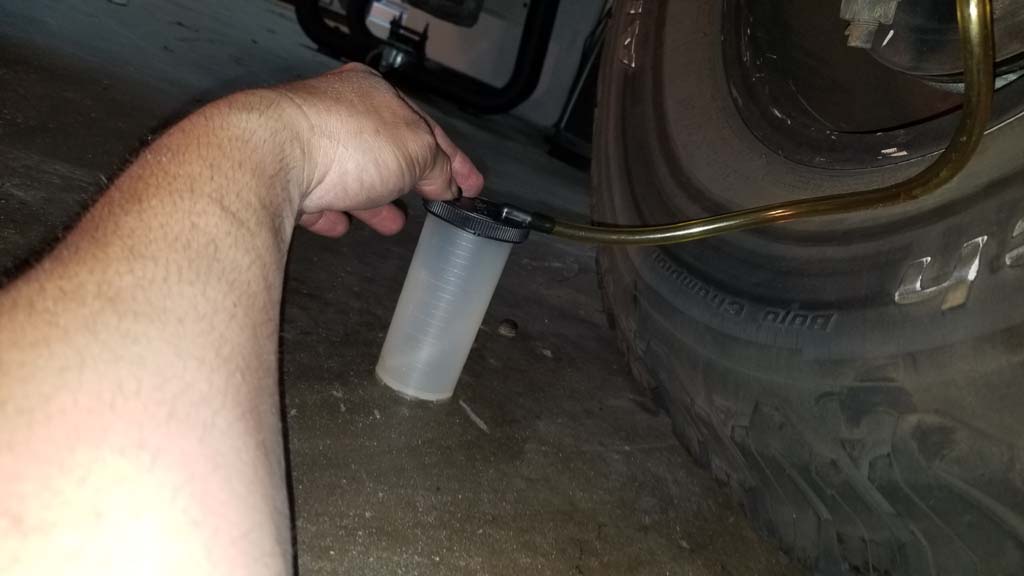
Do a quick bleed on the rear brakes, you will do a full bleed after you have all 4 brake lines replaced. Remove the rubber cap from the brake bleed screw. Put this where you can find it, if you lose one you can pick up some at the local auto parts store. Don't ask how I know.
|
 |
 |
Bleed your brakes. Check your master cylinder and refill prior to bleeding. You will need to recheck this as you bleed to ensure that you don't allow it to go dry and suck air into the system. You will need an 11mm combo wrench.
Note: Start with the passenger rear brake line since it is the furthest from the master cylinder. |
 |
 |
|
| Front Installation: |
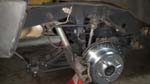
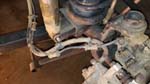
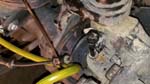
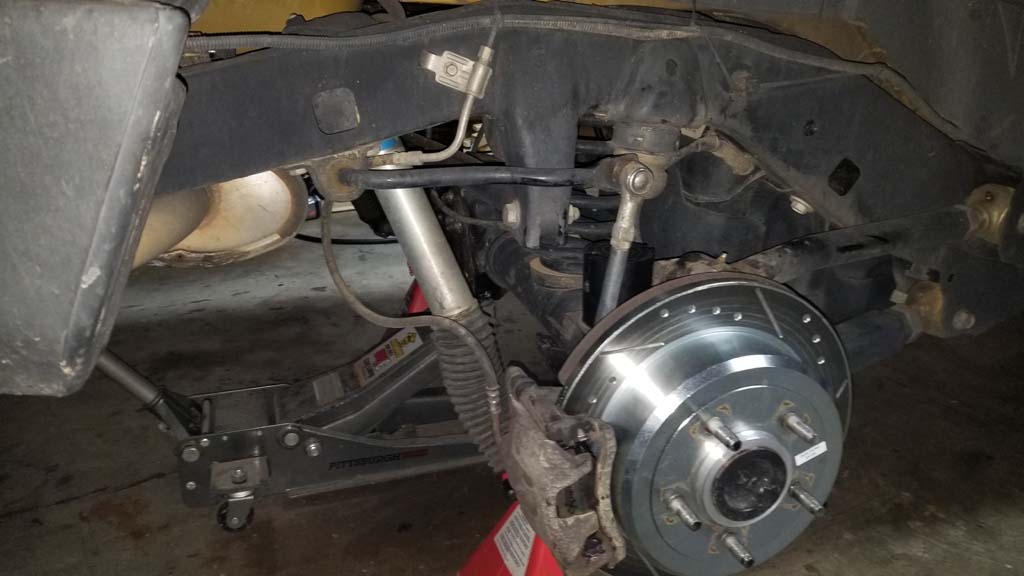
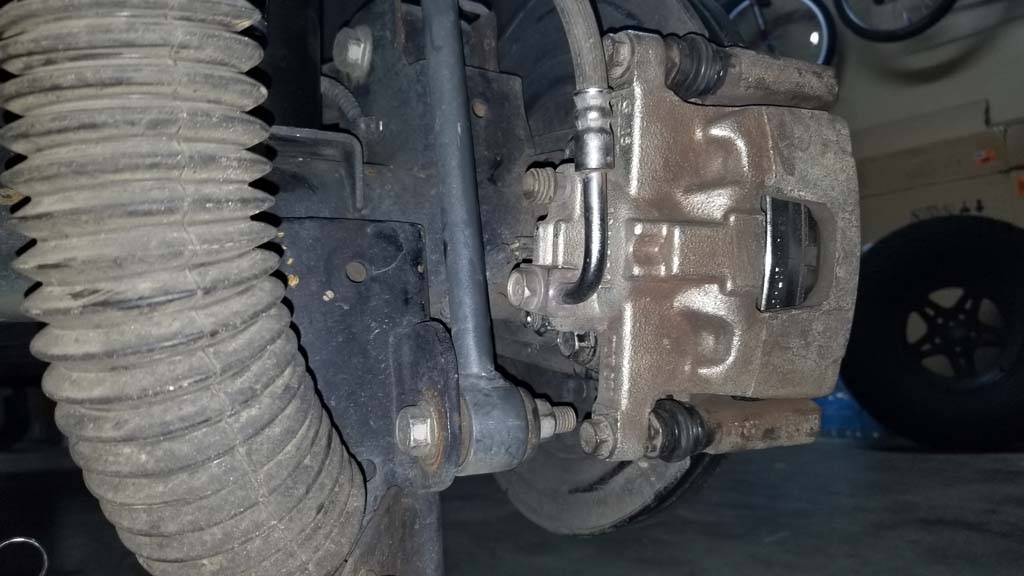
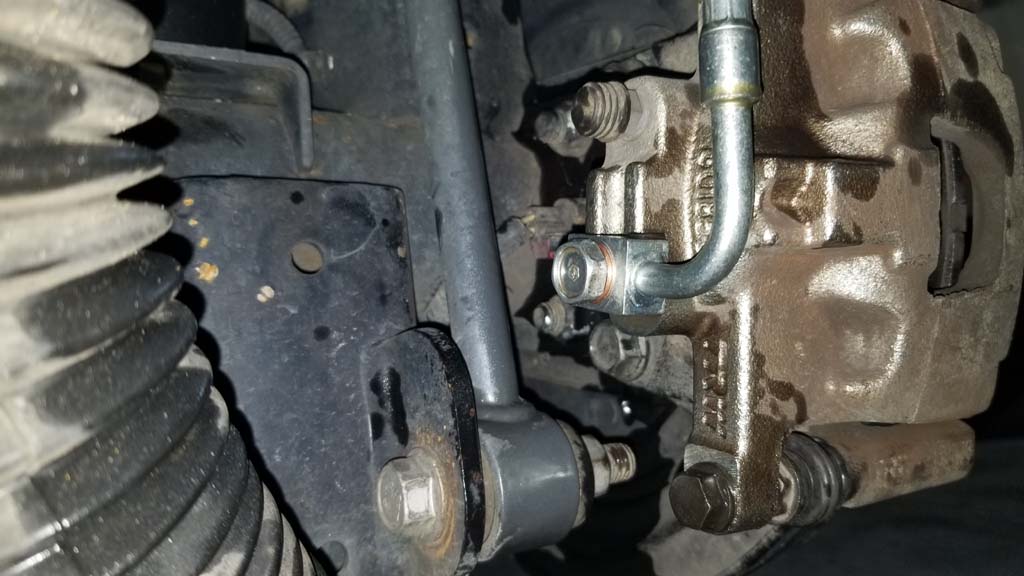
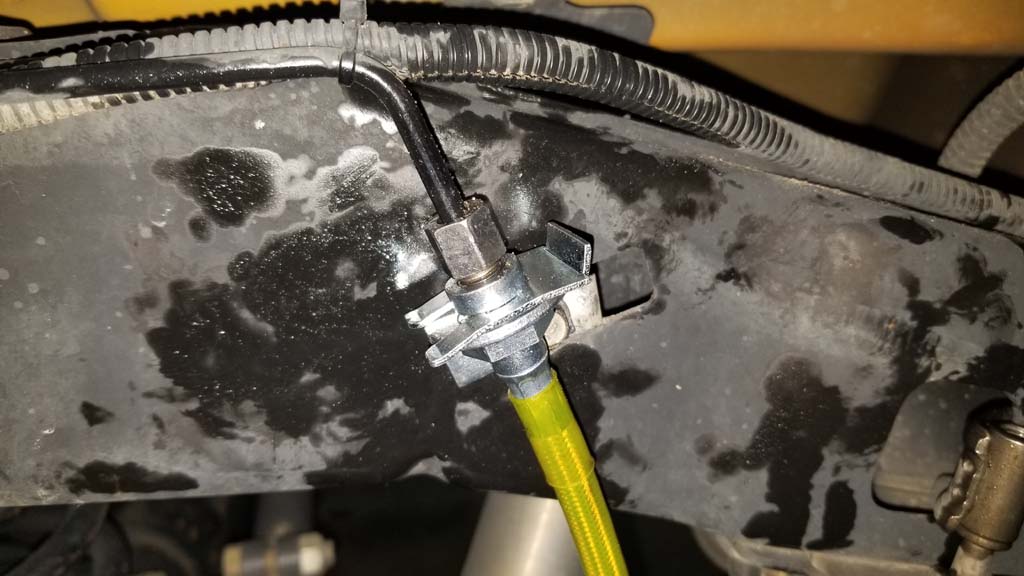
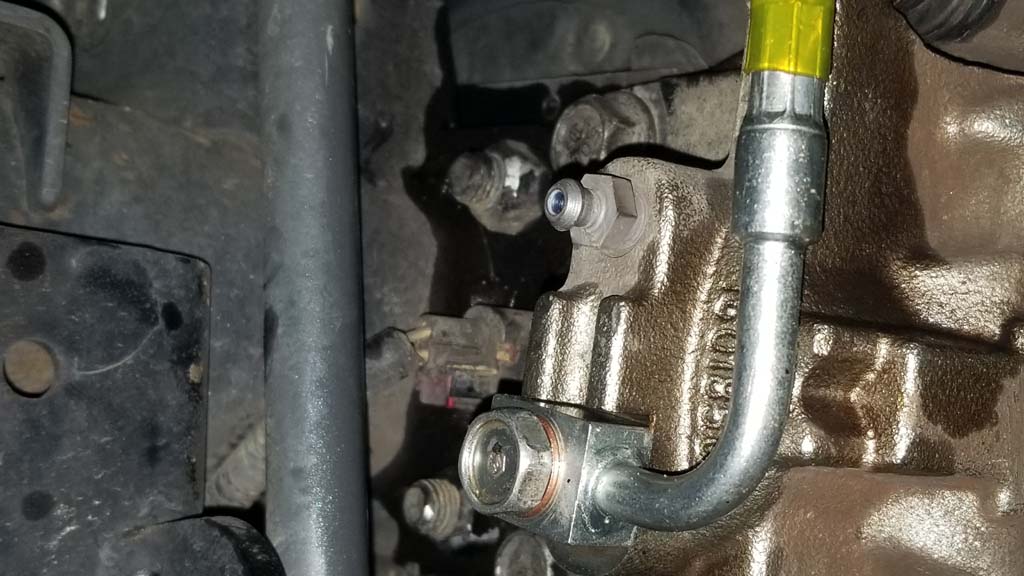
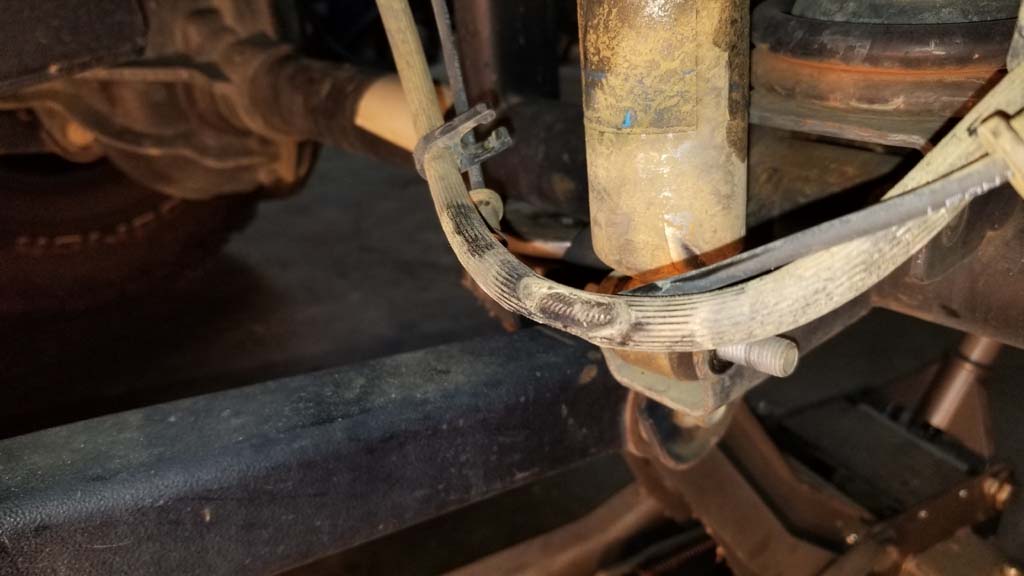
| The front crown brake lines come with the fractory axle bracket already installed. The line does have enough room to slip inside of the bracket, so there is no binding. |
 |
 |
| 1. Chock the rear tires. Jack up the front axle and support it on jack stands. Remove both tires. You could also just do one side at a time, just remember to support the axle on that side with a jack stand. I recommend you use a good pair of vinyl gloves (with extras) when working with the brake fluid. I have some 9mil gloves and I ripped a few while working with the parts. One of my friends gets a skin irritation from brake fluid, so use some caution. |
| You will be disconnecting the upper hard line from the end of the flexible brake line. Removing the banjo bolt and crush washers from the brake caliper and removing the upper brake line bracket from the frame. This will make a mess and you want to be careful to wipe off/up and brake fluid because it will eat into some paints if left on the surface. |
| You will need the rear brake lines, 2 frame brackets, 2 retention clips and 4 brass crush washers for the banjo bolt. You will also be reusing the factory bolt holding the brake line bracket to the axle and the ABS cable retention zip ties. |
| Just like the rear the new brake line frame brackets are upside down from each other. On the driver side the mounting point for the new brake line will be up, while on the passenger side it is down. You will need to adjust the had line to make this work. It does slide in it's mounting brackets along the frame. Alternately you could drill an additional hole in the bracket so that they are both on the up side. Passenger side would need to be drilled. |
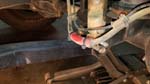
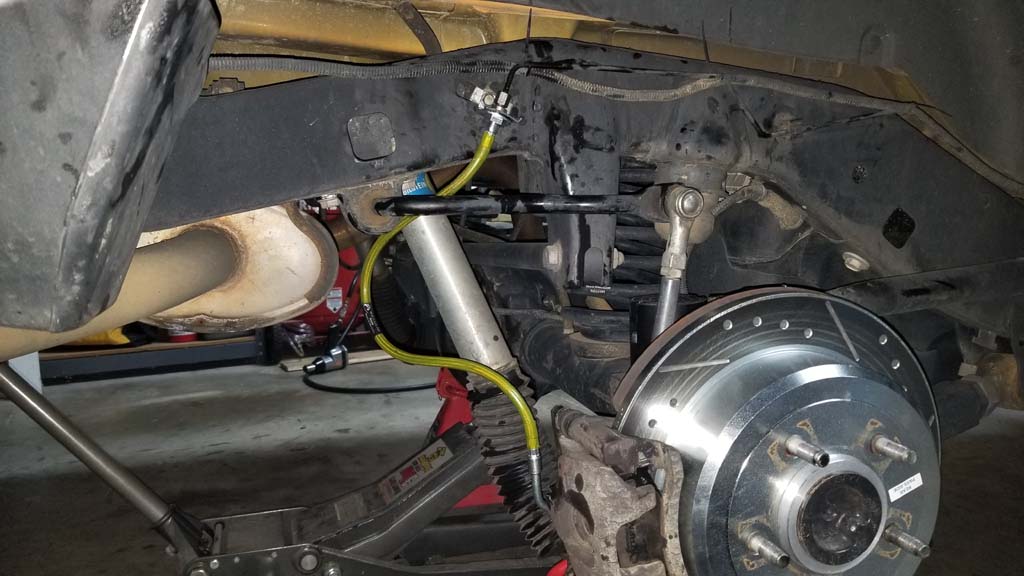
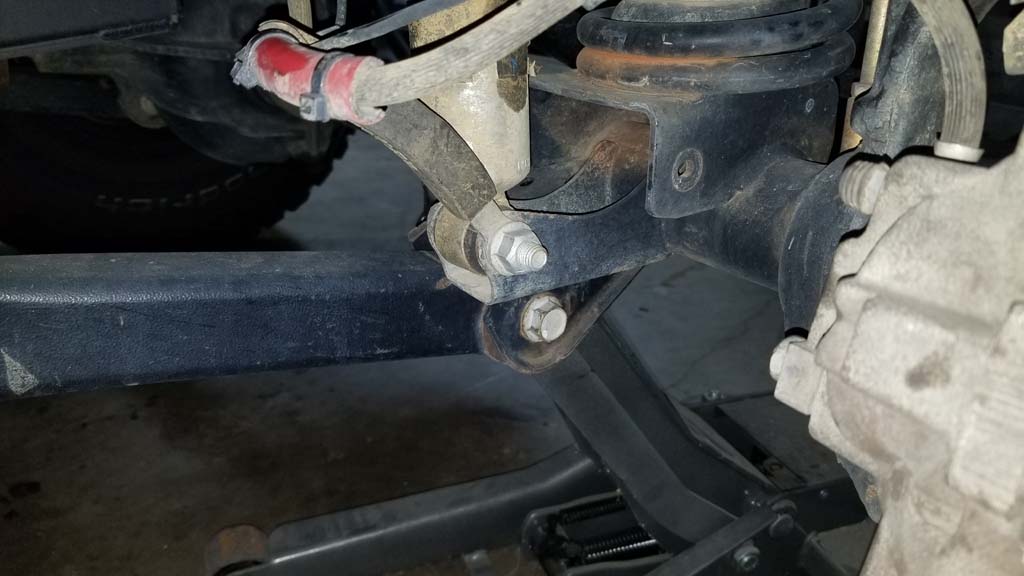
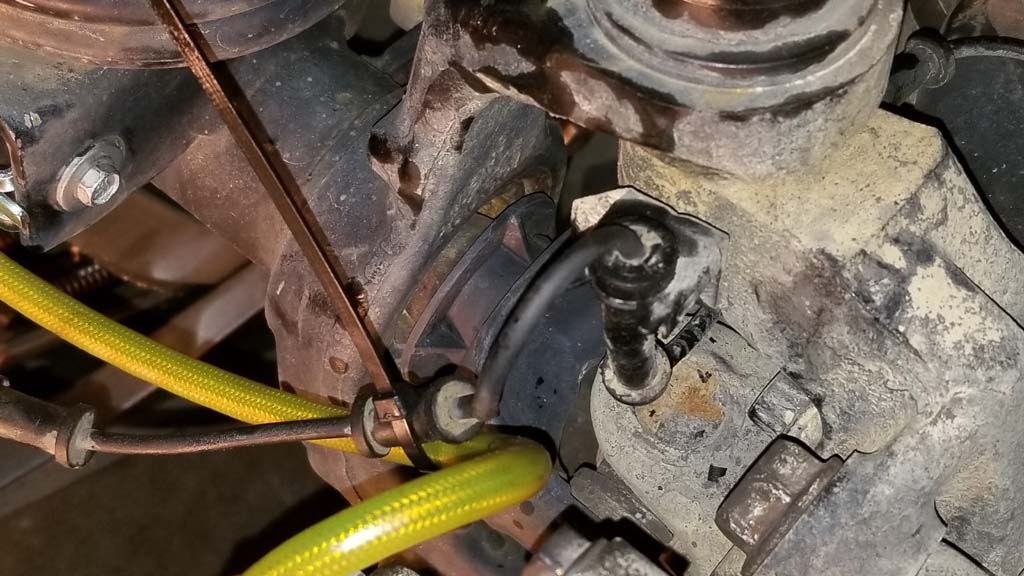
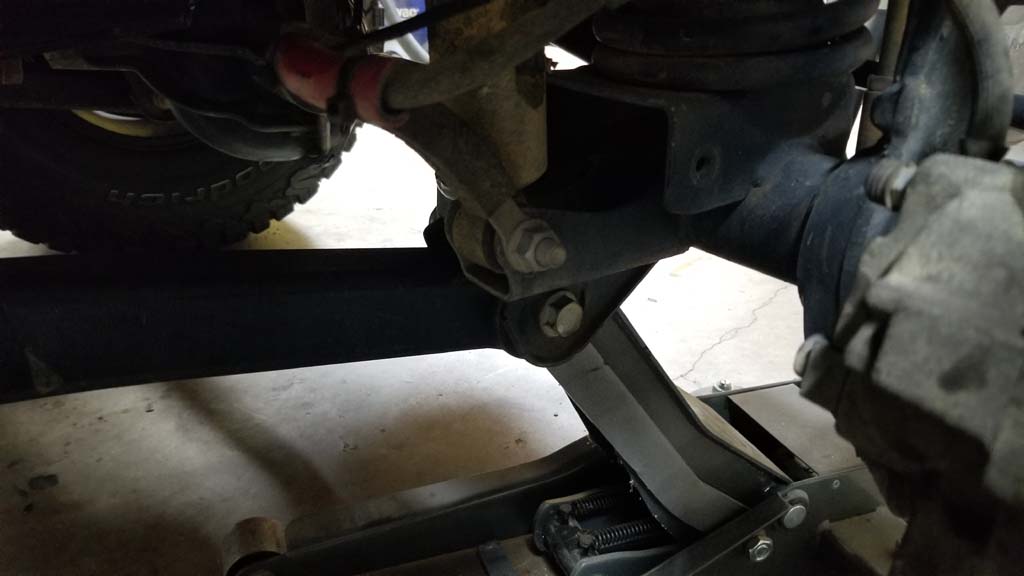
| I had removed the factory brake lines from their bracket and installed the teraflex brake anchor in the past, I needed to remove this before I could continue. The involved removing the nut from the lower shock eye and carefully cutting the zip ties holding the brake line and ABS line in the teraflex brake anchor. |
 |
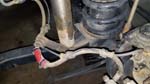 |
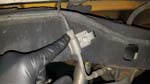
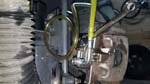
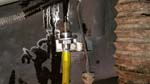
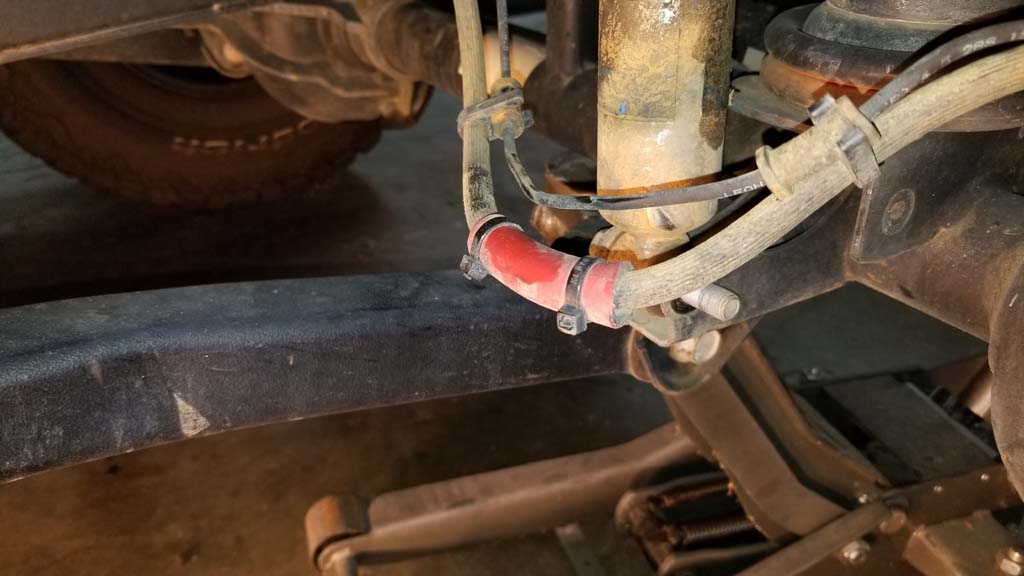
| You may have noticed the extra piece of protection on the brake line. Thats because I didn't notice that the brake line was actually rubbing the tire and full lock turn and had worn away down to the steel braid. |
 |
 |
| 2. Remove the ABS line from the clips holding it to the factory brake line. Also, remove the line from the brake line frame bracket. The should slide out with a slight twisting motion. |
 |
 |
| 3. This is where it gets messy. Remove the upper hard line from the mounting bracket. You will need a 12mm combo wrench. Remove the mounting bracket with a 10mm socket or 10mm combo wrench |
 |
| 4. Remove the banjo bolt with a 15mm combo wrench. |
|
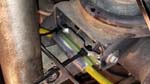
| 5. Remove the zip ties that hold the ABS line to the brake line axle bracket. You will need a trip removal tool, or a pair of needle nose pliers to get these out. Remove the bolt holding the brake line bracket in place using a 10mm combo wrench or socket. The bracket slides into a slot on the opposite side from the bolt. |
|
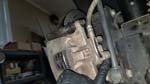
| 6. Feed the new Crown brake line between the shock and spring. Install the bracket in the OEM location. Reinstall the bolt holding the bracket to the axle. |
 |
| 7. Make sure the brass crush washer is removed from the caliper. Remove the banjo bolt from the old brake line and remove the brass crush washer from the banjo bolt. This can be a little difficult because it is a crush washer and may be tight around the bolt shaft. I took a moment to wipe off the bolt and check the threads for any debris and damage. |
|
|
| 8. Bolt the new bracket to the frame with the factory bolt you just removed. Do not tighten competely, you will need to move the bracket around a little. You will need a 10mm socket or combo wrench. |
 |
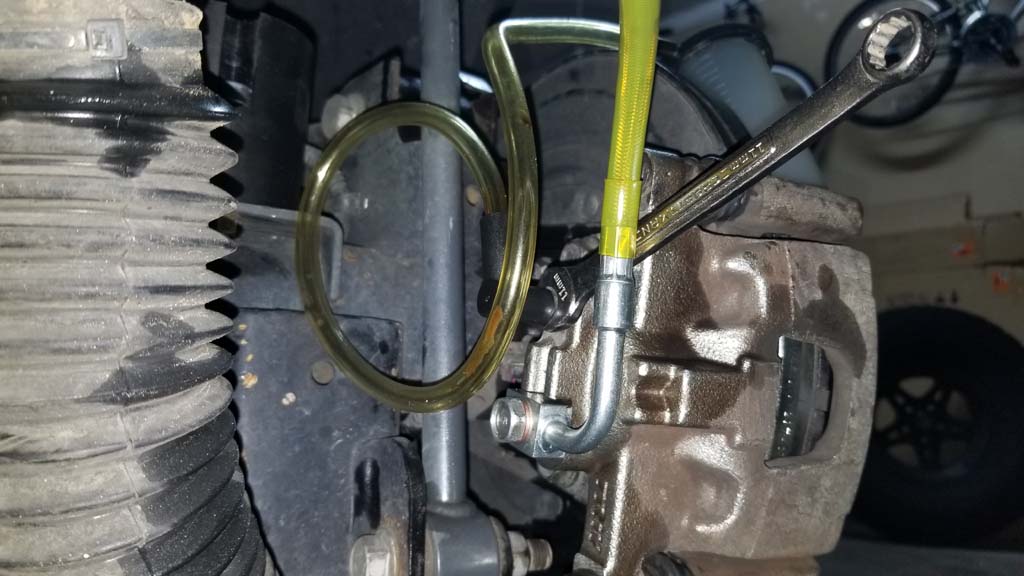
9. Insert the end of the new brake line up into the bracket and screw the end of the hard line into it. You will need to adjust the hard line as needed to get it into position and straight into the new brake line. It should thread in fairly easy once you get it aligned. Use a 12mm combo wrench and 17mm combo wrench to tighten the connection.
WARNING: YOU DO NOT WANT TO CROSS THREAD THIS CONNECTION! |
 |
| 10. Slide one brass crush washer over the end of the banjo bolt. |
 |
 |
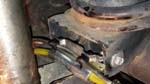
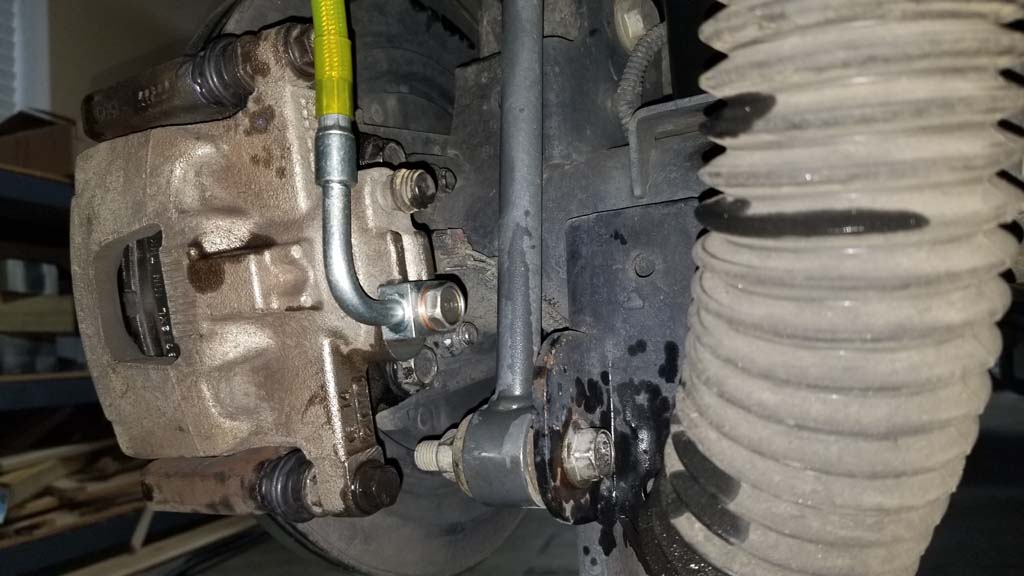
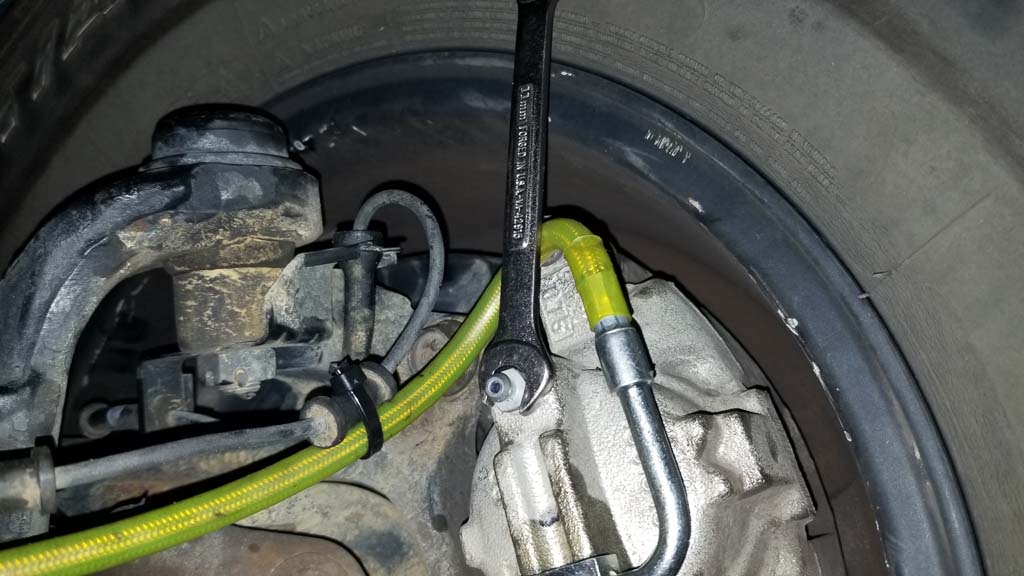
| 11. Insert the banjo bolt through the end of the caliper side brake line and then place a brass crush washer over the end. Install the banjo bolt back into the caliper. The brake line block should aligned so that the hard line from it goes straight back before turning up as in the picture. The caliper does have a tab on it to help with alignment and keep the block from turning when you tighten the banjo bolt. You will need a 15mm combo wrench. |
 |
|
| 12. Install the retention clip into the slot on the brake line end. The retention clip goes above the brake line bracket with the tab at the end facing up. Use a channel lock pliers to squeeze the clip into place. Tighten the bolt holding the bracket to the frame. Use a 10mm combo wrench. |
|
|
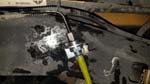
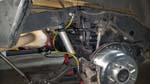
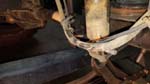
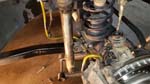
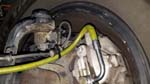
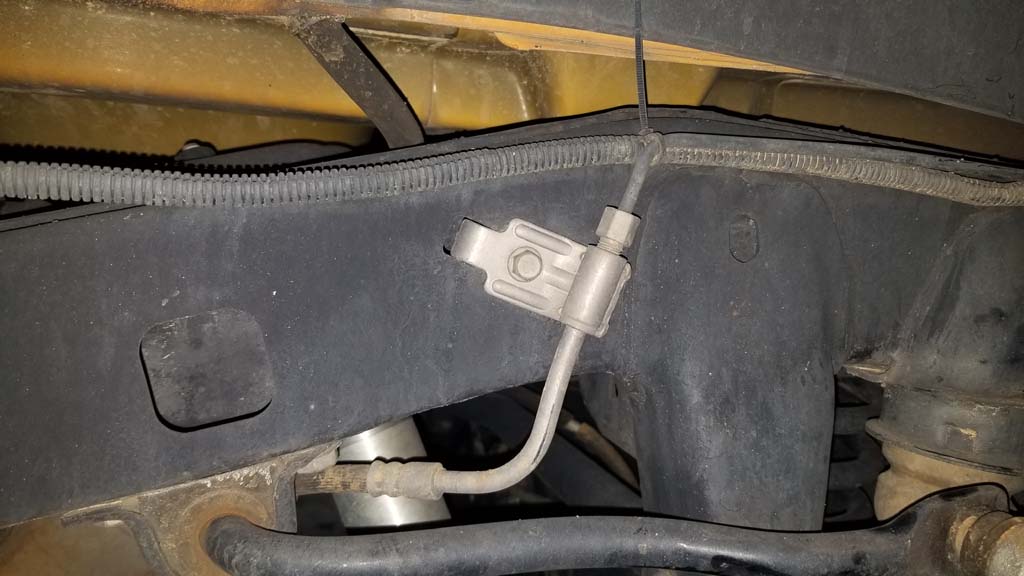
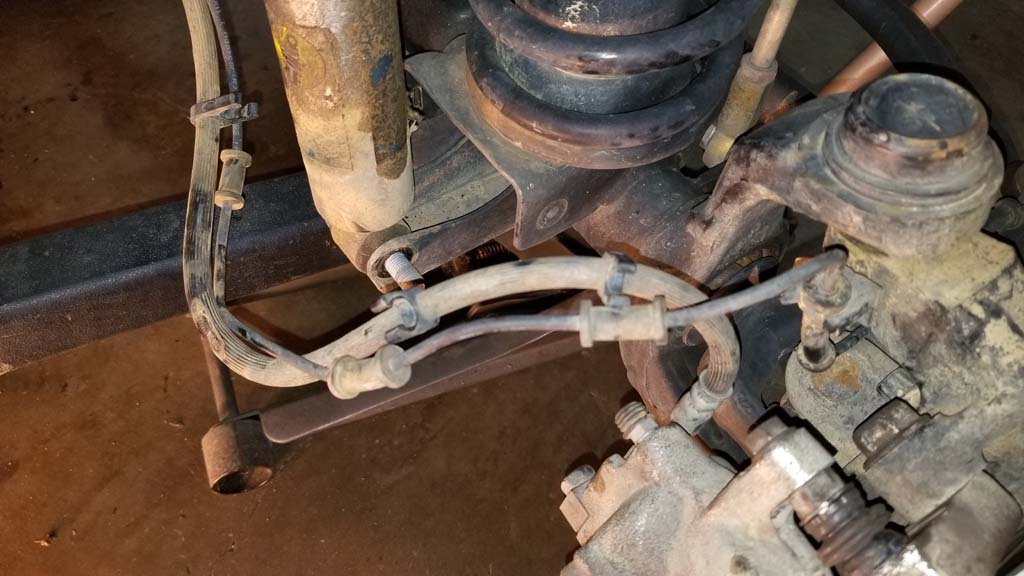
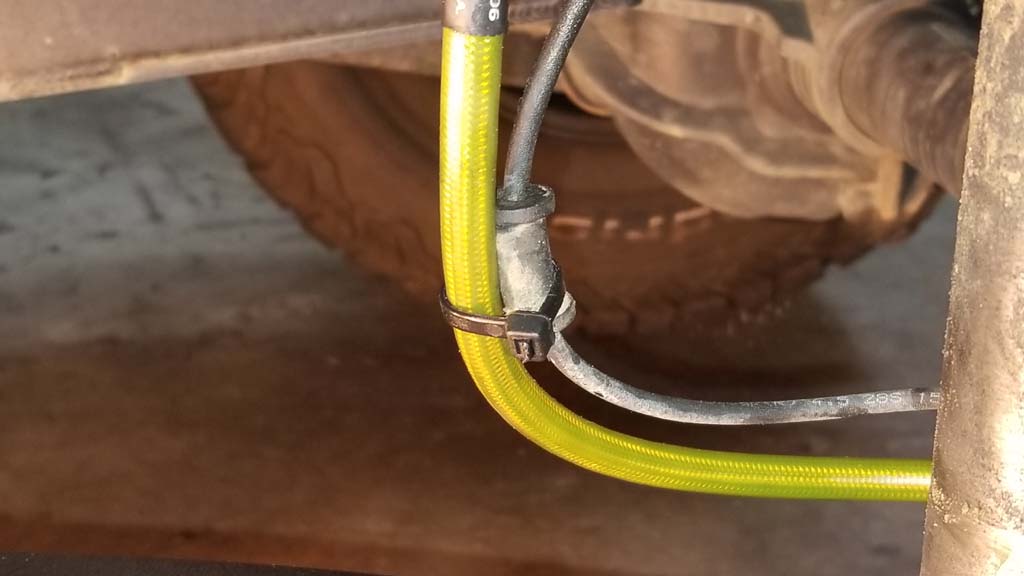
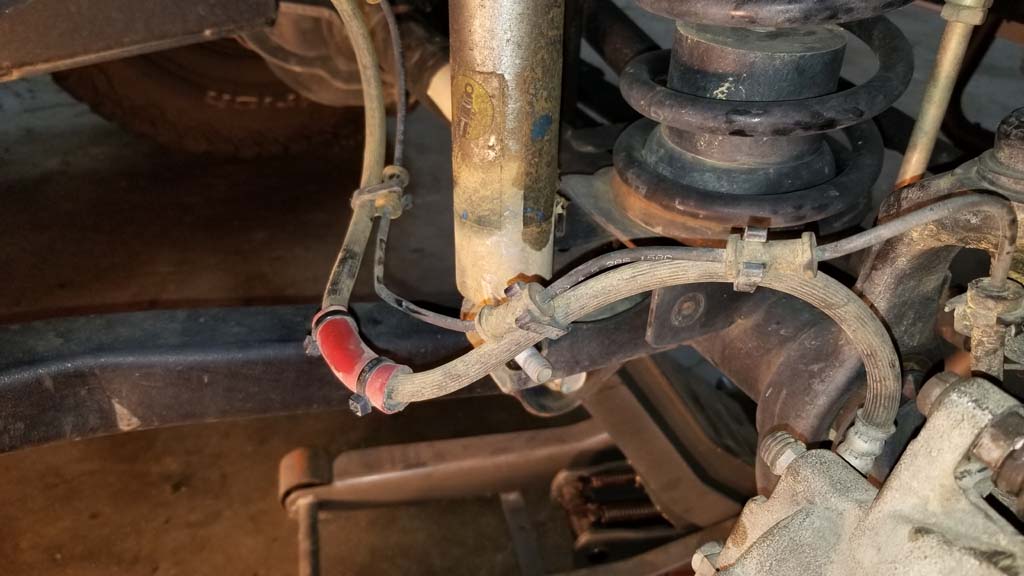
| 13. Route the ABS line along the brake line and zip tie in place. Reinstall the ABS line retainers in the brake line axle bracket. I had cut mine, so I just installed new ones and zip tied the ABS line in place. I didn't tighten these at first. You will need to make sure you have enough play in the line when you run the shock out to full extension. |
 |
 |
 |
 |
| ABS line and Brake line in place. |
 |
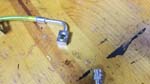
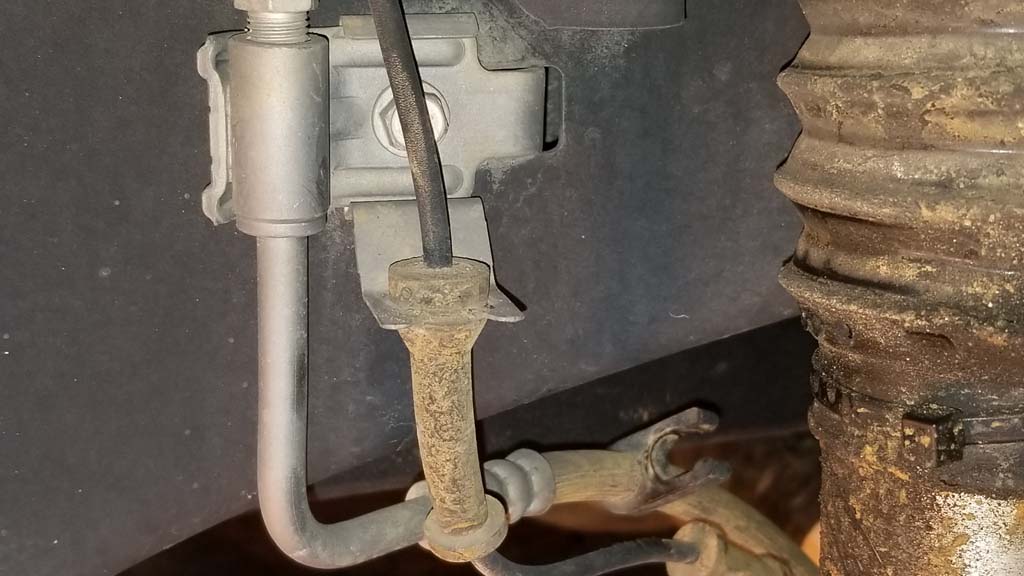
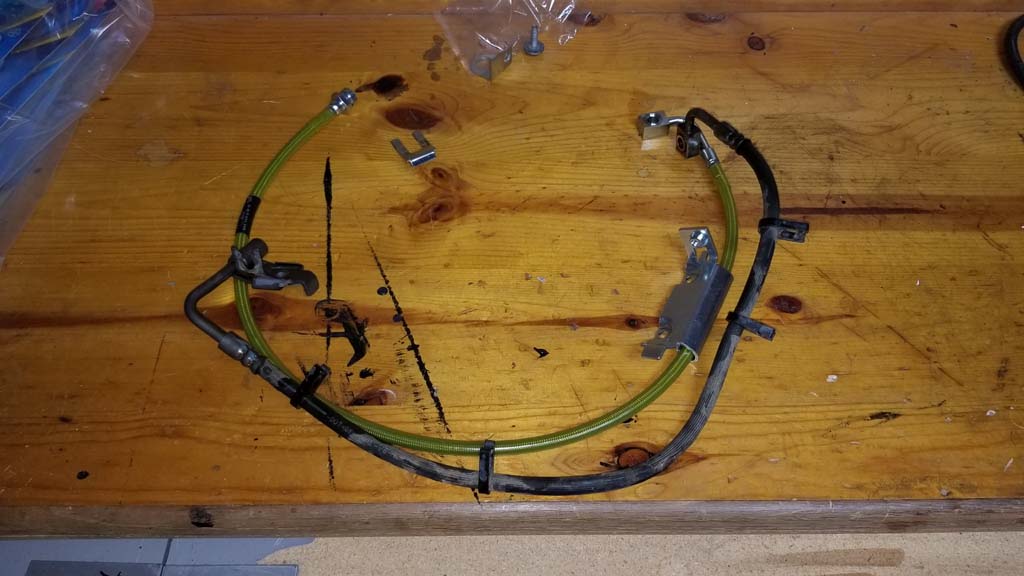
| Comparison of the different lengths of the front brake lines. |
 |
| Do a quick bleed on the rear brakes, you will do a full bleed after you have all 4 brake lines replaced. Remove the rubber cap from the brake bleed screw. Put this where you can find it, if you lose one you can pick up some at the local auto parts store. Don't ask how I know. |
 |
 |
Bleed your brakes. Check your master cylinder and refill prior to bleeding. You will need to recheck this as you bleed to ensure that you don't allow it to go dry and suck air into the system. You will need an 11mm combo wrench.
Note: Start with the passenger rear brake line since it is the furthest from the master cylinder. |
 |
 |
 |
 |


