I have busted a few lights and even now have crack in one
of my side marker lights. I've been backed into a tree by a spotter
and luckily didn't shatter my light. If you have ever priced these
at the dealership they are expensive. So I started looking for a
little protection. I've seen and even used those wire protectors,
while they will stop the incidental rock, they do little to protect the
sides. I found that Sun Performance make guards for the front and
side marker lights. These are fairly sturdy and will protect the
lights from the larger objects. Now the rears I found guards that
looked very similar to the front ones. A couple of different manufacturers
make these. Mostly you see them called Euro guards, the ones by
Mopar are expensive.
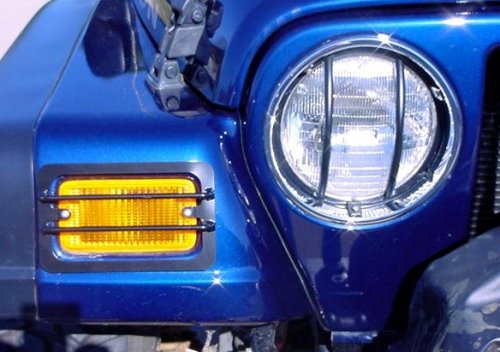
Front
Marker Lights: 1. Remove the T-15 Torx screws from the front marker
lights, insert the spacers in the hole and install the guards with
the supplied screws.
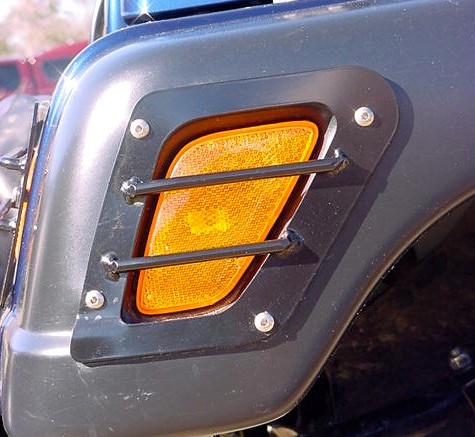
Side
Marker Lights: 1. First you will need to position the guard over the lens.
I just made certain that there was an equal distance all around the
lens. I also made certain that I positioned the bend in the
bottom front coner over the corresponding bend in the flare.
I drilled the first hole (I suggest the upper rear), install screw
and nut with the 1/8" allen wrench and 3/8" inch combo wrench.
I didn't tighten it down all the way. I then pressed in on the
guard and drilled the bottom front hole and inserted the screw and
nut. The bottom front hole is the hardest to insert the screw
and nut. Then just drill the remaining holes. Don't forget
to tighten up the first screw and nut.
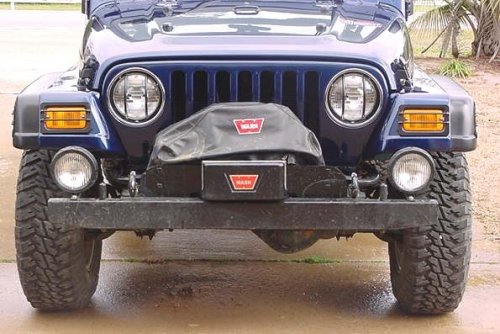
Headlight
Guards: 1. These are a real pain since they aren't perfect for the
headlight. Remove the (3) T-15 Torx screws for the bezel and
install the guards. The pain is getting all the T-15 Torx screws
to engage the holders in the grill. Once you get them started,
you will be able to tighten them all down. Don't crank down
on the screws to hard, the metal edges of the guard can crack the
plastic headlight surround. The guard would be better if the
ring was larger, but it does it's job of protecting the light.
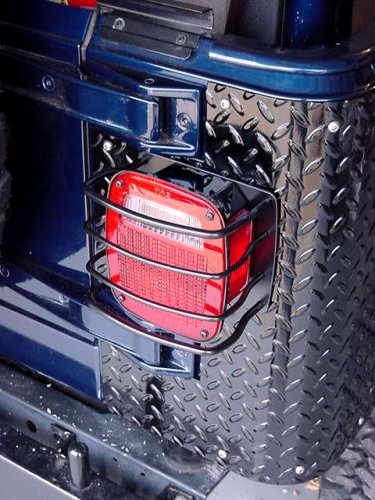
Rear
Taillight Guards: 1. The set of guards that I bought had a slot at the bottom,
so I could slip the lights into them. Some of the others actually
require you to remove the light and thread the connector back through
the guard before you install it. If you have this type then
you will need to disconnect the lights. The driver side is easy
since you should be able to pull the connector through the body hole
and then disconnect it. The passenger side is worse, you may
be able to reach it by pulling the flap back on the rubber fender
well and disconnecting it. On the 2003's it is a real pain to
get to since it is up behind the charcoal canister. I had installed
my OYR corner guards so I needed a longer bolt to fit in here.
I tried to find a replacement screw, but it was real hard to find
a #12-24 screw that was 1" long. After a while I gave up
and found a #12x1 stainless coarse screw. To get the light off
you will unscrew the 4 screws in the corners of the light bezel,
and remove the bezel. You may need to insert a screwdriver between
the edge and pry it out, don't drop it. Now you will be able
to see 3 bolts holding the assembly on to the body, remove these with
the 3/8" socket. Remove these, but be careful of that light
bulb that you are working around. Once the light is off, installation
is just the reverse.
Do these light guards provide good protection? I've
already banged them off of a couple of branches and haven't damaged the lights.
Now I admit that these are not designed for off road racing, nor pushing down
large oak trees, but if you need to push on a branch they will survive. A
horizontal tree branch will be able to get past the bars, but usually if the
branch is big enough to do the damage then the light guard will take the brunt
of the impact and most likely save the lens. The other branches that are
small enough to get past the guards, will still hit the guard frame and have
some of the force dissipated. The most susceptible one to damage from a
branch is the front marker light. If a branch hits the guard hard enough
it will still crack the lens, but any hit that hard is also going to leave a
mark on the front fender. The most hits so far have been the rear
taillights. I constantly get them into the bushes and saplings when I try
to turn around in tight spots. I ran these on my last 2 TJ's and didn't
break a single lens. I did manage to push in the back of my '98 when
I was spotted backwards into a tree, I hit hard enough to stall the engine.
The only other damage was a slight bow to the guard. I have shattered a
couple of rear taillights and marker lights on my CJ's and YJ, but not yet on
any of my TJ's. The difference: Most likely my experience, but the guards
have still saved me a couple of times. I used to run the grid style
covers, but these would compress when the tree branch struck and break the lens,
so I switched over to something a little heavier. I would imagine that if
you drove straight into the point of a branch, no guard would save the lens, but
with these you would at least have the chance of it hitting a bar.
The front turn signal
guards are starting to rust already. The powder coat is coming off.
It looks like I will be taking these off in the future and stripping all the powder coat
off and repainting them. I had figured that the Sun Performance guards
would be better than the Steel Horse ones I had bought in the past, well I
should have bought the cheaper Steel Horse ones (yes, I said that). I'm
not impressed with the powder coat. Oh well.