From the Hi-Lift® Jack website.
The Hi-Lift® Jack is a rugged, highly versatile jack that puts you
in command of situations requiring lifting, pushing, pulling, winching,
and clamping. Although light in weight and easy to maneuver, the Hi-Lift®
Jack offers a rated lifting capacity of 2 1/3 tons (2114.74kg).
Most of us that do any off roading or even landscaping, I have a buddy
that uses his for his fencing company, he used to make these Jacks. If
yours is anything like mine you have used it for more things than just
working on the vehicle off road. We carry them on the front bumper, rear
bumper, roof racks, the hood, etc… All the time exposing them to
the weather, dirt, sand and then hope that they work when we really need
them. Well mine has seen many years of being left outside. It has gone
from being a nice read color to kind of a molted rusty brown. I figured
it was time to give the jack an overhaul and see if anything is really
wearing out on it. Now I haven’t touched the jack since the start
of last years Hurricane season down here, of which the jack weathered
everyone outside. I wasn’t really confident that the jack actually
operated smoothly. I did grease it up really good last time I put it on
the front, and I do carry grease and WD-40 to loosen it up, so I wasn’t
to worried about having to use it. So I pulled the jack off the front
bumper and gave it a try. Things were looking up since it actually worked
fairly smoothly. So now was time to take it apart. If you need any additional
parts other than the FIX-IT-KIT, you can call Hi-Lift® Jack Company
at (800) 233-2051, or (812)384-4441 from outside the USA.
Installation: |
1.
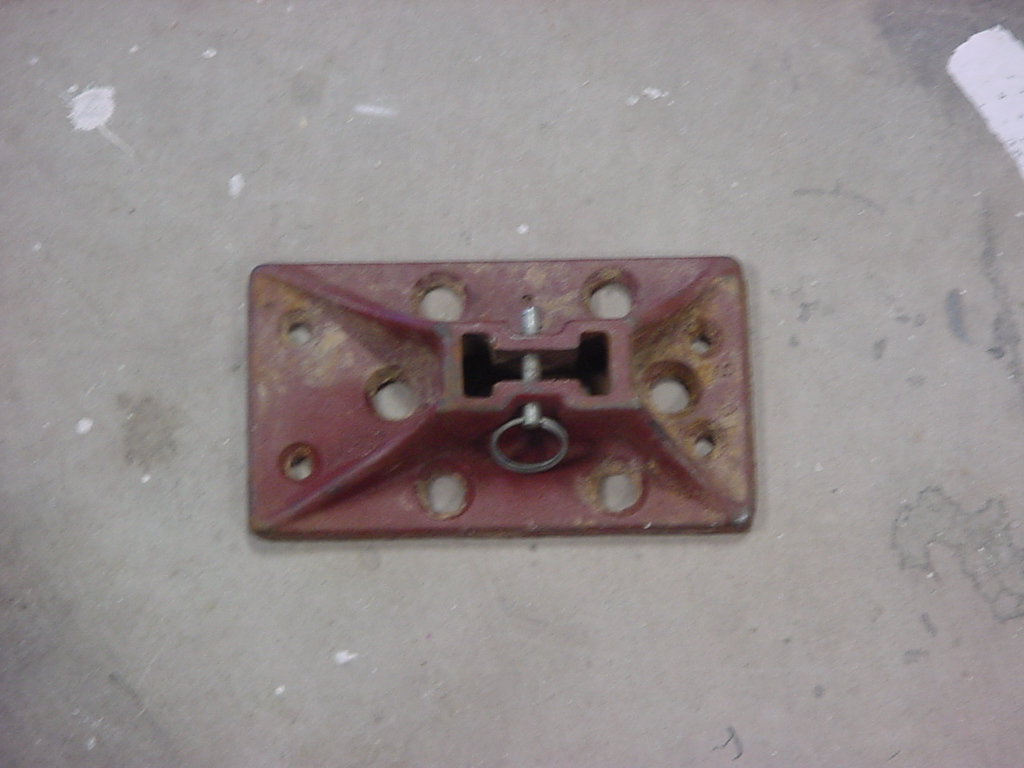
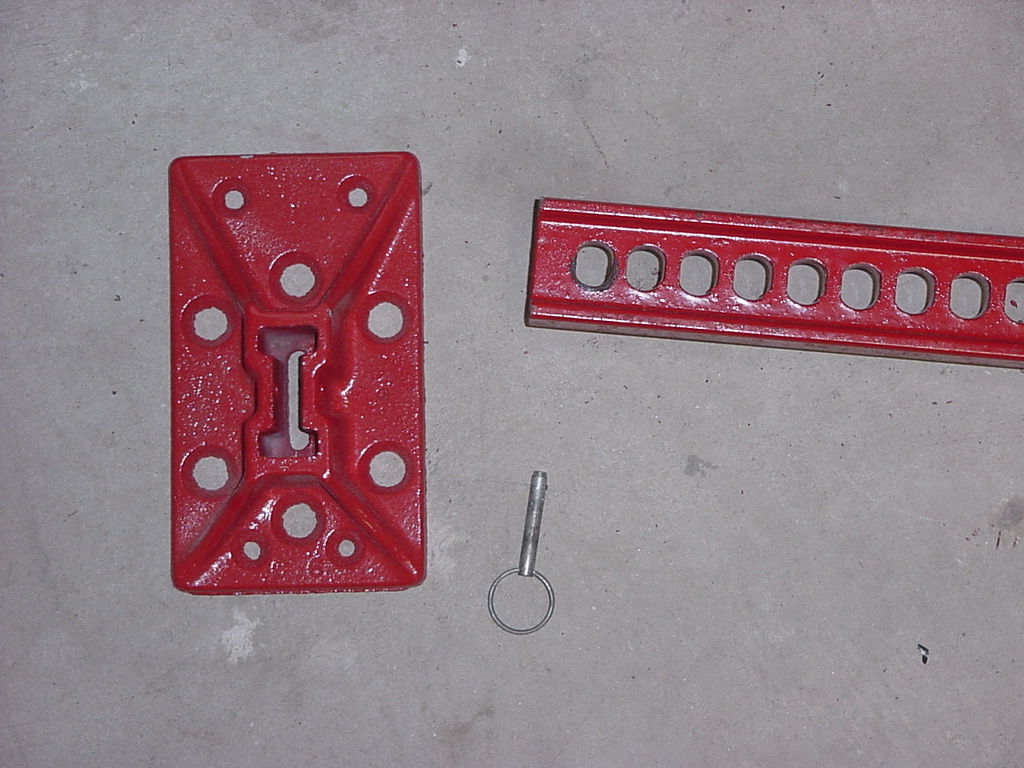
For those of you that still have it attached. Remove the foot piece
from the bar by pulling out the cotter pin. I have a regular snap
pin in mine since I store the foot piece in the back of the Jeep.
You will need a pair of pliers for this. |
 |
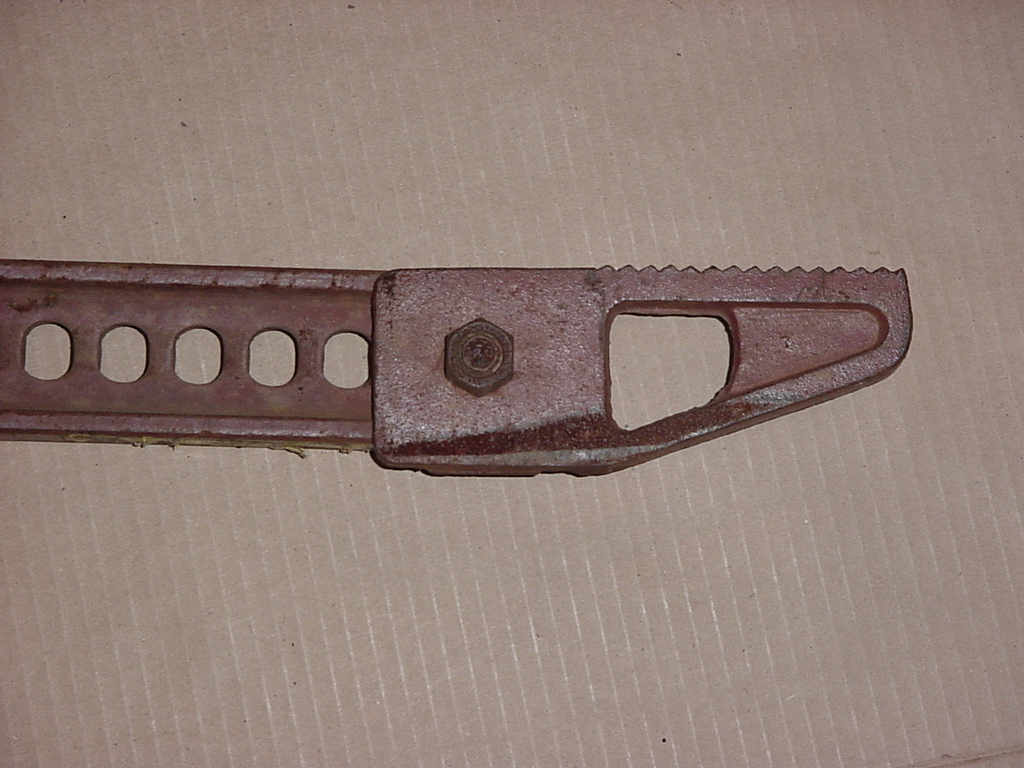
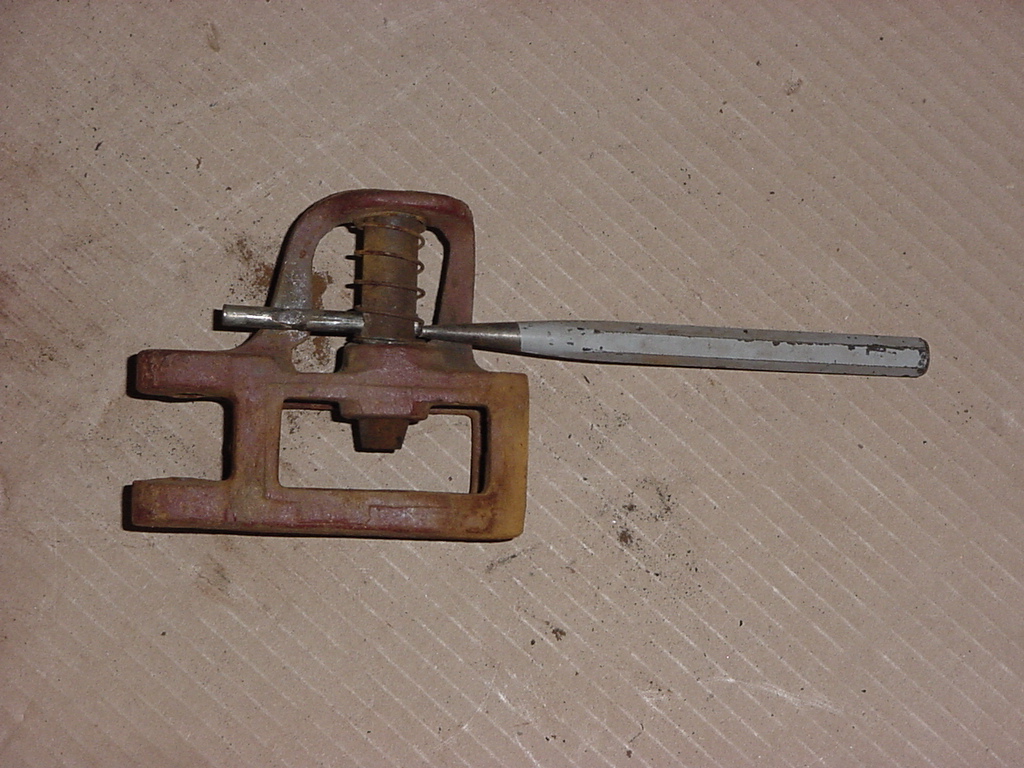
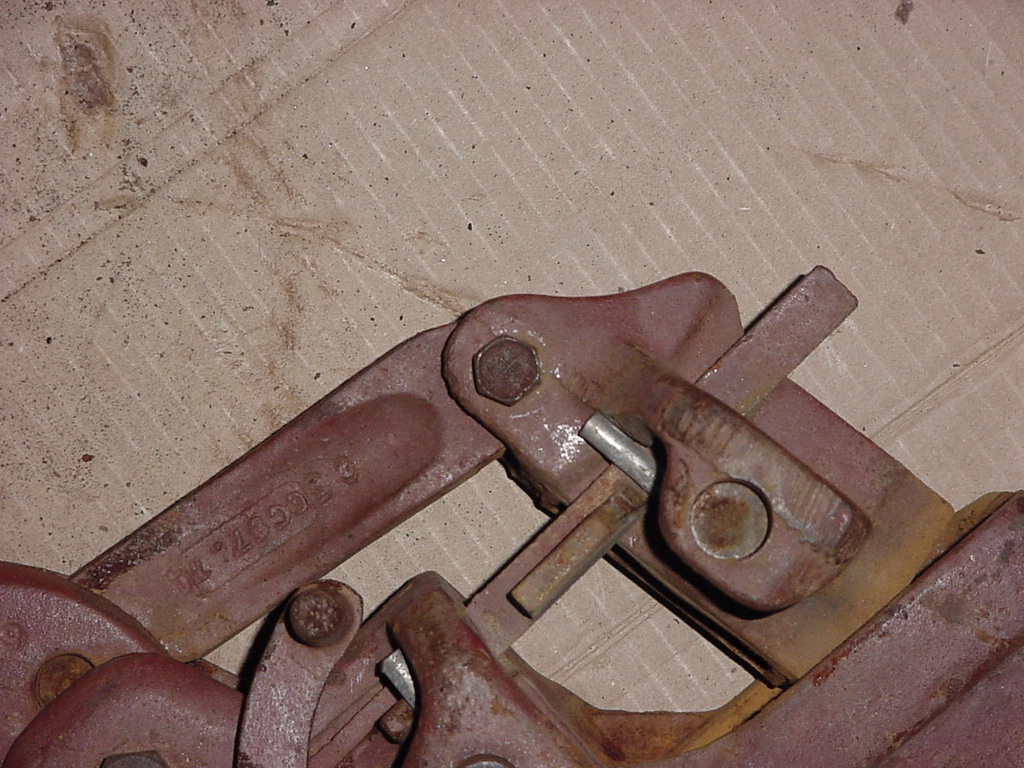
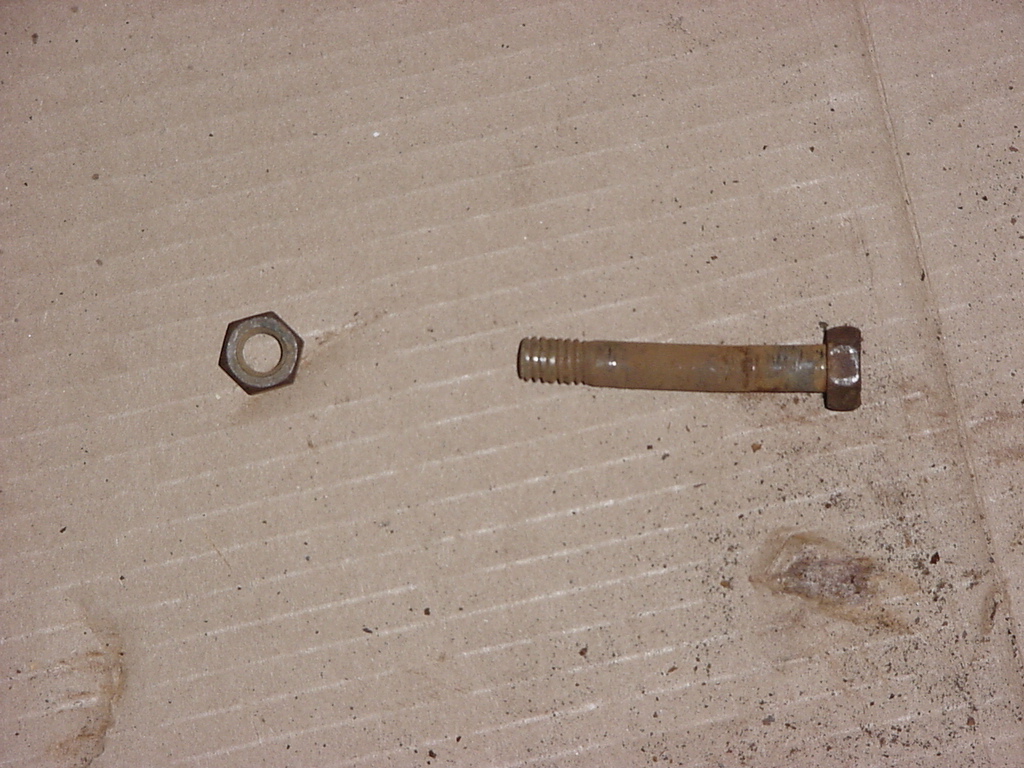
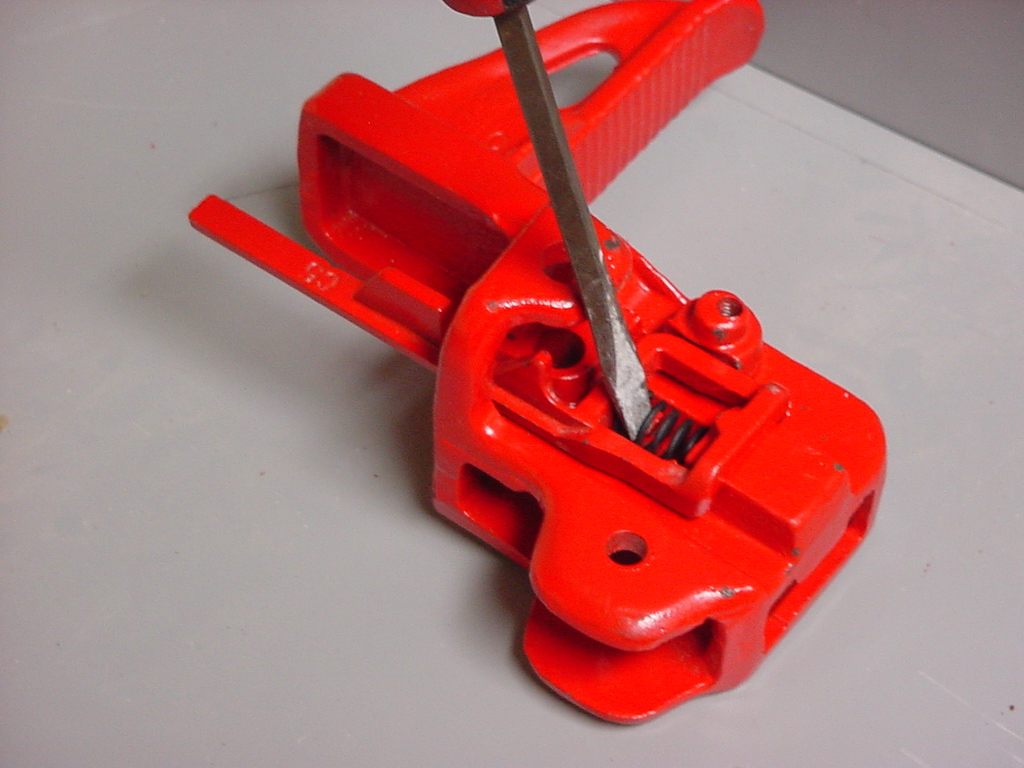
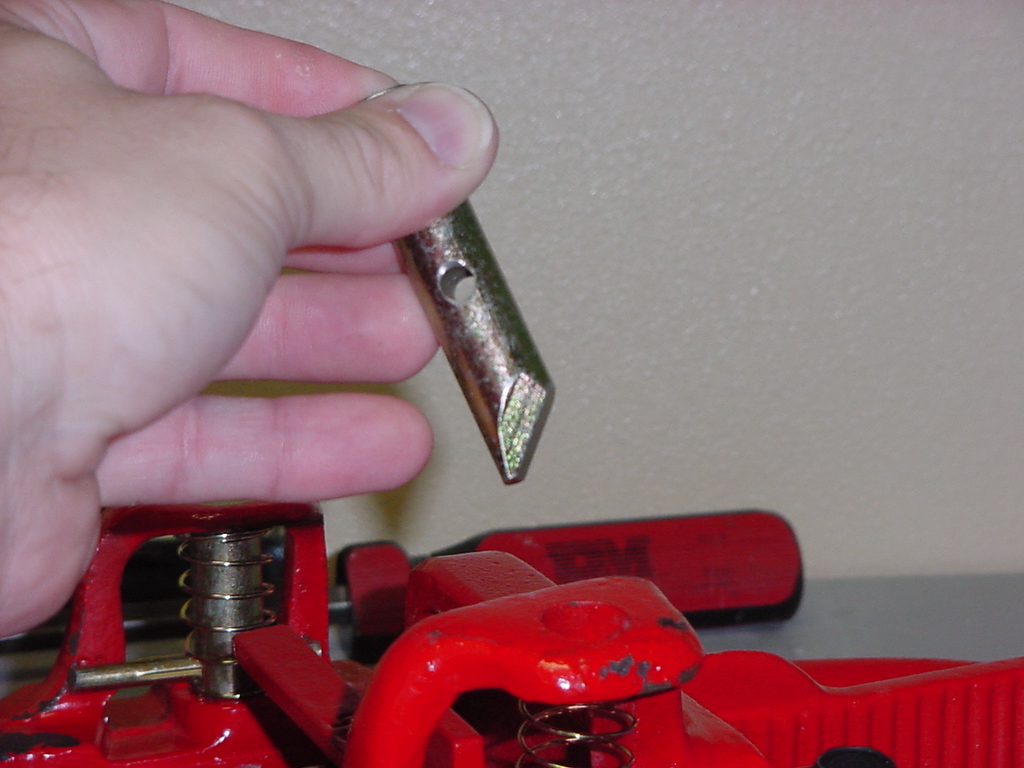
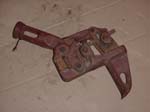
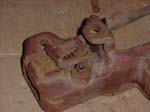
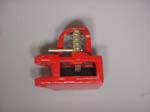
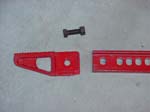
2.
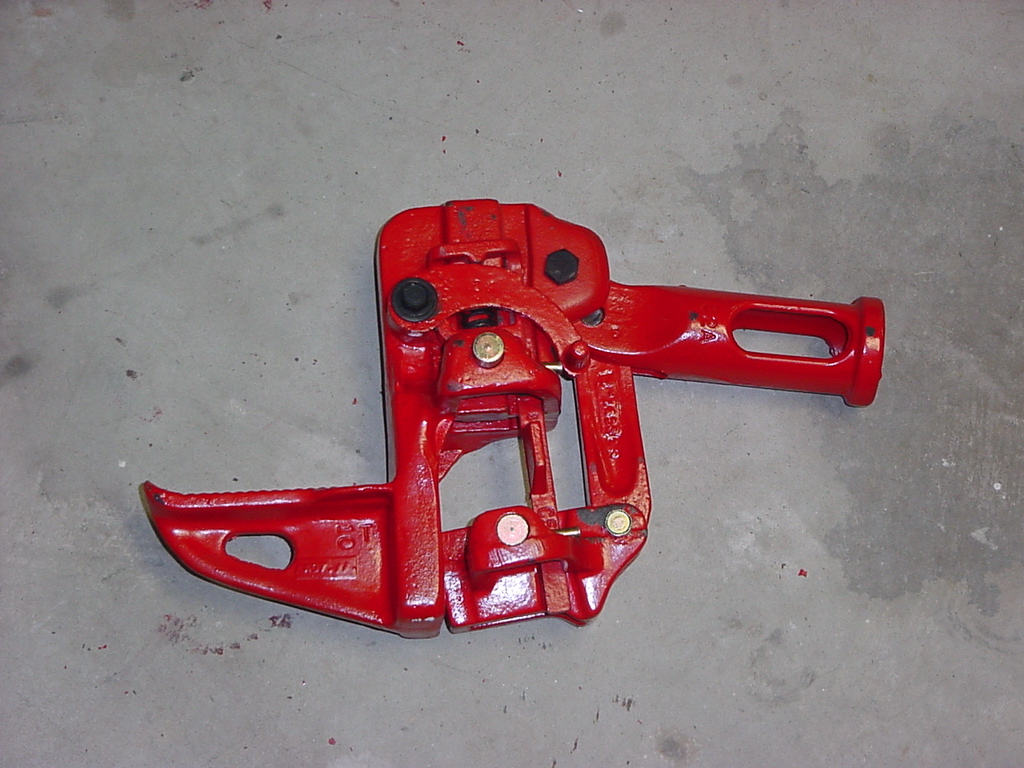
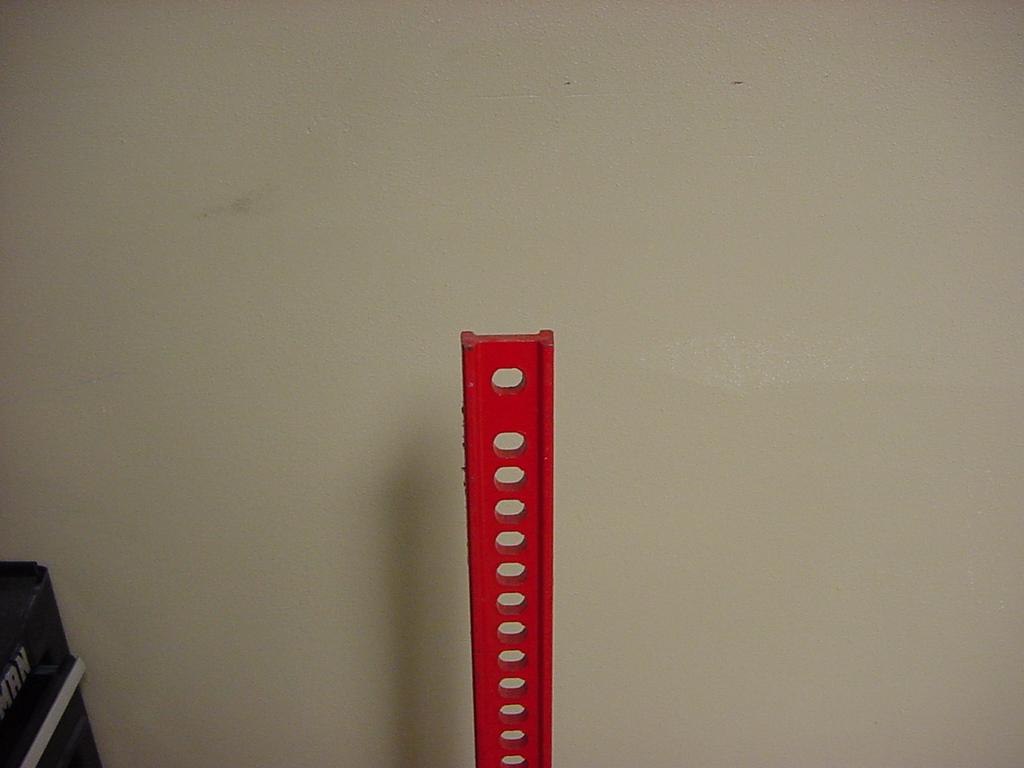
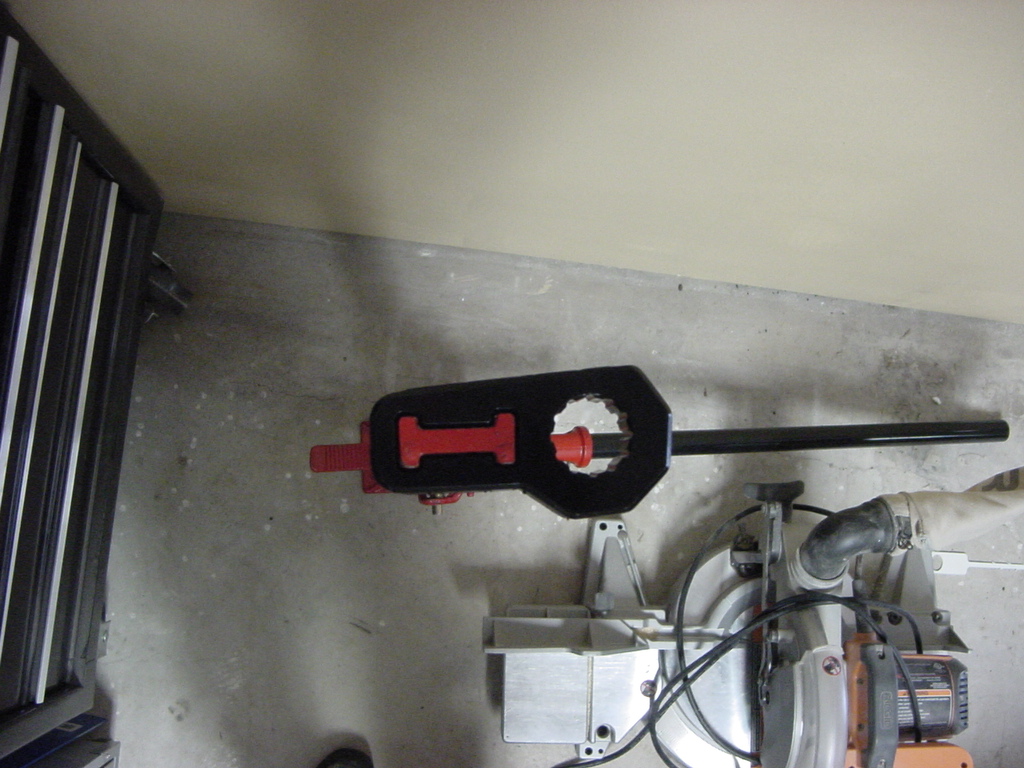
Remove the Top Clam-Clevis by removing the Top Clam-Clevis Bolt
with a 3/4” combo wrench and a 3/4” socket. It’s
easier if you can clamp this in a vice, but I managed to lock a
leg around it and get it to come free.
|
 |
3. Remove the
bar from the Running Gear assembly by just running it all the way
to the ground and just pulling the bar out. |
 |
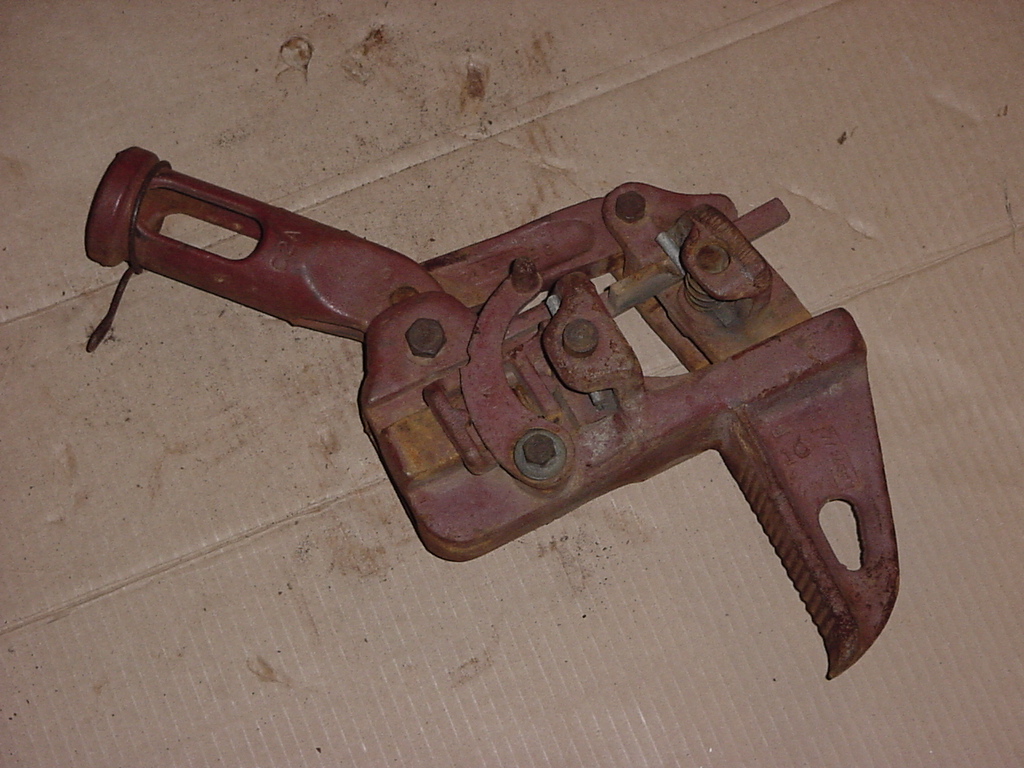
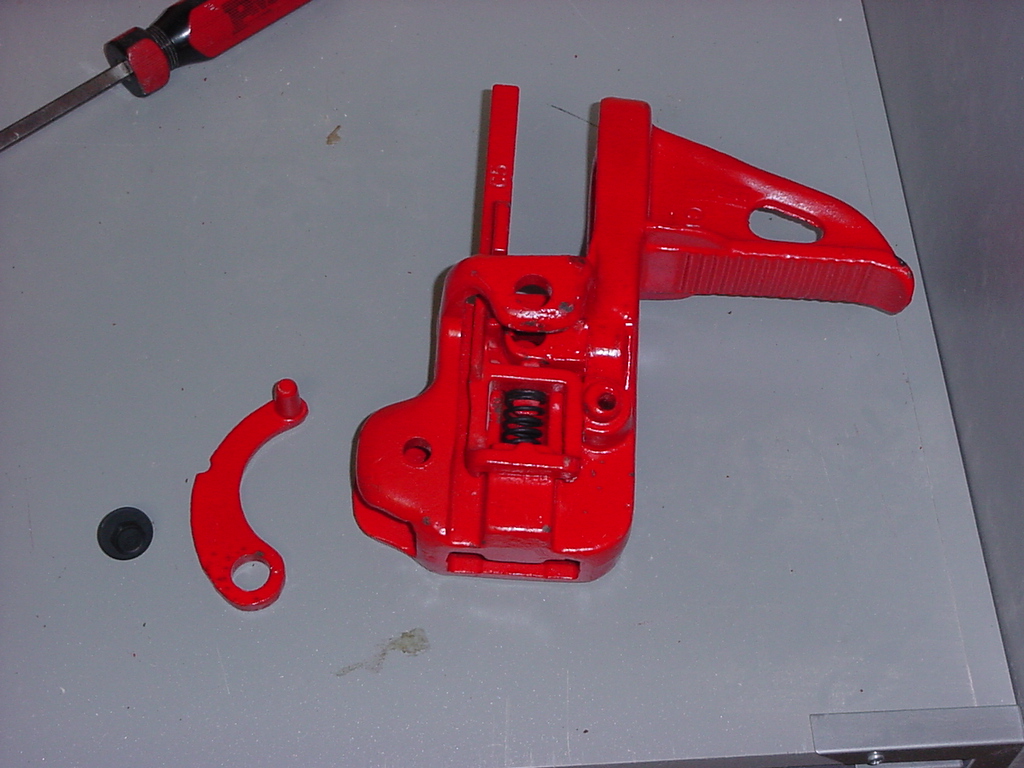
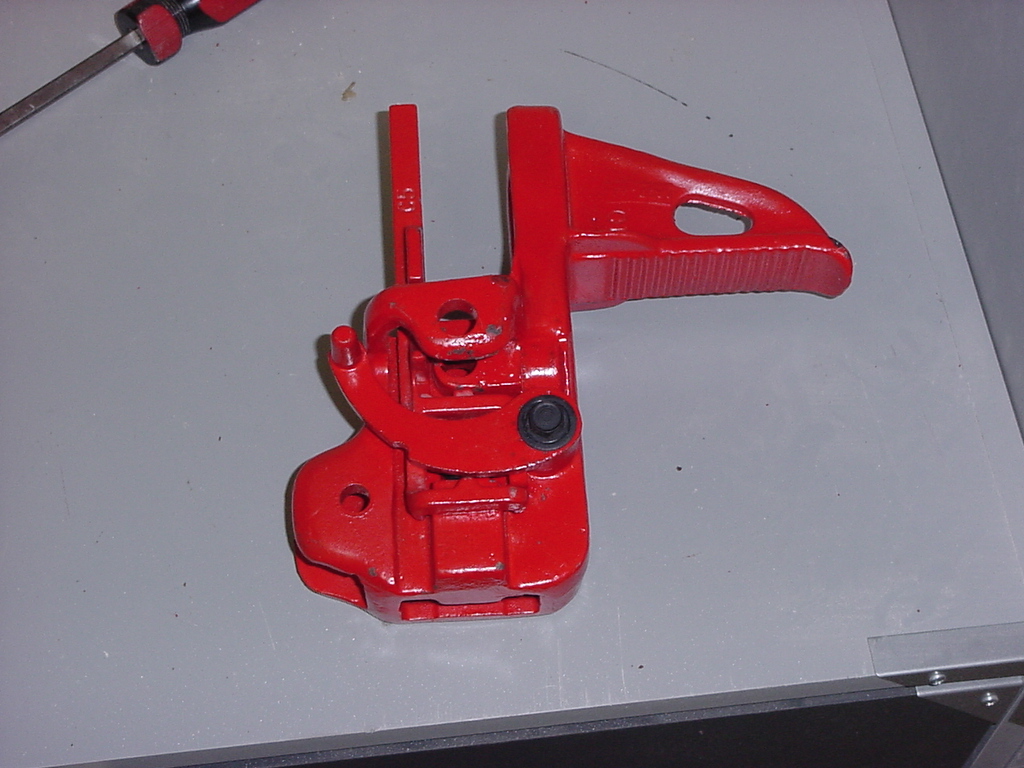
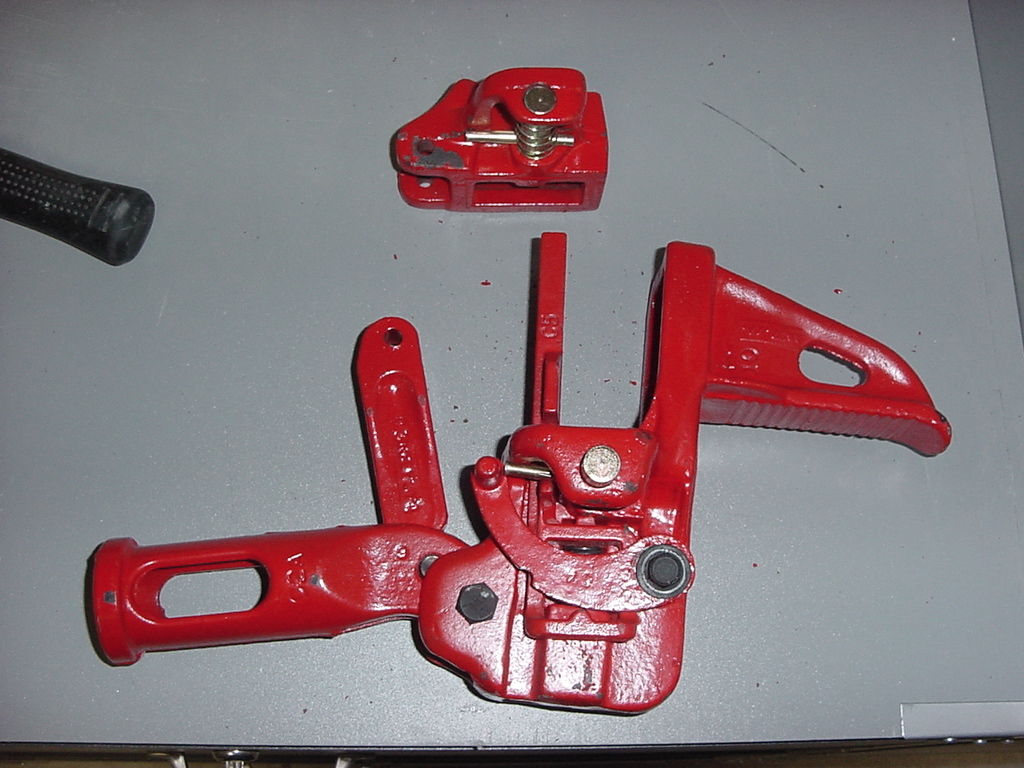
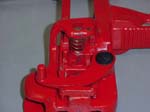
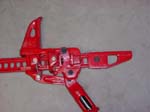
4. Disassemble
the Running Gear assembly. |
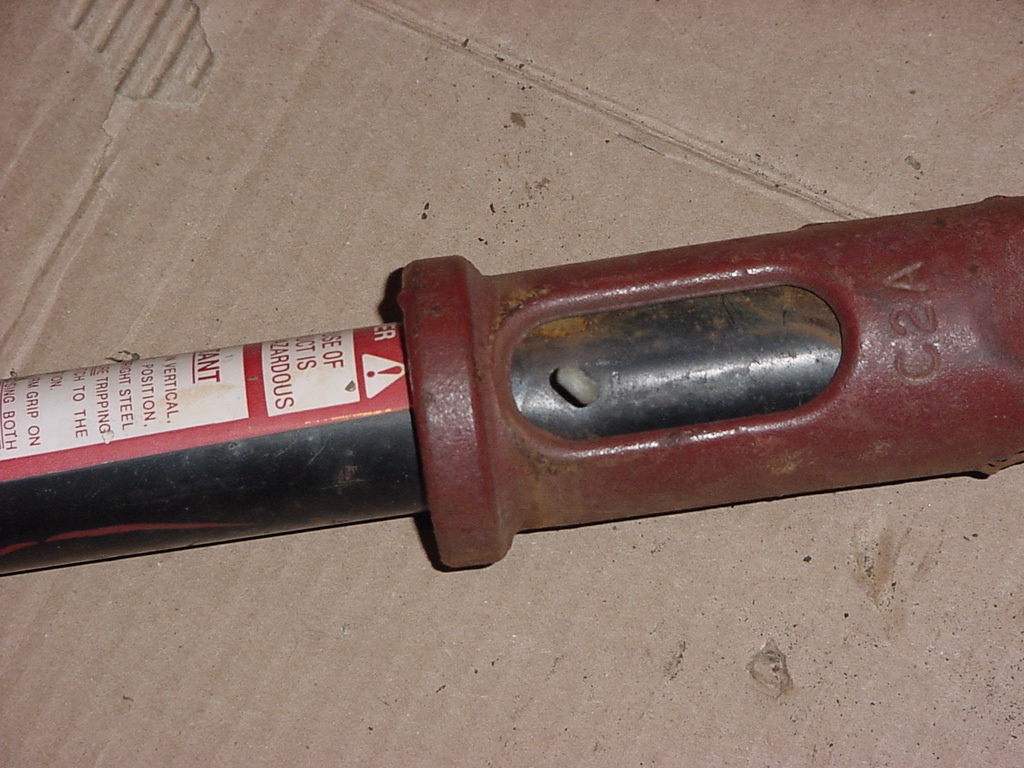
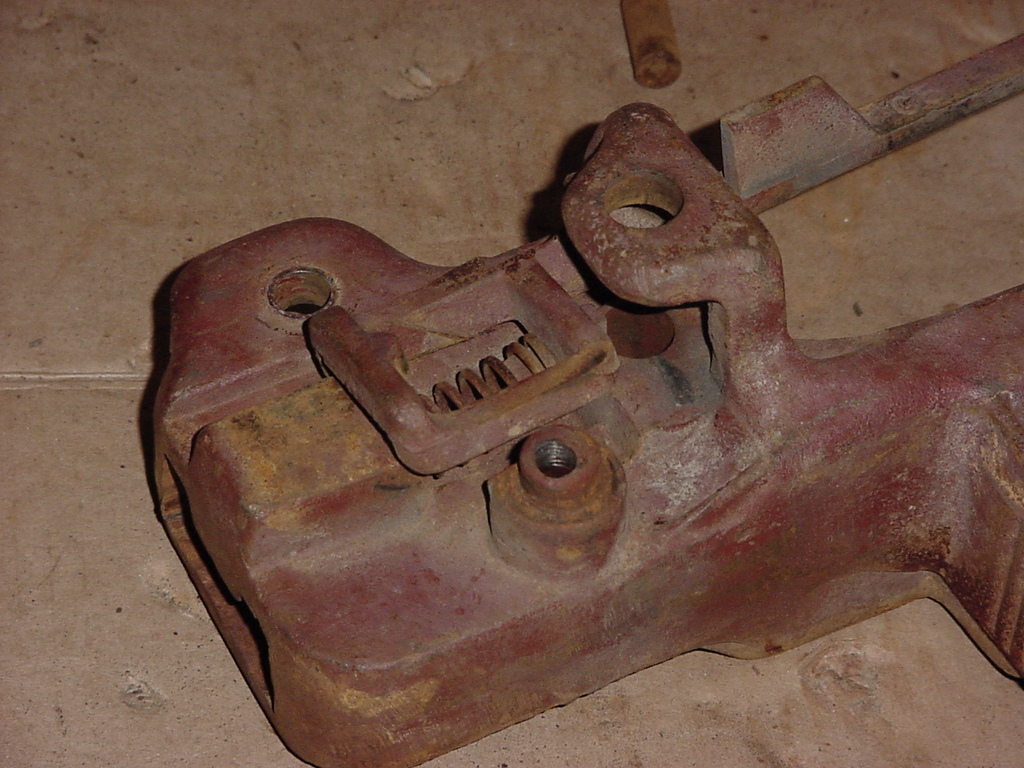
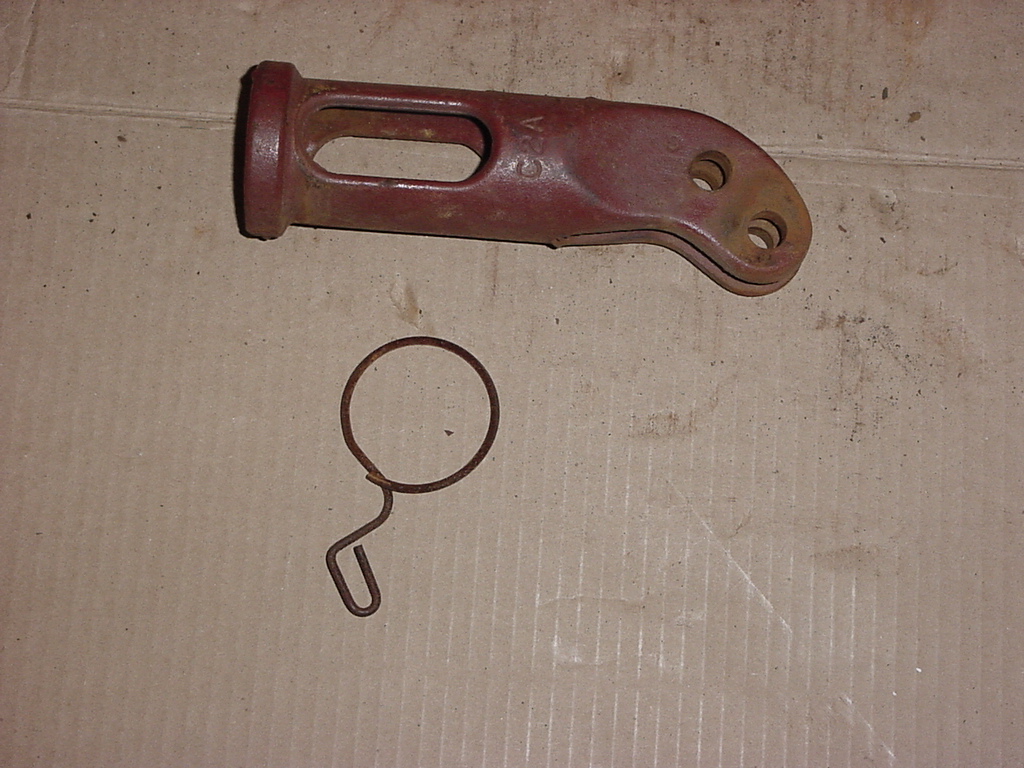
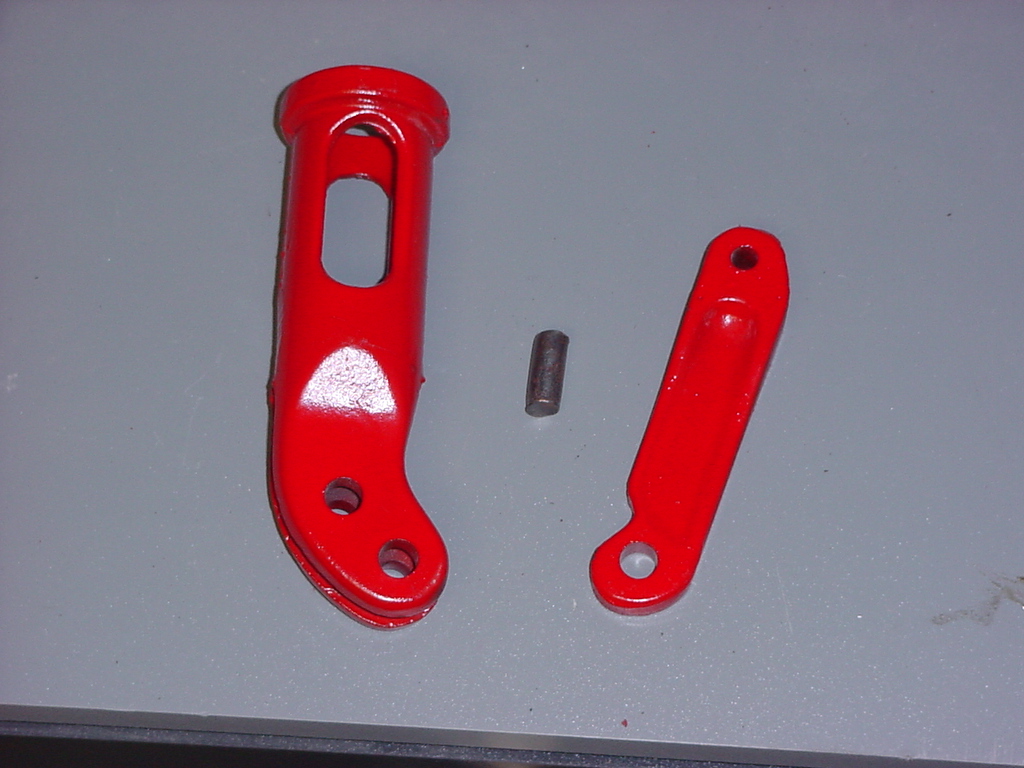
5. Remove the
Handle by pulling out the cotter pin from the Handle Socket. You
will need a pair of pliers for this. |
 |
6. Remove the
Climbing pins using a drift punch and a hammer to drive the cross
pins out. |
 |
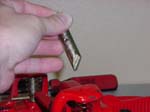
7. Remove the
Climbing Pins and Climbing Pin Springs. Be careful with the springs
since they will find the most inconvenient place in the garage when
they pop out. |
 |
8. Remove the
Cab Screw and washer holding the Reversing Latch with a 1/2”
Socket. |
 |
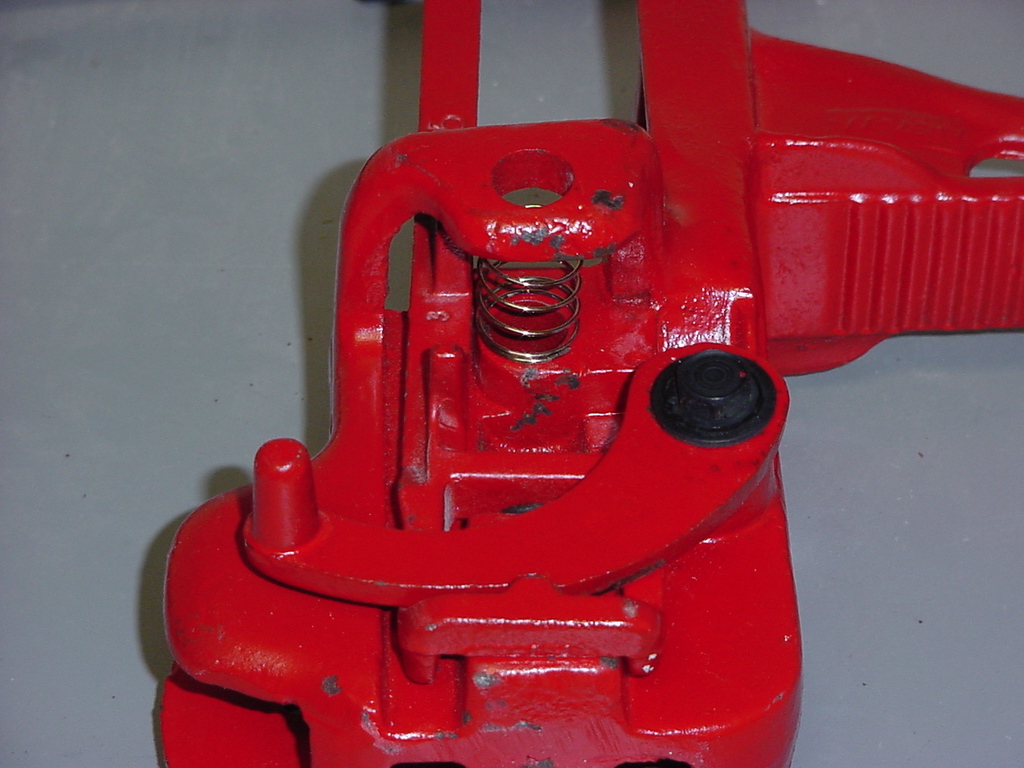
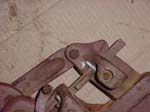
| 9. Remove the Reversing Switch
Cam Bar and Spring. |
|
|
|
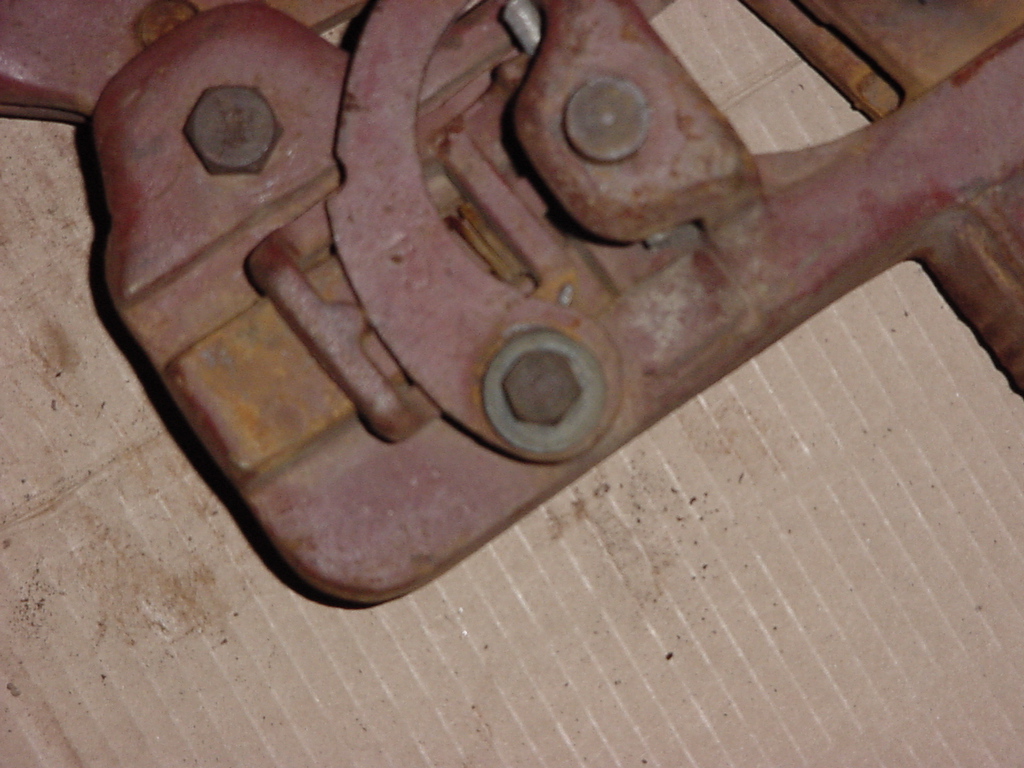
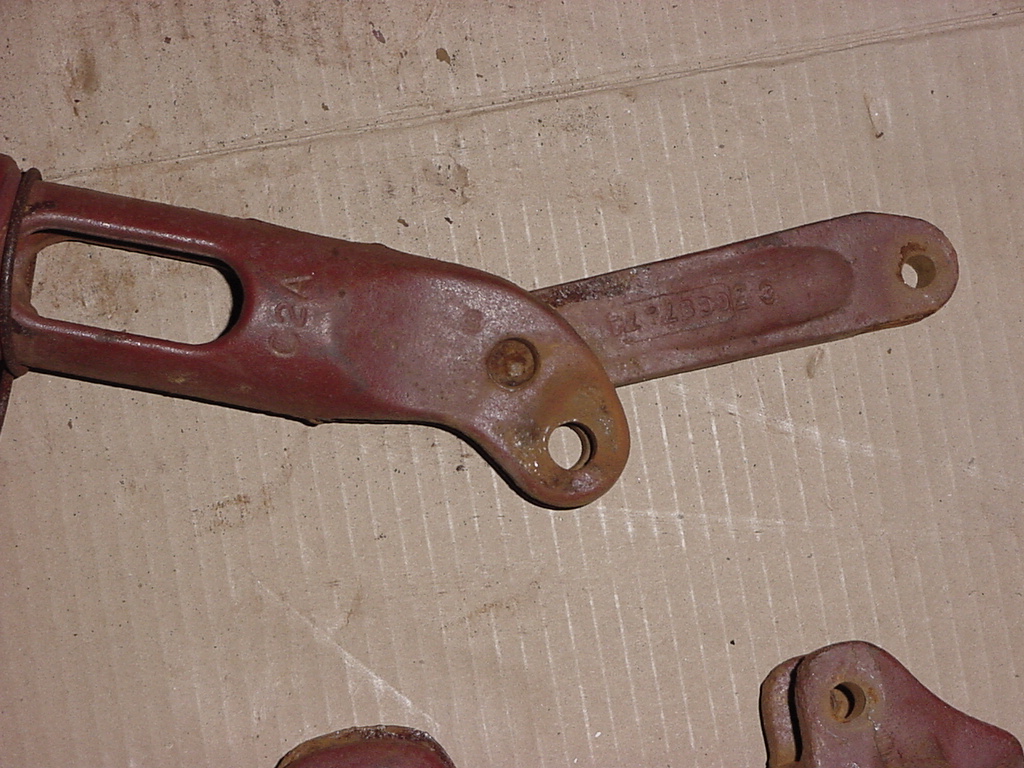
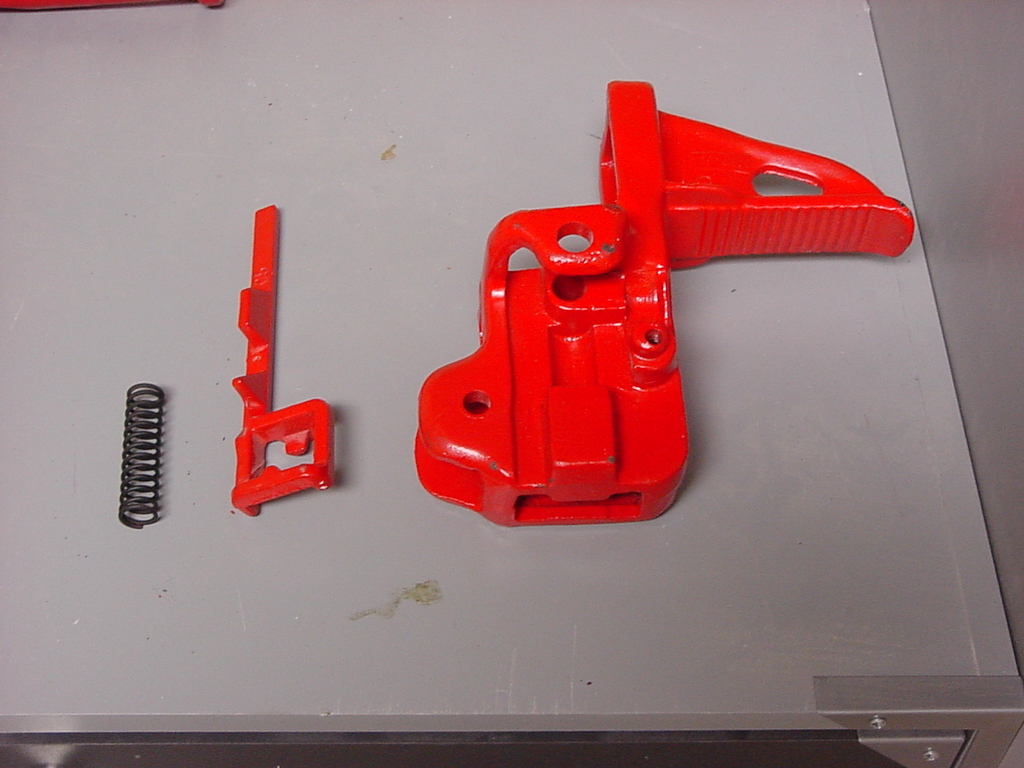
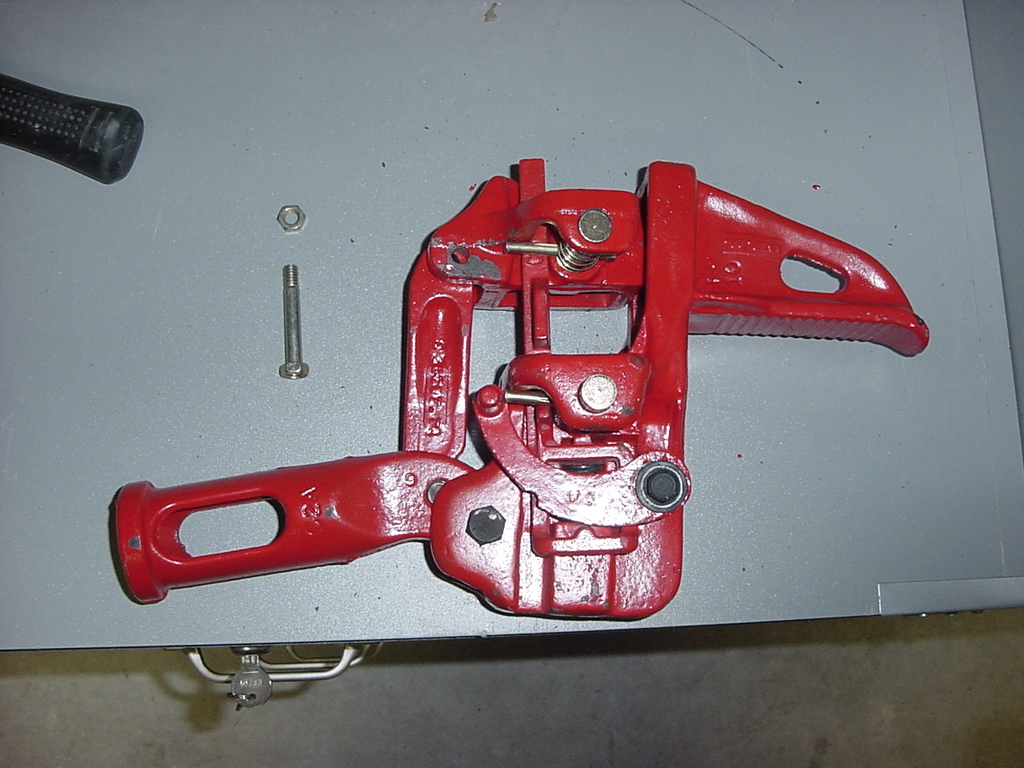
10. Remove
the Hi-lift® Shear Bolt that holds the Pitman to the Small runner.
This will require a 1/2" socket and combo wrench. |
 |
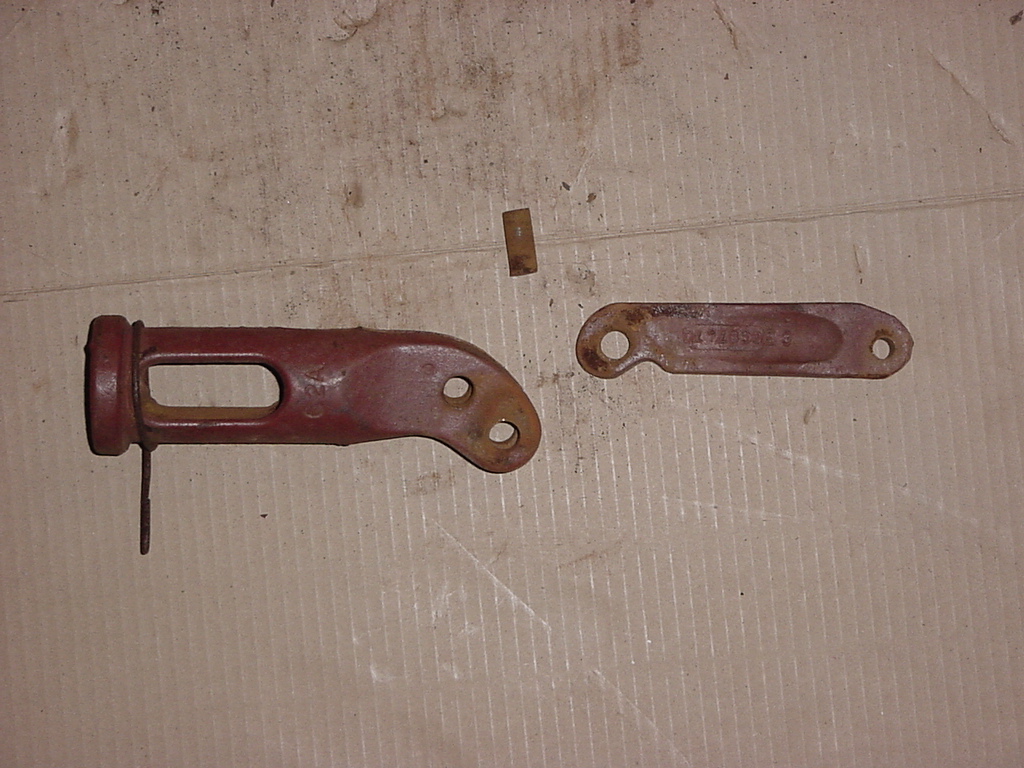
11. Remove
the Hex bolt that holds the Handle socket to the Large Runner. Use
a 11/16" and 5/8" combo wrench. |
 |
12.
Tap out the Pitman Pin that holds the Pitman to the Handle Socket. |
|
|
13. Lets not
forget the handle. Remove the Handle Spring Clip from the Handle.
If yours is like mine, you won’t need to try very hard, it
just kind of snaps apart and falls off. |
|
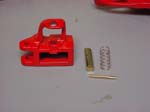
14. Now that
you have everything apart, take a close look at the Climbing Pins,
Climbing Pin Springs, and the Hi-Lift® Shear Bolt. My springs
were rusty, but didn’t seem to have lost any force. The Climbing
Pins were a little rusty, so I hit them with the wire wheel. Note:
Do not hold the pin with your finger, it will most likely end up
with you trying to figure out where the pin went after you drop
it. I looked at the Hi-Lift® Shear Bolt and saw that it was
bent. Obviously, after all the years of use I had managed to bend
it, I probably came pretty close to shearing it at one time. With
this being bent, even though the springs and Climbing Pins looked
good, I won’t take the chance for safety reasons. If I had
stressed 1 part, I may have others that are stressed. I will replace
all the parts. |
|
|
15. I looked
at all the parts where pins or bolts go through and made certain
I didn’t have any burrs, or obvious damage. |
16. Take a
wire wheel and clean off all of the dust, dirt, grime and rust.
I was able to get inside the holes on the bar with a dremel wire
wheel. You might be able to get in there with a small wire brush. |
17. Wipe down
the jack with some degreaser and alcohol to clean off any foreign
material. |
18. Spray a
coat of rust converter on the jack pieces to catch any rust that
you weren’t able to get with the wire wheel. |
| 19. I lightly sanded the jack
pieces again to get rid of any of the inevitable dust/ fuzzy’s
that seem to be attract to anything freshly painted. I then sprayed
a coat of red paint on the jack. Once this dried, it was time to reassemble. |
 |
| |
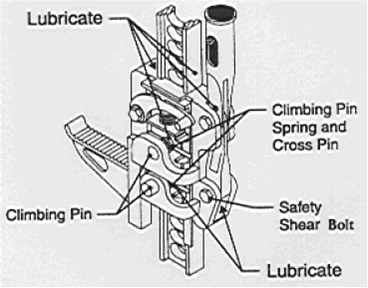
NOTE: When
you reassemble the Hi-Lift® Jack you will need to lubricate the
following parts:
Lubricate the Jack using white lithium grease, light penetrating oil,
or a silicon or Teflon spray at the following points:
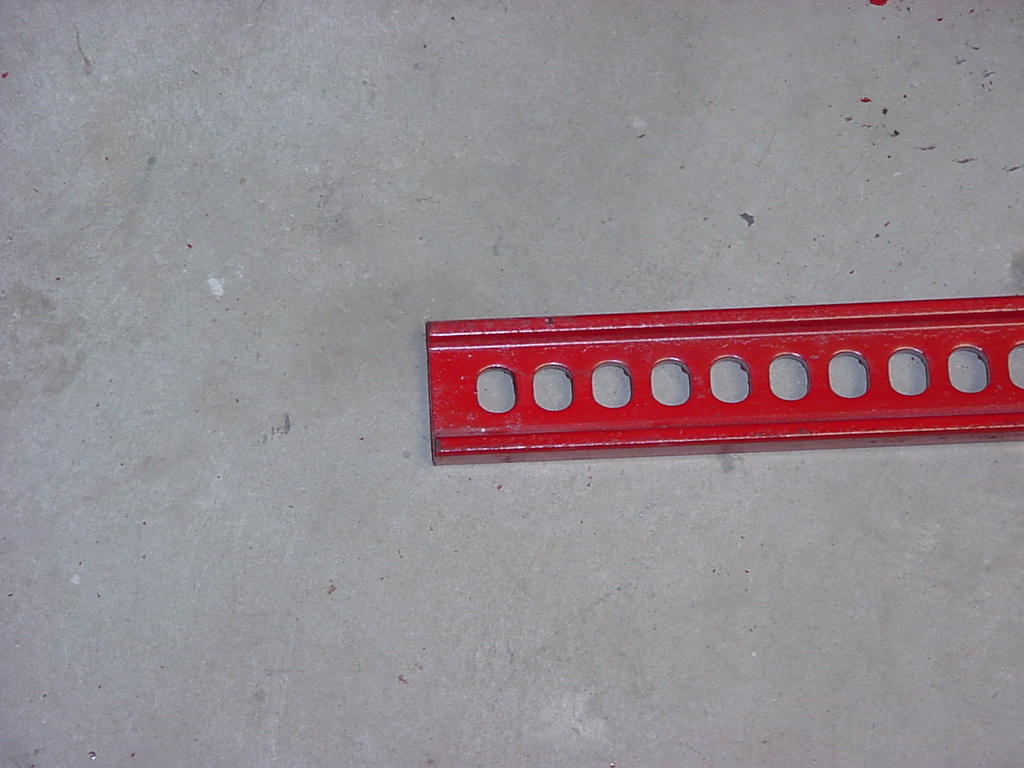
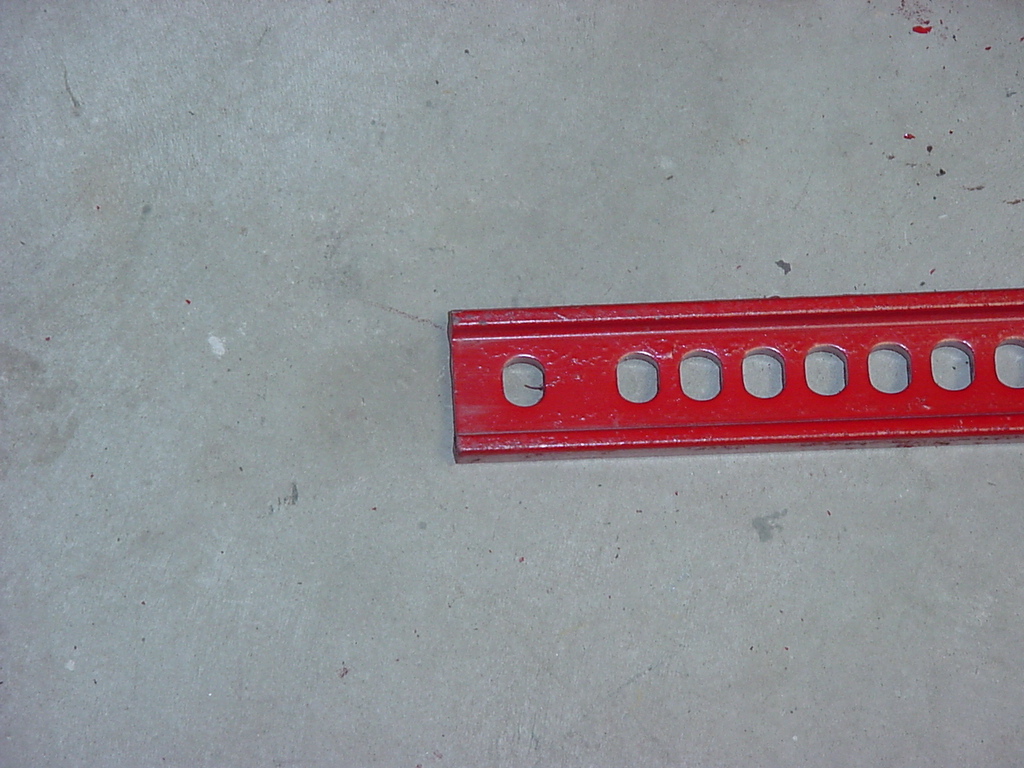
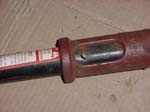
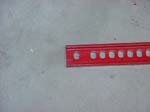
Steel Bar:
Keep the front and back edges of the steel standard (bar) lightly
lubricated and free from dirt and rust.
Pitman Pin:
Keep the pitman pin lubricated or it will damage the handle socket
and pitman.
Shear bolt:
Keep the shear bolt clean and lubricated to keep it from wearing out.
Climbing Pins and Springs:
Keep both climbing pins and springs lubricated and free from dirt
and rust.
I found that in addition to what Hi-Lift® recommends you should
also lubricate the Hex Bolt and Cap Screw w/ Washer. I also put a
little grease on the insides of the Large and Small Runner.
Do not use motor oil or grease to
lubricate the jack.
|
| |
| Reassembly: |
|
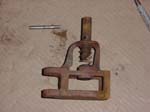
| 1. Assemble the Running Gear
first. Lubricate and tap the Pitman Pin that holds the Pitman to the
Handle Socket in. Now mine was a little loose after cleaning up all
of the rust on the old one. Don't worry, once it's installed in the
large runner it can't come out. |
|
|
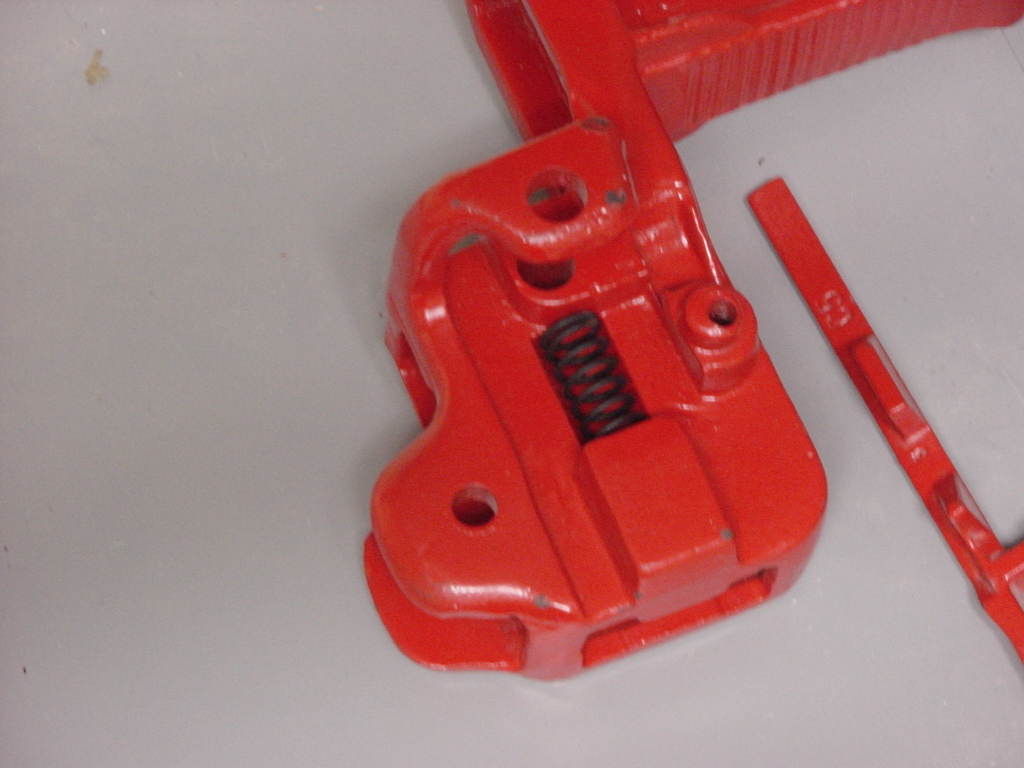
2. Lubricate and install
the Reversing Switch Cam Bar and Spring into the Large Runner. |
 |
| 3. Slide the spring inside
of the large runner. |
 |
| 4. To get the cam bar to slide
into position you will need to pry back the spring. I used a flat
tip screwdriver through the center of the bar to pry back the spring. |
|
|
5. Install the Cab Screw
and washer holding the Reversing Latch with a 1/2” Socket. |
|
|
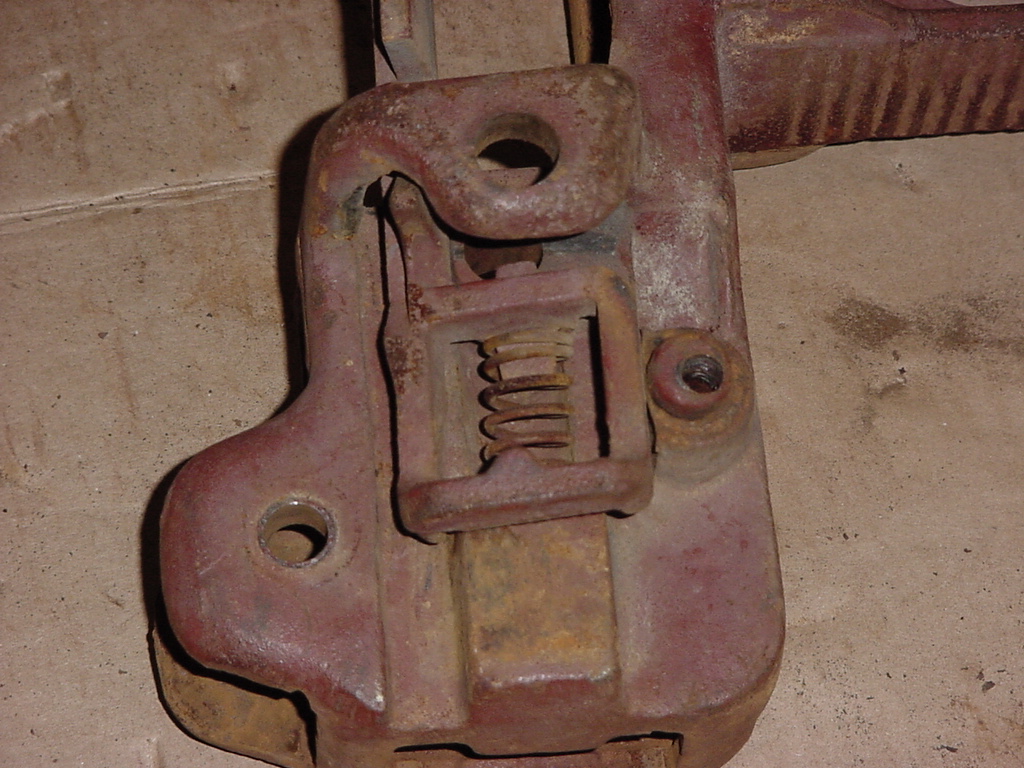
6. Install the Climbing
Pin and Climbing Pin Spring. Install the spring in the larger runner. |
 |
| 7. Insert the climbing pin
into the larger runner. The beveled side of the climbing pin goes
towards the top (towards the reversing latch). |
 |
8. Install the Cross Pins
into the Climbing pins using a drift punch and a hammer. Be careful
you don't catch the wire of the spring. Once you have the cross
pin in you can rotate the spring until just the bottom is under
the cross pin. |
 |
| 9. Install the Climbing Pin
and Climbing Pin Spring into the small runner. The climbing pin bevel
goes towards the front (top) of the small runner as position in the
picture. |
 |
| 10. Install the Cross Pins
into the Climbing pins using a drift punch and a hammer. Be careful
you don't catch the wire of the spring. Once you have the cross pin
in you can rotate the spring until just the bottom is under the cross
pin. |
 |
| 11. Install the Hex bolt that
holds the Handle socket to the Large Runner. Use a 11/16" and
5/8" combo wrench. The bolt goes through from the reversing latch
side this will ensure that the latch clears the bolt. |
|
|
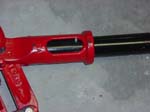
| 12. Position the small runner
over the Reversing Switch Cam Bar. There is a notch in the small runner
underneath the cross pin that the bar slides through. push the small
runner up enough that it can slide into the notch in the large runner. |
|
|
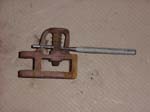
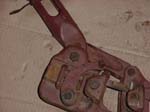
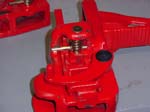
| 13. Install the Hi-lift®
Shear Bolt that holds the Pitman to the Small runner. This will require
a 1/2" socket and combo wrench. The bolt goes through from the
reversing latch side. |
 |
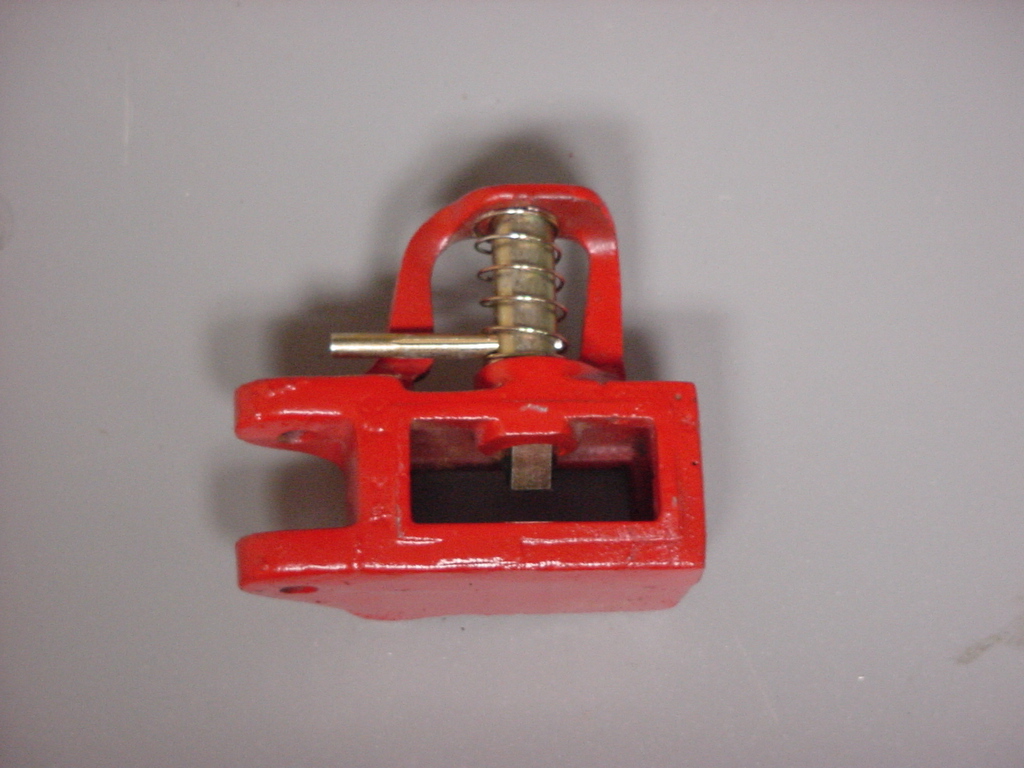
| The assembled running gear. |
 |
14. Install the Handle in
the Handle Socket and install the cotter pin. |
 |
| The bar may have two different
ends to it. |
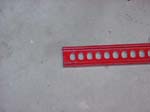
Bottom end |
Top end |
15. Install the Clam-Clevis
by installing the Top Clam-Clevis Bolt with a 3/4” combo wrench
and a 3/4” socket into the top end of the bar |
 |
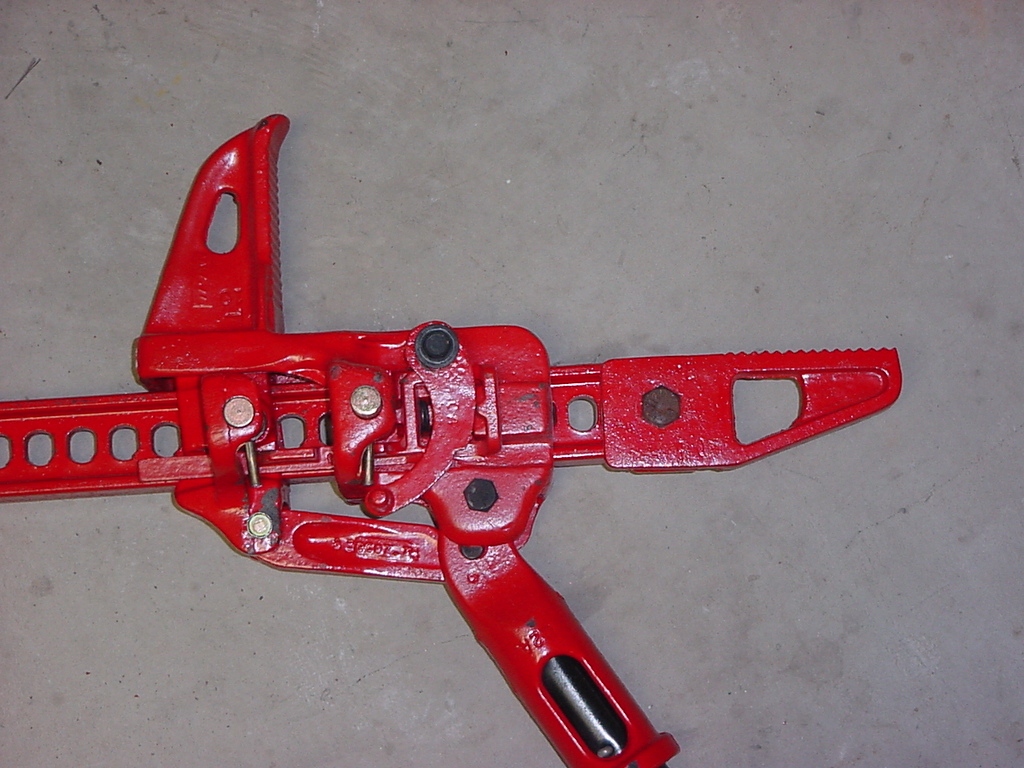
16. Now reinstall the Running
Gear Assembly back on the bar. I ran the assembly all the way up
to show you how it should look against the Clam-Clevis. |
 |
| 17. Install the Foot Piece
on the bar and insert the cotter pin. The longer side of the foot
goes forward on the Jack. |
 |
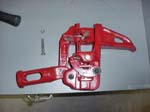
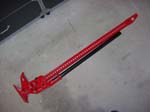
The completed rebuild. |
 |
| Don't forget to test the Jack.
Ensure that the reversing latch is latched and just operate the jack.
It should move up smoothly, and when you release the reversing latch
should go crashing to the floor. Remember there is no weight against
it at the moment. |
 |
You will need to lubricate
the following points on the Hi-Lift.
- Steel Bar
- Pitman Pin
- Shear Bolt
- Climbing Pins and Springs
|
|
| |
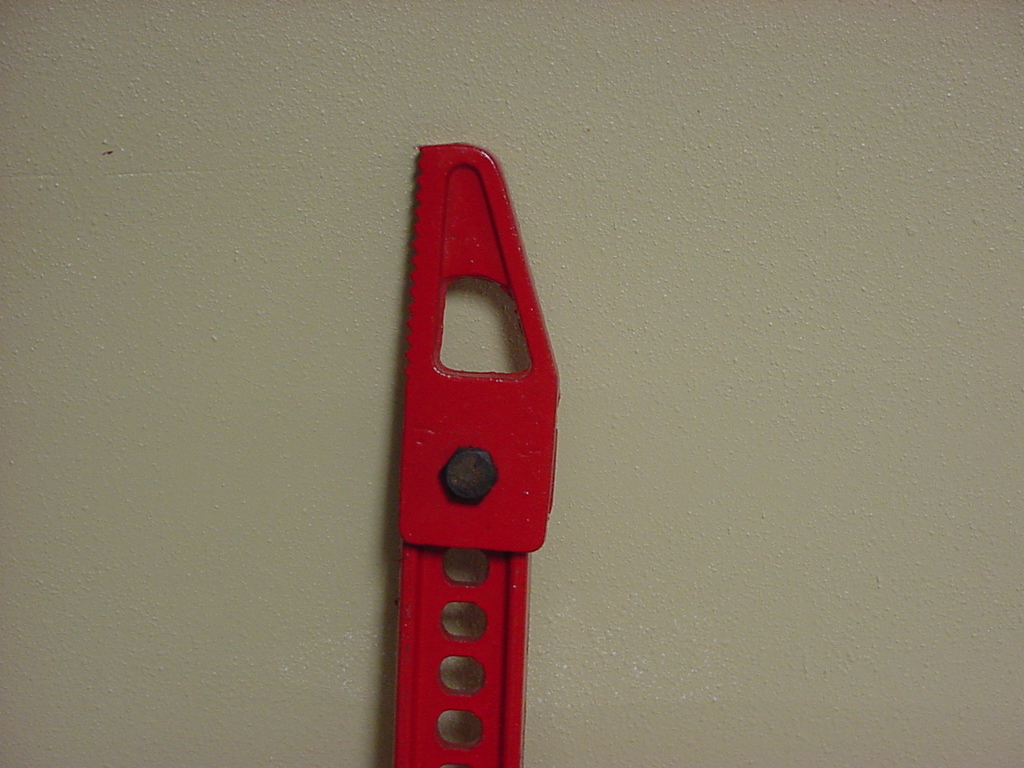
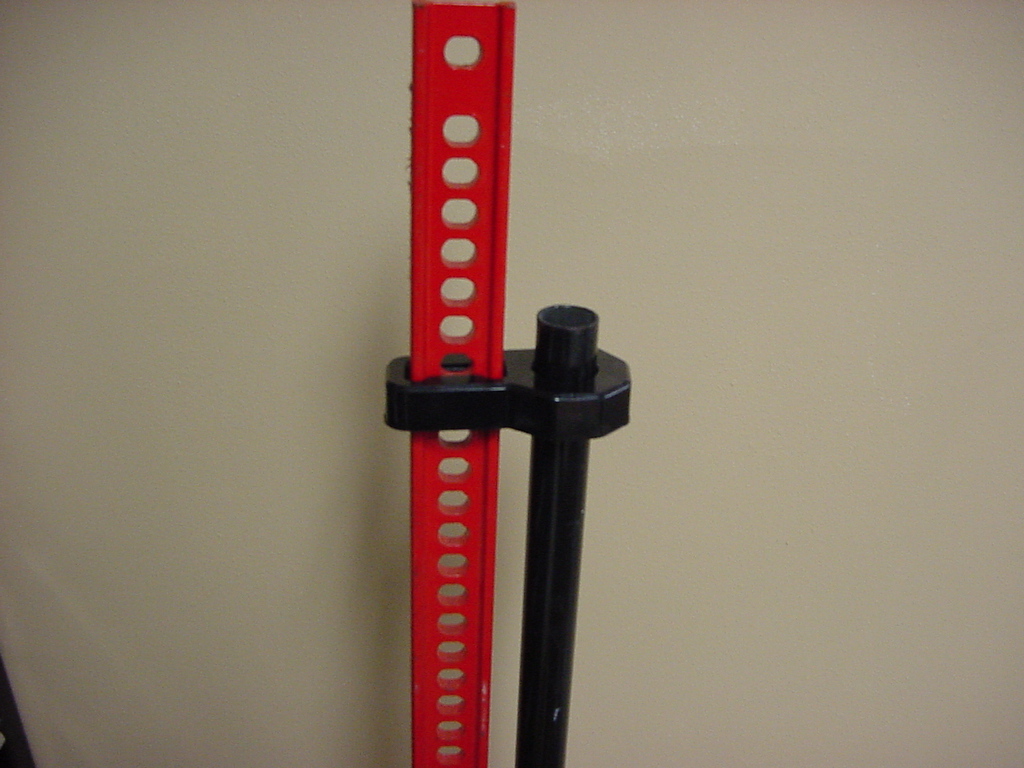
| Daystar Handle Holder |
During my recent overhaul of my Hi-Lift Jack I snapped the old rusted handle holder. Not much of a loss really, I had been using some bungee straps to hold the handle from rattling and flailing about. I looked around for another way to hold the handle. Hi-Lift makes a holder and so does Daystar. I was able to get a Daystar holder for really (free) cheap so I decided to use it on my Hi-Lift Jack. There is a difference between the two holders. With the Daystar you need to remove the top clamp slide the holder on and then reinstall the clamp. With the Hi-lift holder, you can slide it right over that top clamp.
NOTICE: IT IS VERY IMPORTANT FOR THE HANDLE-KEEPER TO BE REMOVED DURING JACK USE TO ALLOW THE HANDLE TO BE PLACE IN THE FULL UPRIGHT POSITION AS STATED IN THE HI-LIFT SAFETY INSTRUCTION MANUAL. |
Here is what it looks like. You can get them in various colors. Yellow, Red, Black. If I remember correctly. |
|
| 1. Remove the Top Clam-Clevis by removing the Top Clam-Clevis Bolt
with a 3/4” combo wrench and a 3/4” socket. It’s
easier if you can clamp this in a vice, but I managed to lock a
leg around it and get it to come free. |
|
|
| 2. Slide the handle holder down over the top of the bar. |
|
|
| 3. Slide the handle holder over the handle. |
|
|
| 4. Install the Clam-Clevis
by installing the Top Clam-Clevis Bolt with a 3/4” combo wrench
and a 3/4” socket into the top end of the bar |
|
| Remember every time you need to use this Hi-Lift you will need to remove that top clamp and remove the holder. With that in mind I would recommend going with the Hi-Lift holder if you consistently use that top clamp. I have the Jack Mate, so I only have the clamp on for the pictures. |