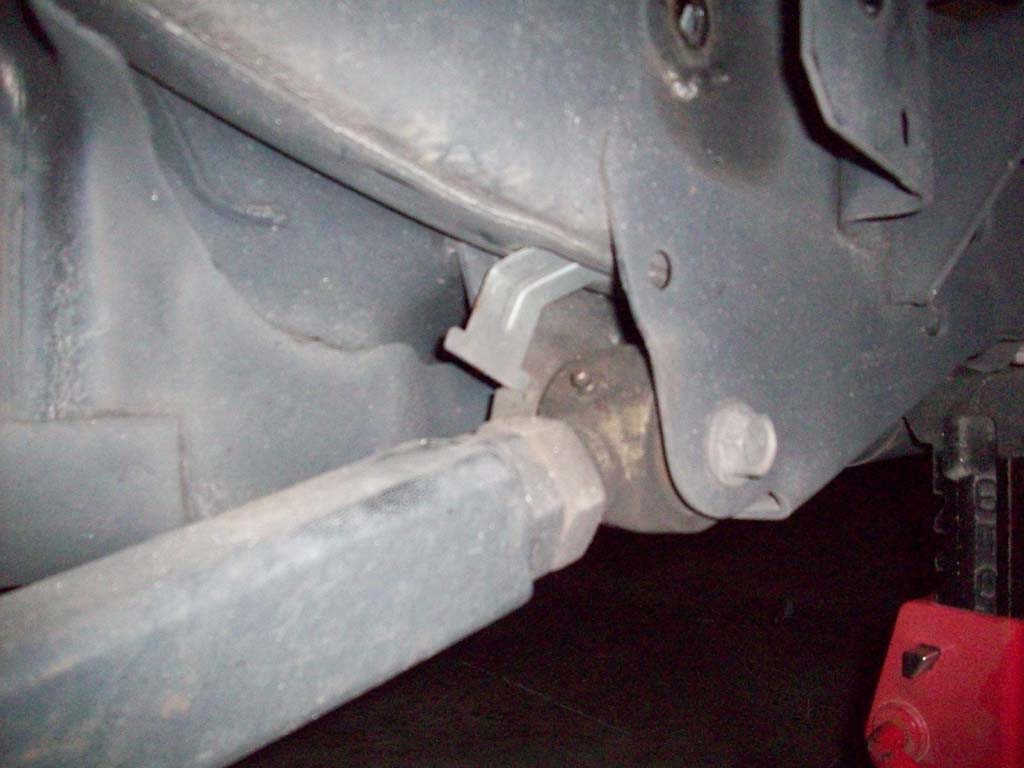
I finally managed to track down a squeak coming from the rear of the Jeep. It appears that I may have overgreased a Johnny Joint on my Clayton Control Arm and caused the snap ring to unseat and the bushing to slide out of the housing just enough to cause the snap ring and washer to ride against the axle side mount. I looked for information and even contacted Clayton to find out what size joints they used on the arms so I could order the correct rebuild kit for them. This proved to be confusing at times, but I finally did find one mention of how to measure the joint to get the right size rebuild kit. I did opt to skip ordering the tool, but if I was doing more than one joint I would definately suggest getting it and saving time and frustration. I included a link to Currie's Youtube video on rebuilding the Joint. The tool makes it much easier, but you need a different tool for each joint size.
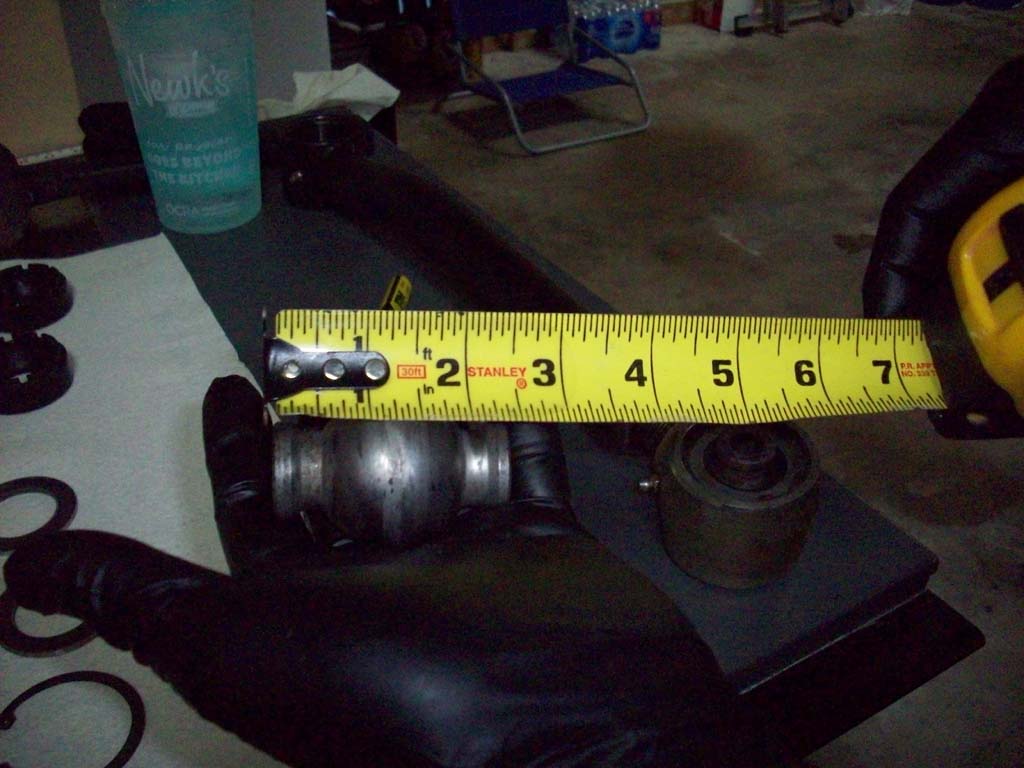
| Measuring for the right joint: |
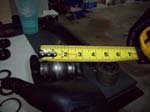
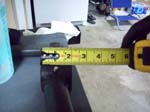
| The Johnny Joint come in various sizes, so you need to get the correct rebuild kit for the application that is on your vehicle. The JK's use two sizes. The rear upper, lower and front lower control arms use a 2 1/2" Johnny Joint, and the front uppers use a 2" Johnny Joint. Measure across the width of the ball joint. This is typically the inner width of the fame or axle mount point. This is 2 1/2" across. The second measurement to be aware of is whether the joint is a standard of narrow width joint. The standard width of the housing for the 2 1/2" Johnny Joint is about 2" across. |
 |
 |
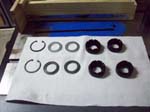
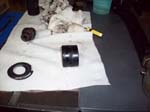
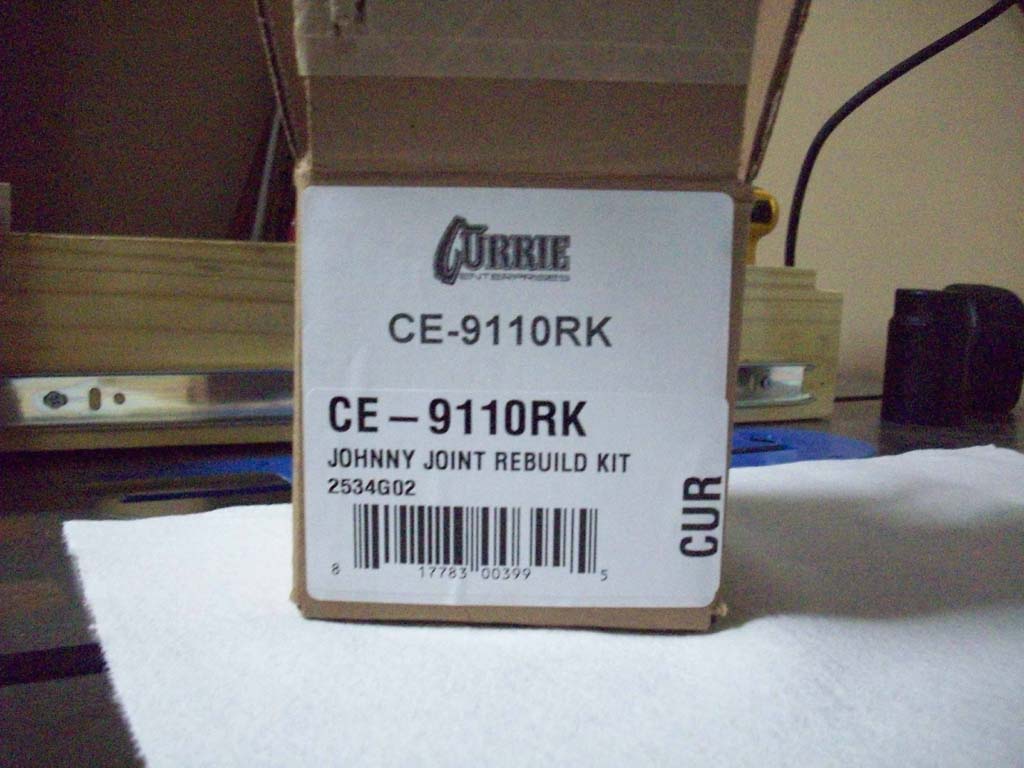
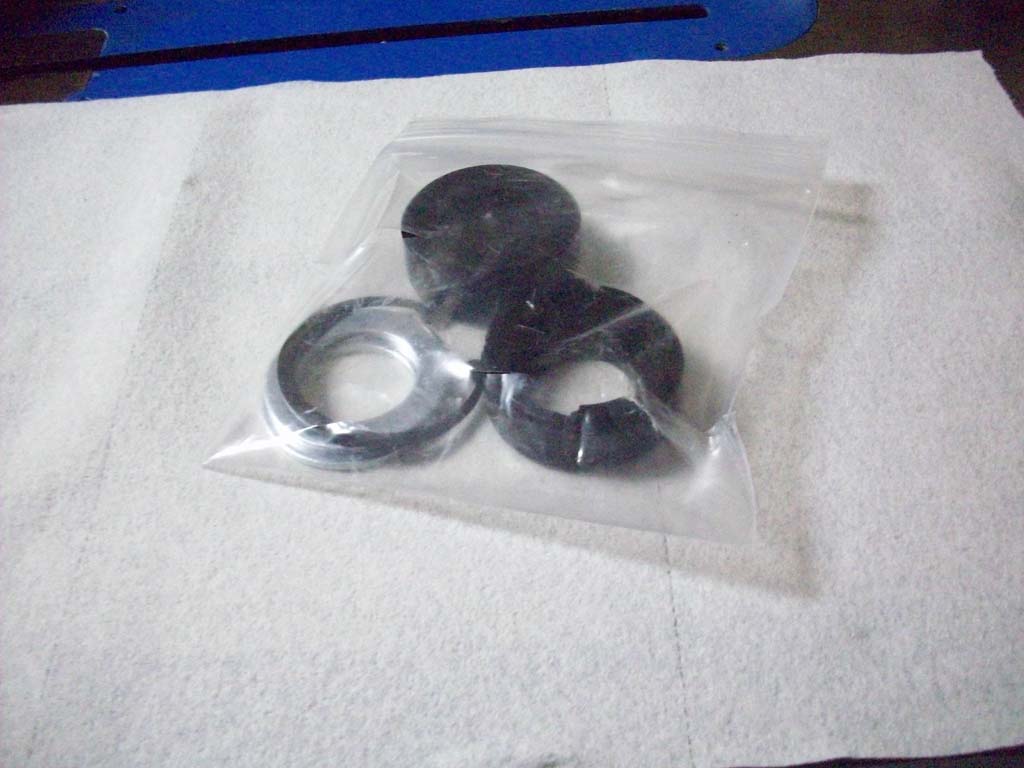
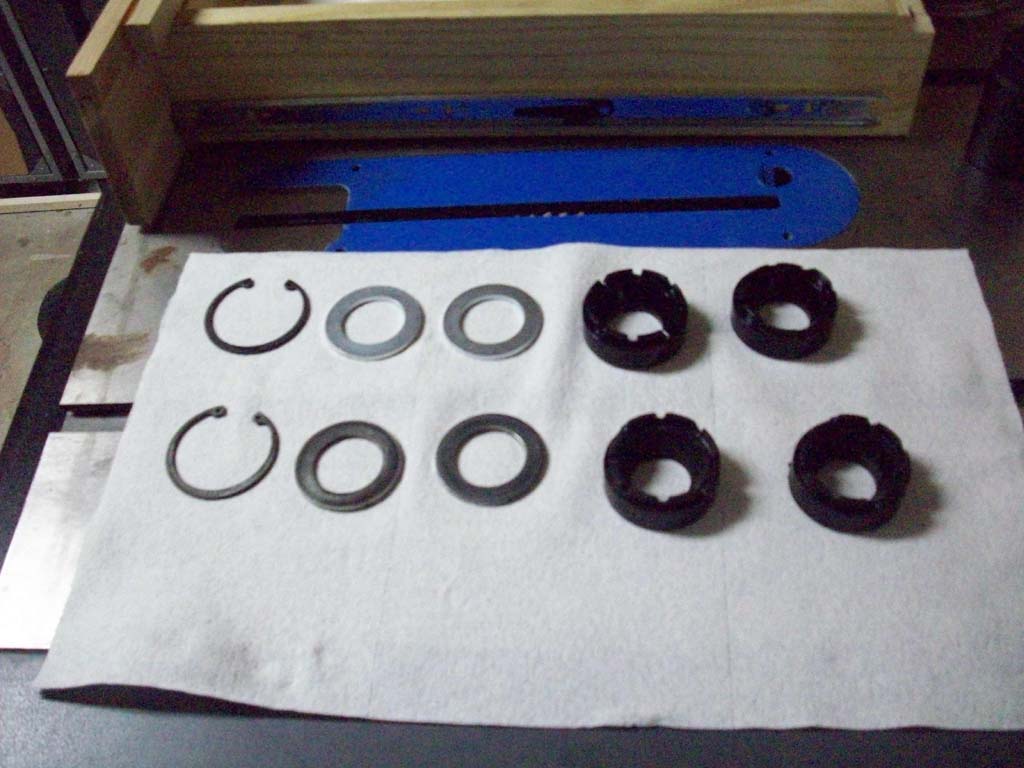
| I picked up two (2) of the 2 1/2" rebuild kits for the control arms. The kits come with new washers, snap rings and bushings. The inner metal ball joint is not included as part of the rebuild kit. |
 |
 |
| |
| Rebuilding the Joint (without the tool) scroll down if you have the tool: |
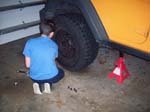
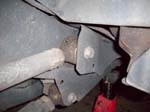
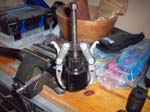
| 1. Block the front tires, jack up the rear axle and place jackstands under the frame right in front of the lower control arm mounts. Your placement may be different depending upon which control arms you need to work on. Remove the tire. |
 |
 |
 |
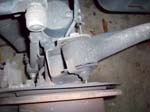
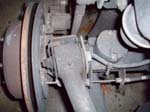
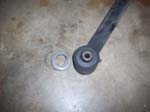
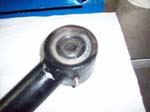
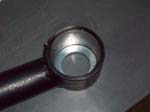
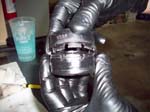
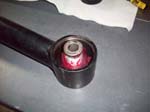
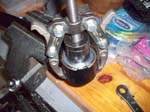
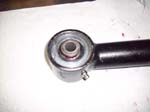
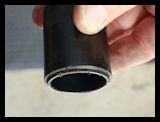
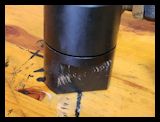
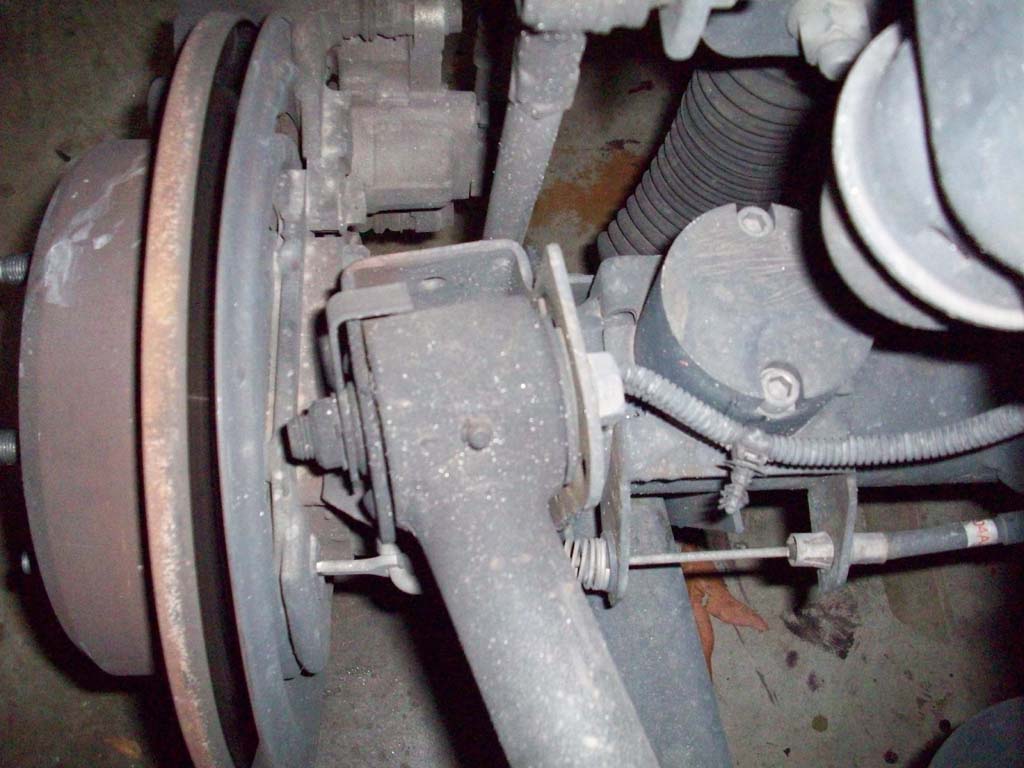
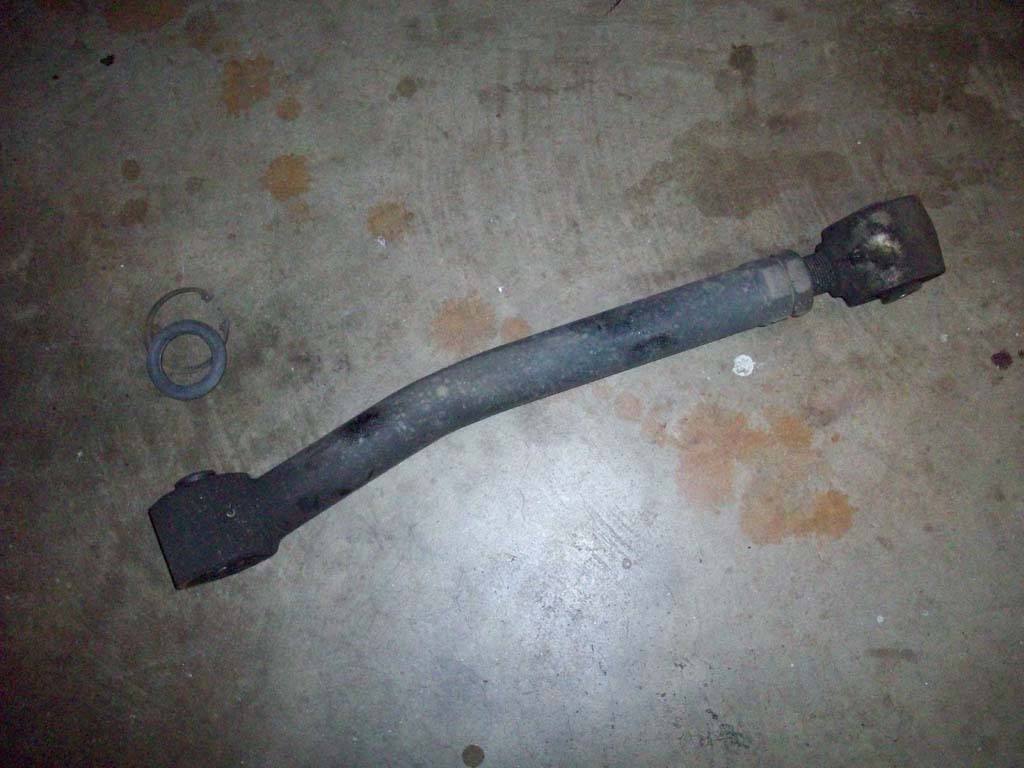
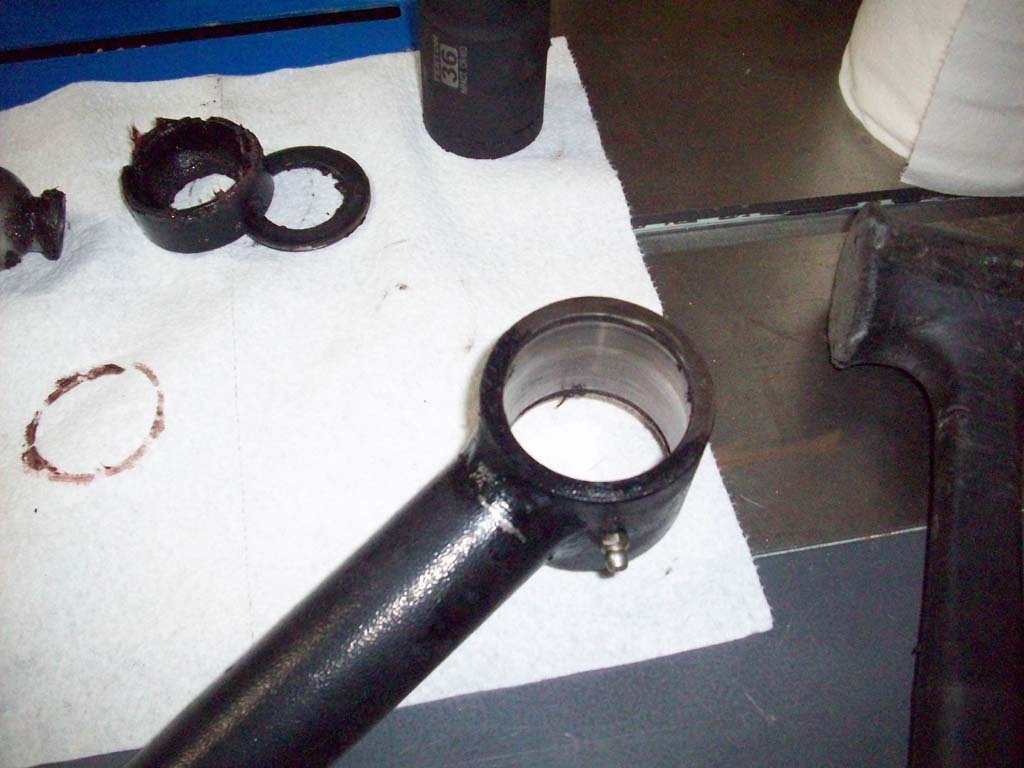
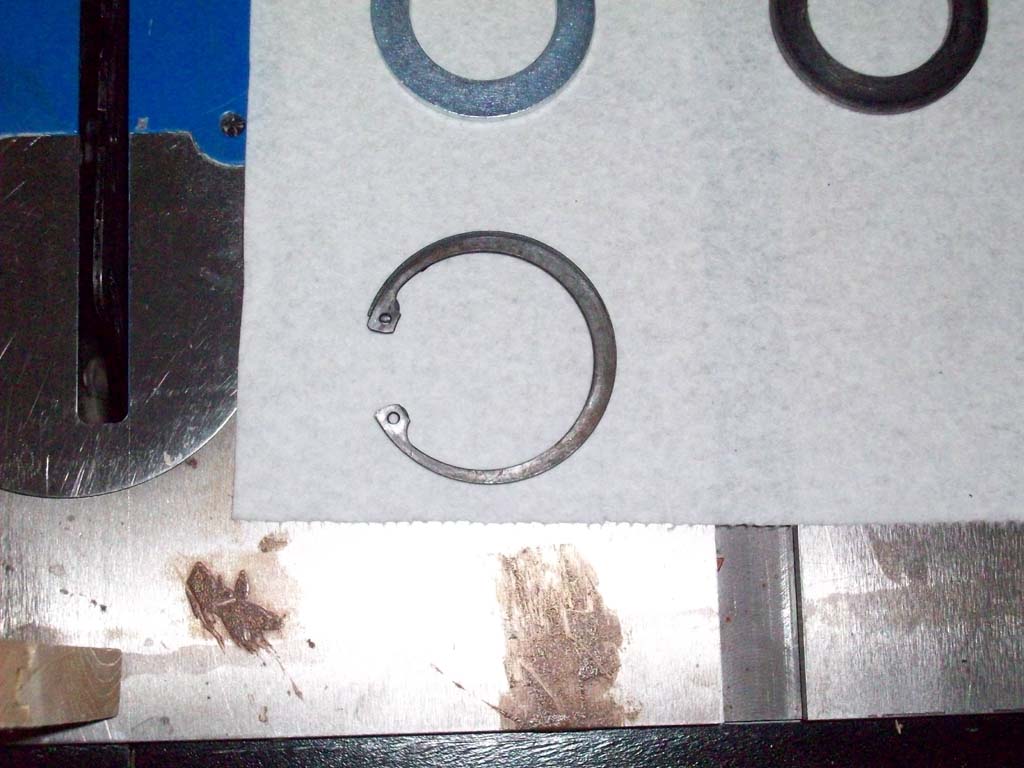
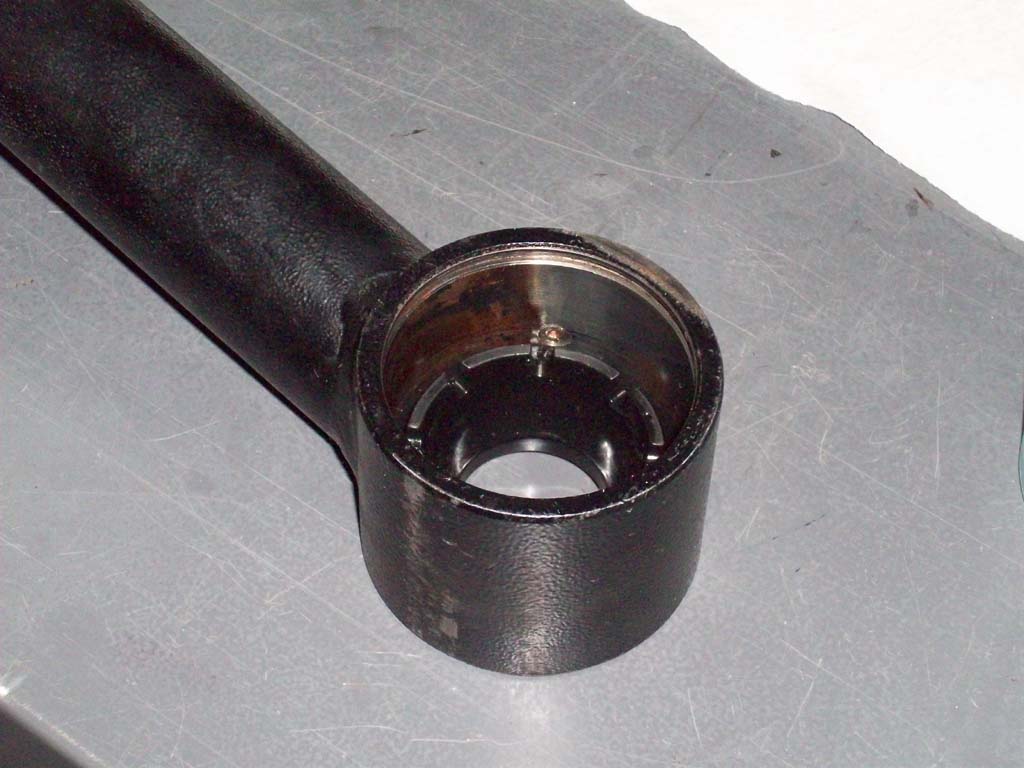
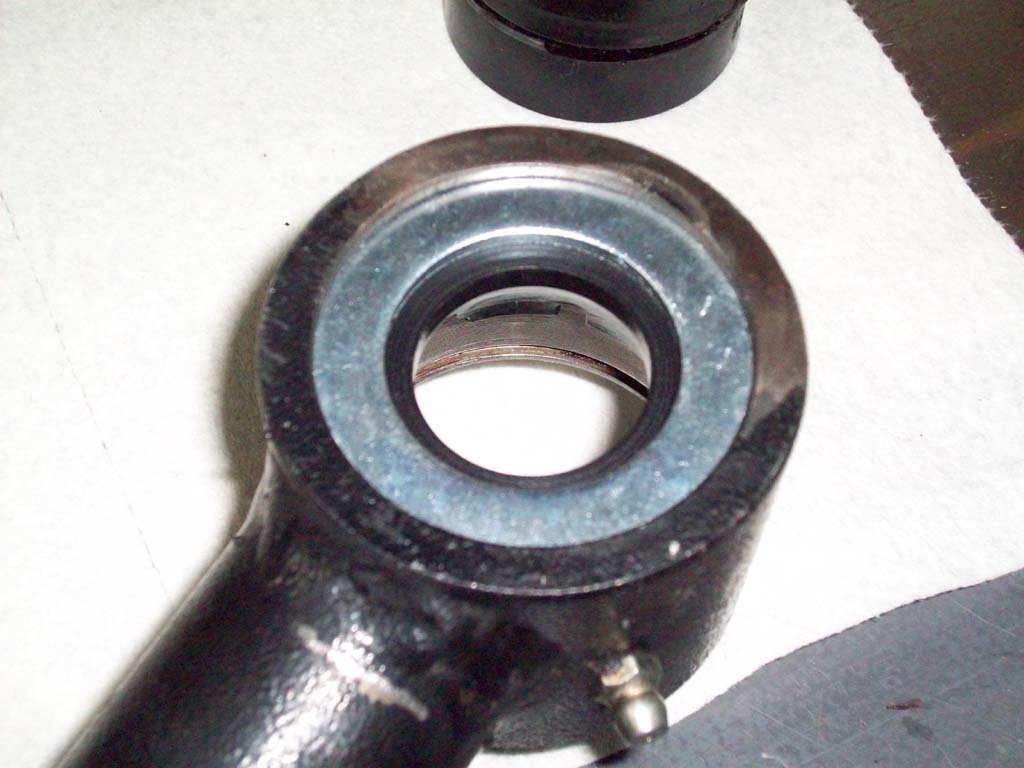
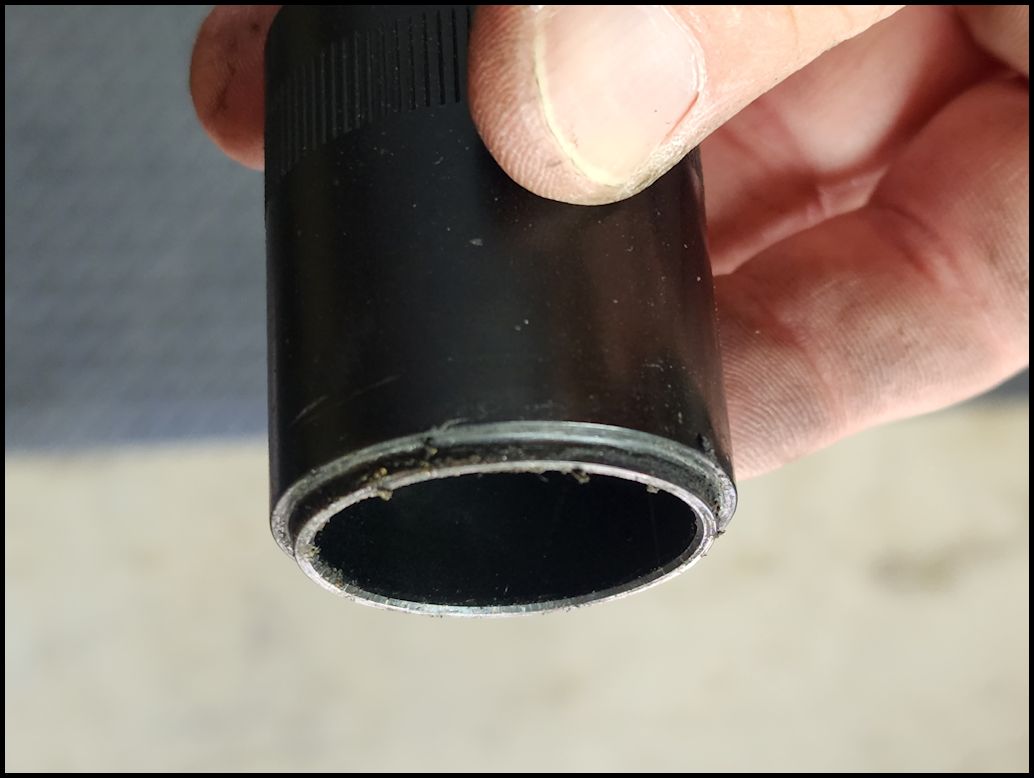
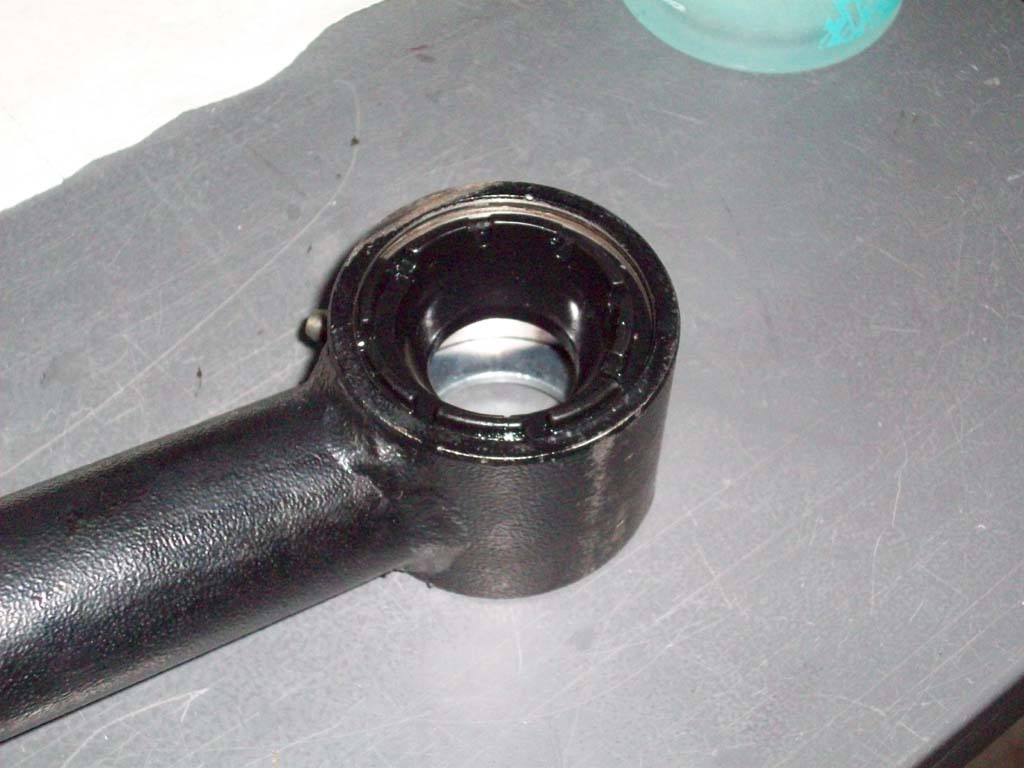
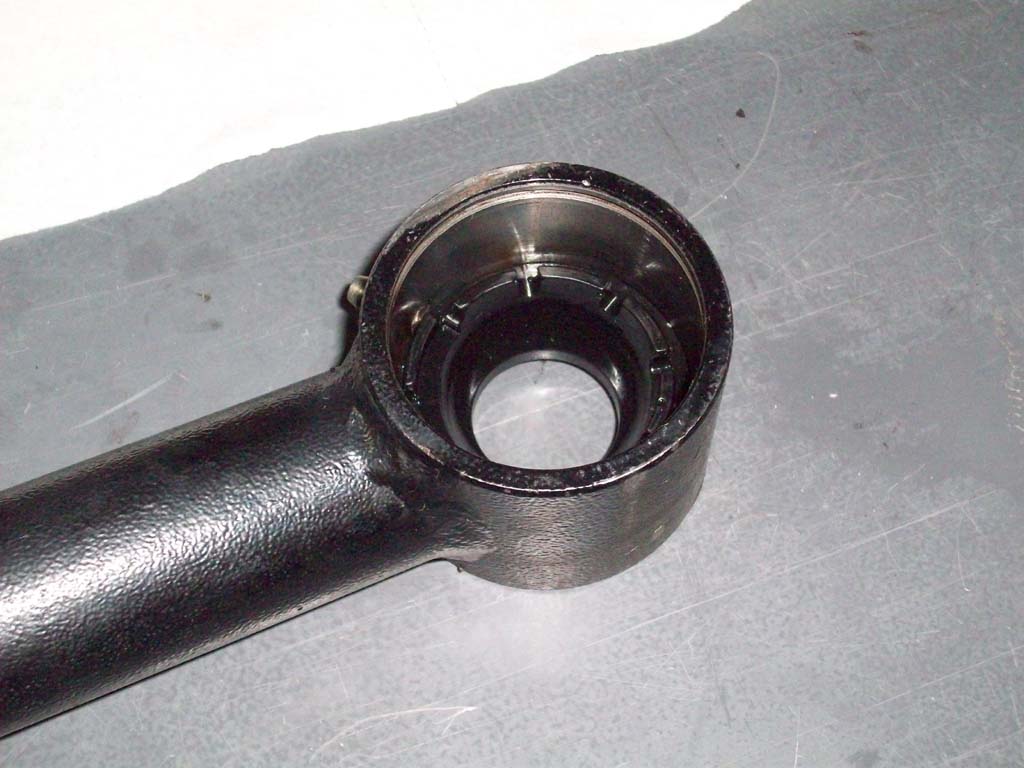
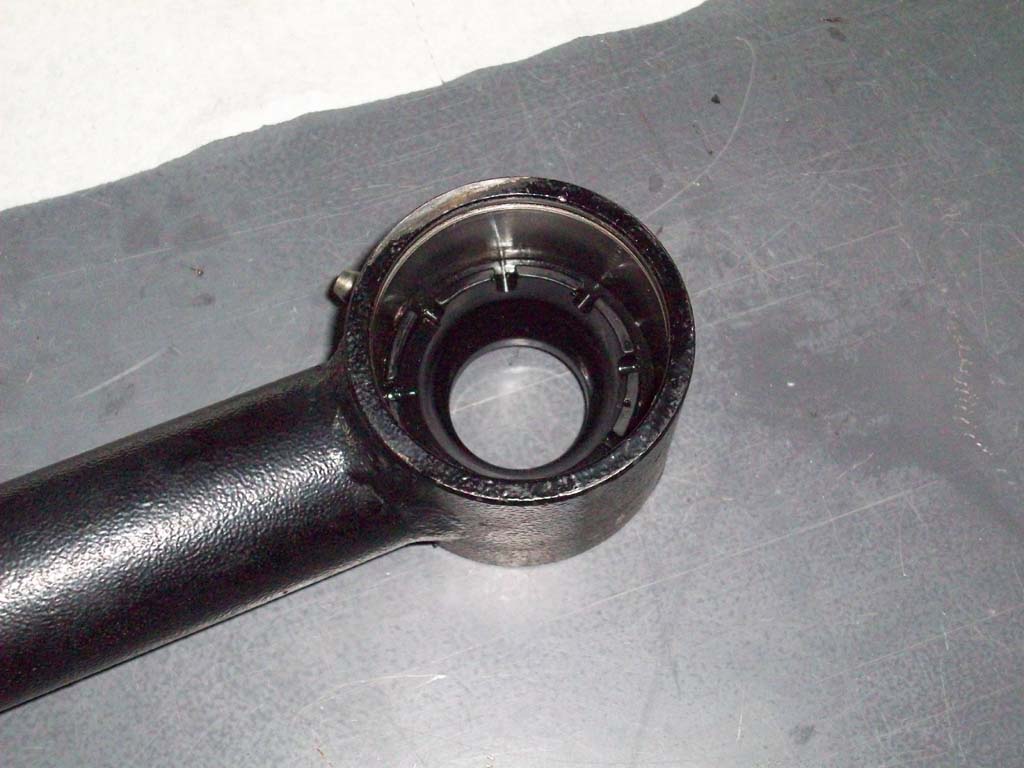
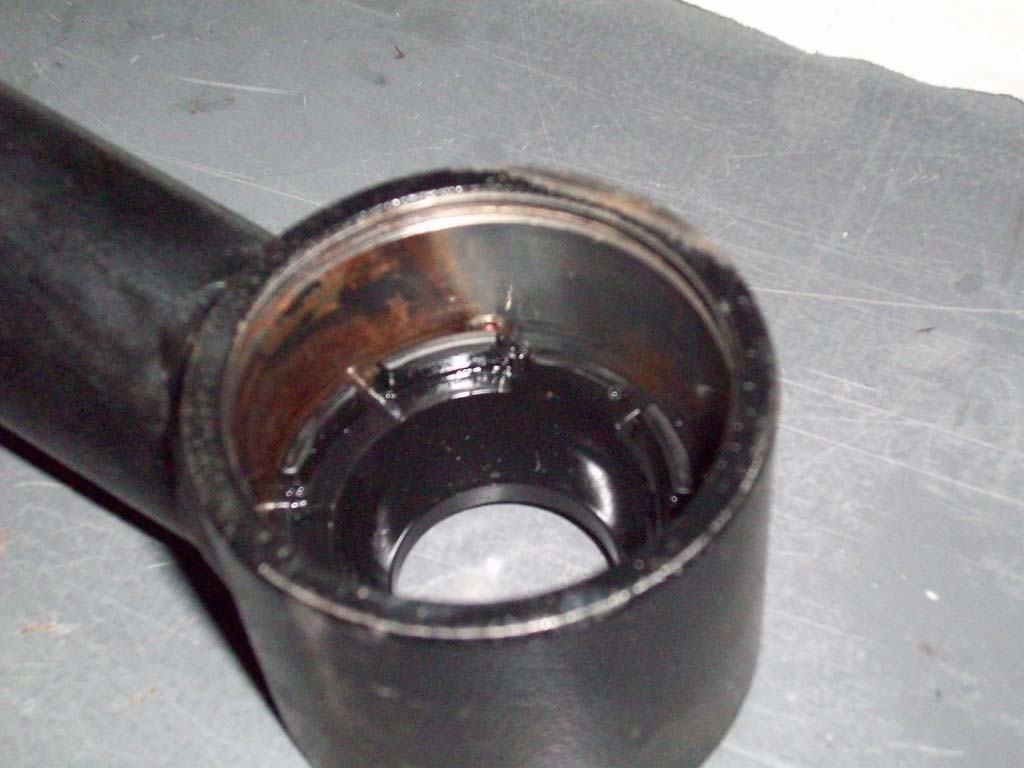
| The picture doesn't show it to well, but the inner snap ring has popped free of it's channel allowing the Johnny Joint to slide out of the housing. This is what was causing an audible squeak from the rear of the Jeep. I believe I tried to overgrease it and popped it out, not an actual failure of the joint. |
 |
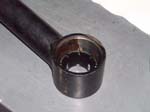
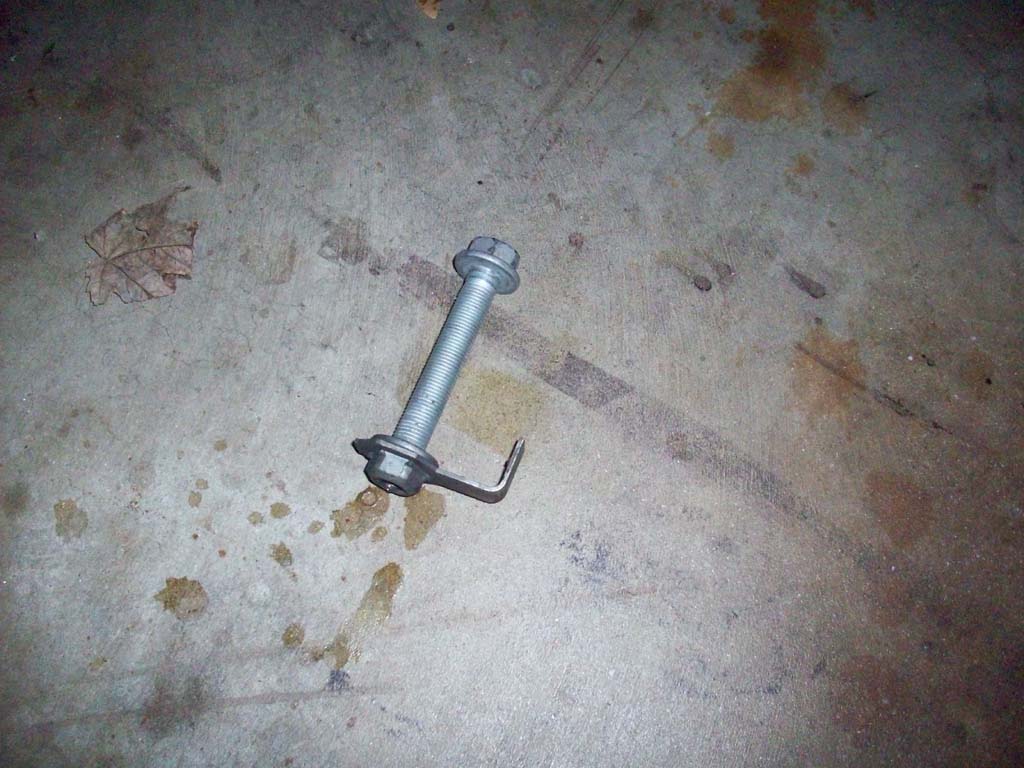
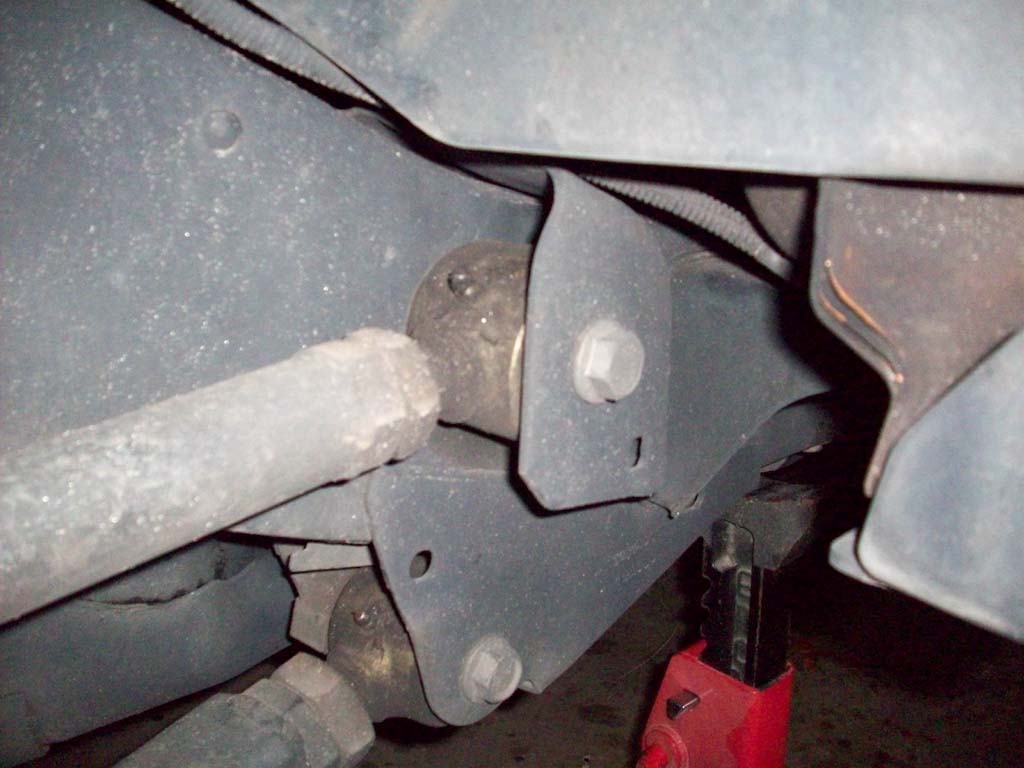
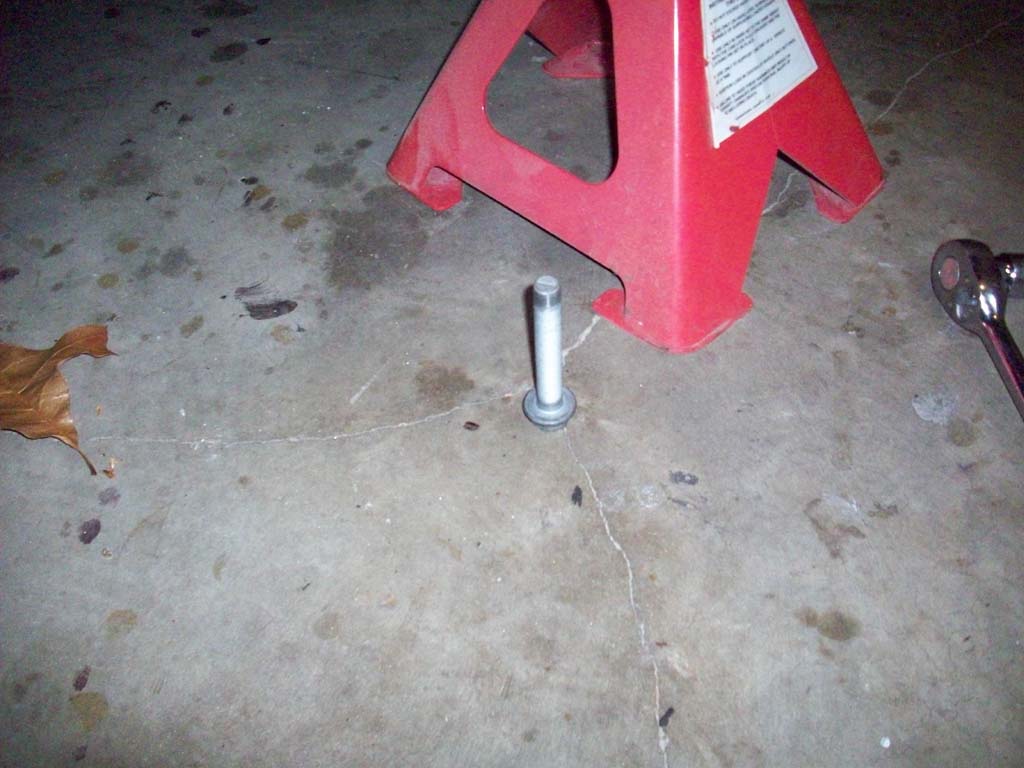
| 2. Remove the bolts holding the control arm to the frame. You will need a 21mm socket and combo wrench. |
 |
 |
 |
 |
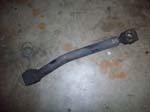
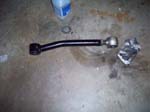
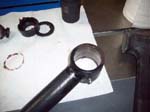
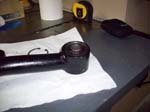
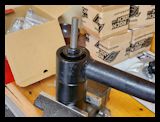
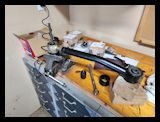
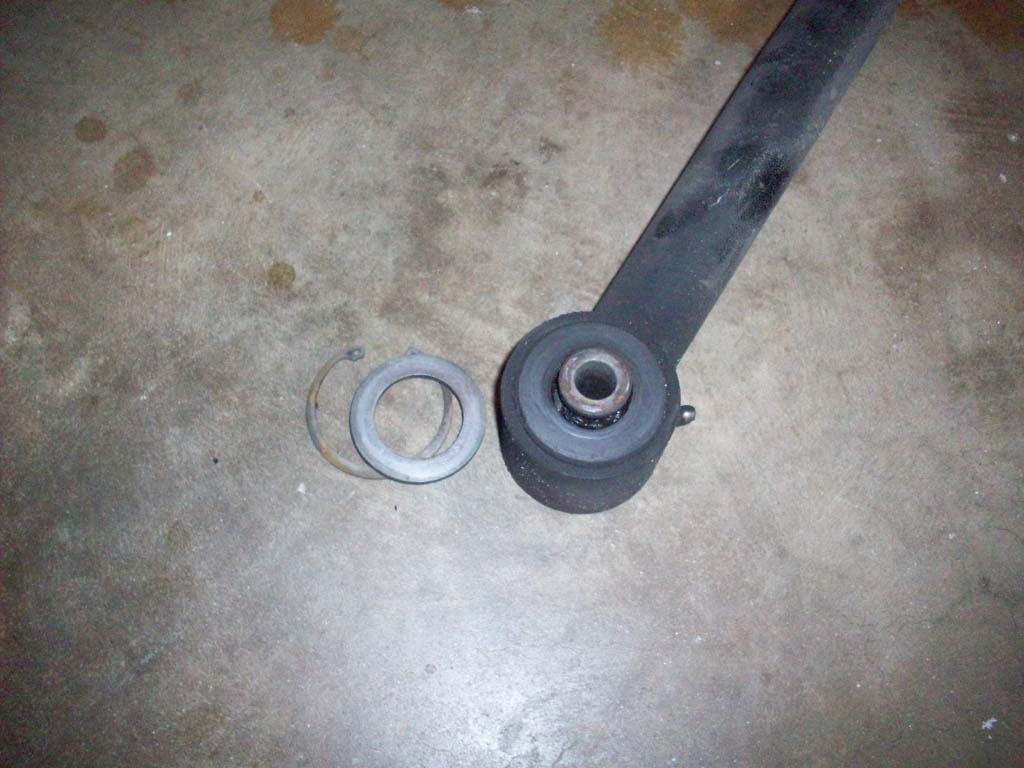
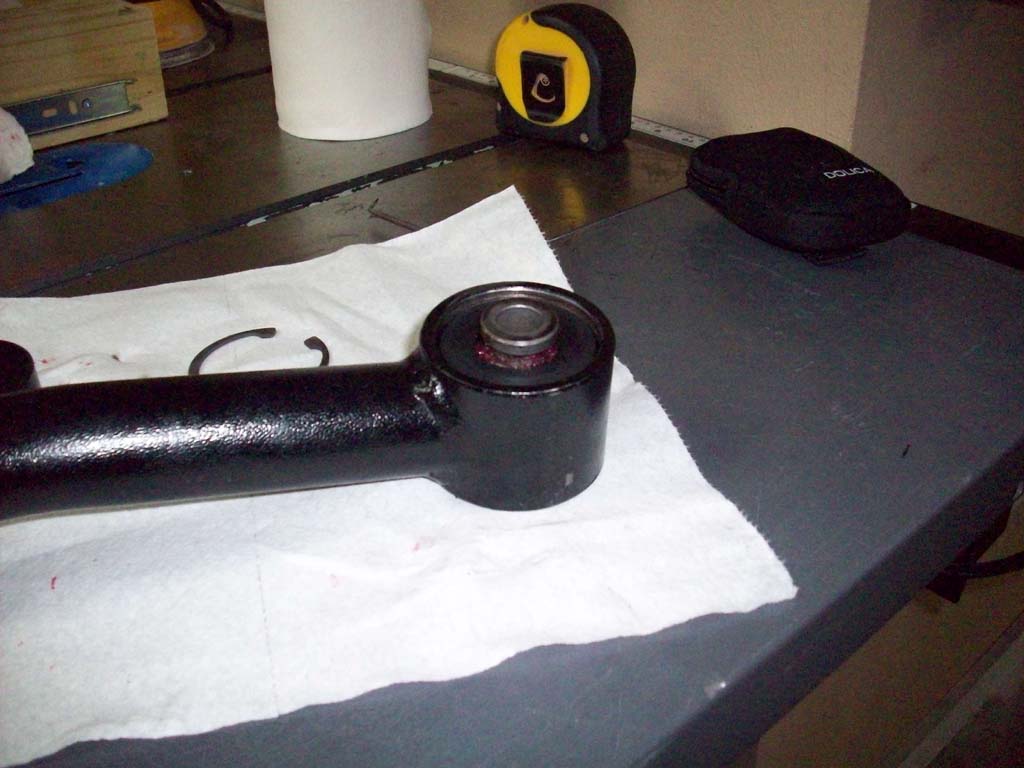
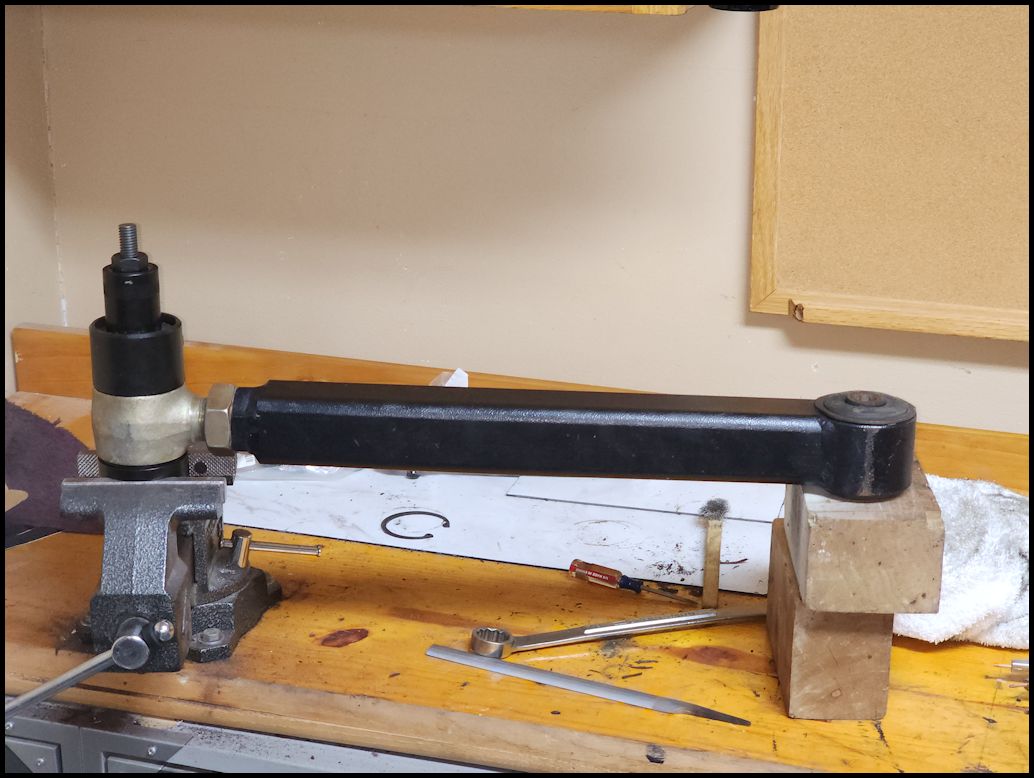
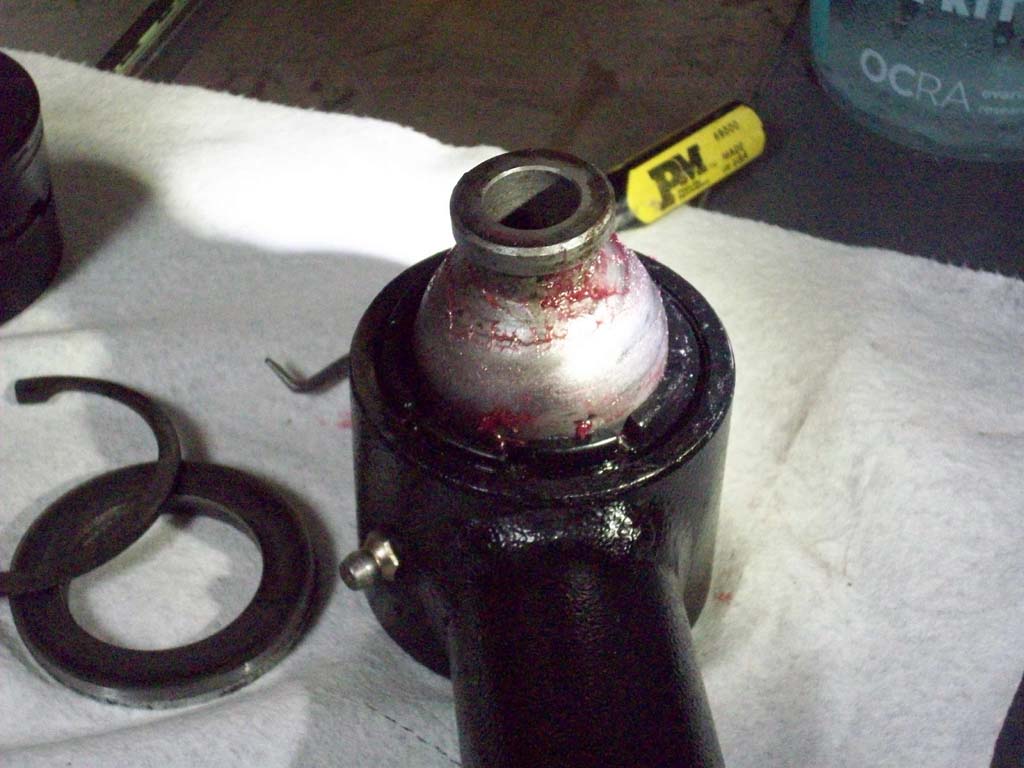
| 3. Remove the arm from the Jeep. I cleaned it up just because it was full of dirt and grease. |
 |
 |
 |
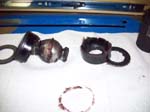
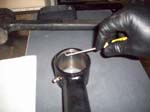
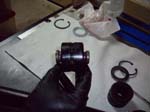
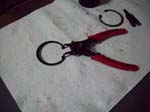
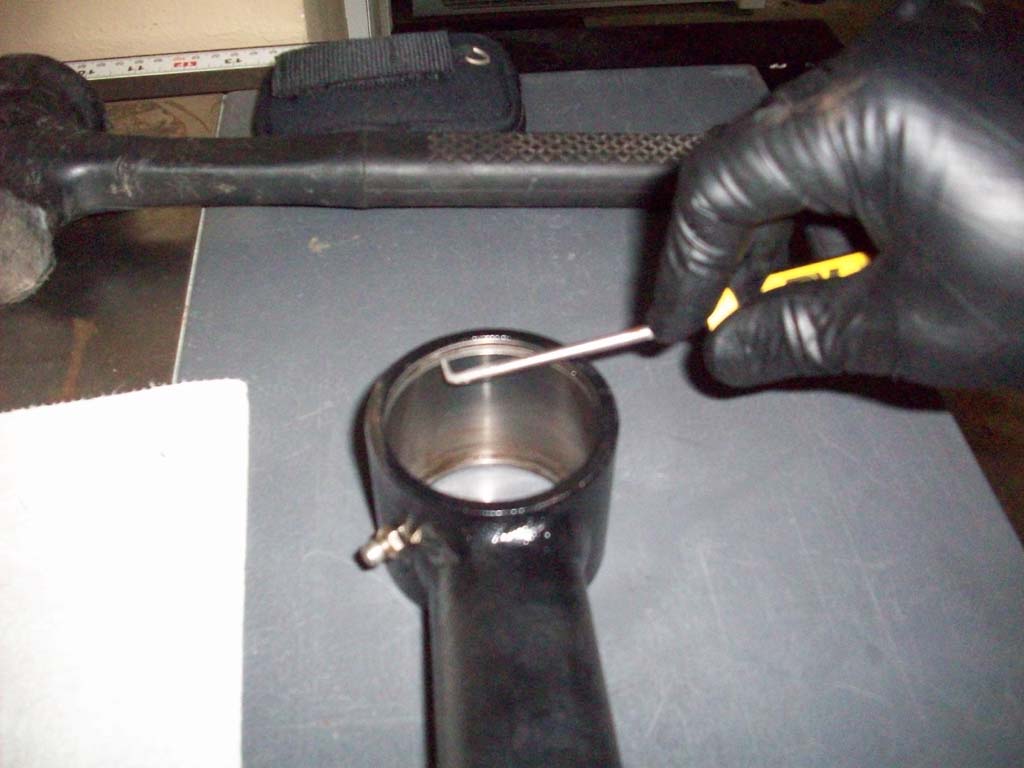
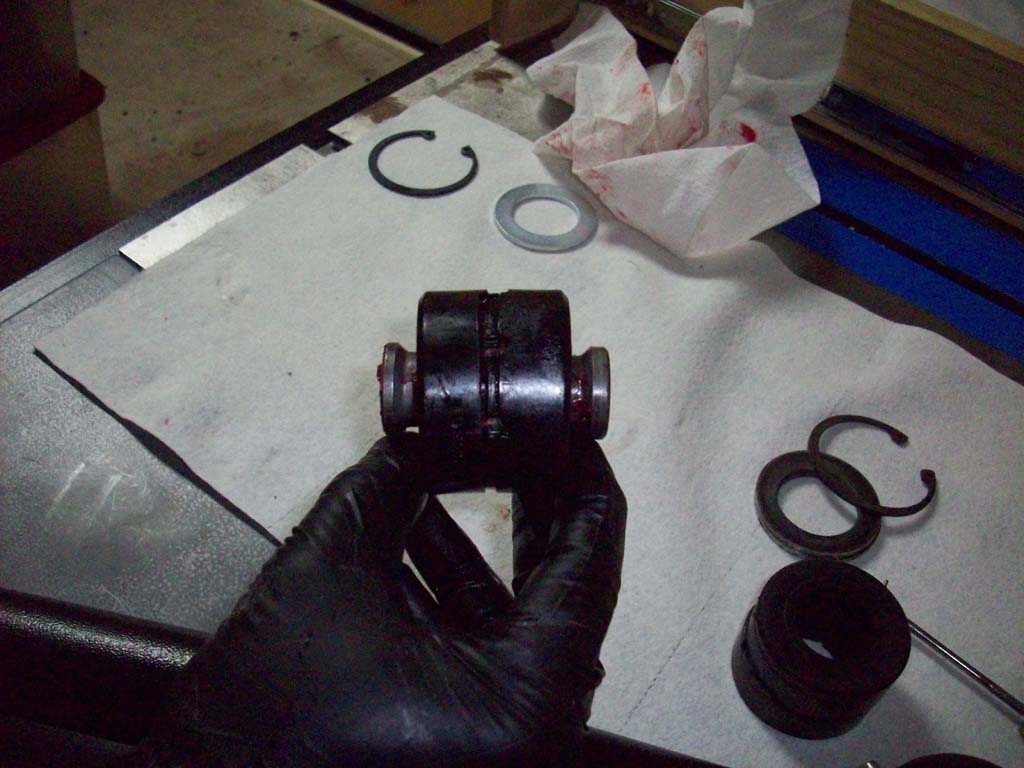
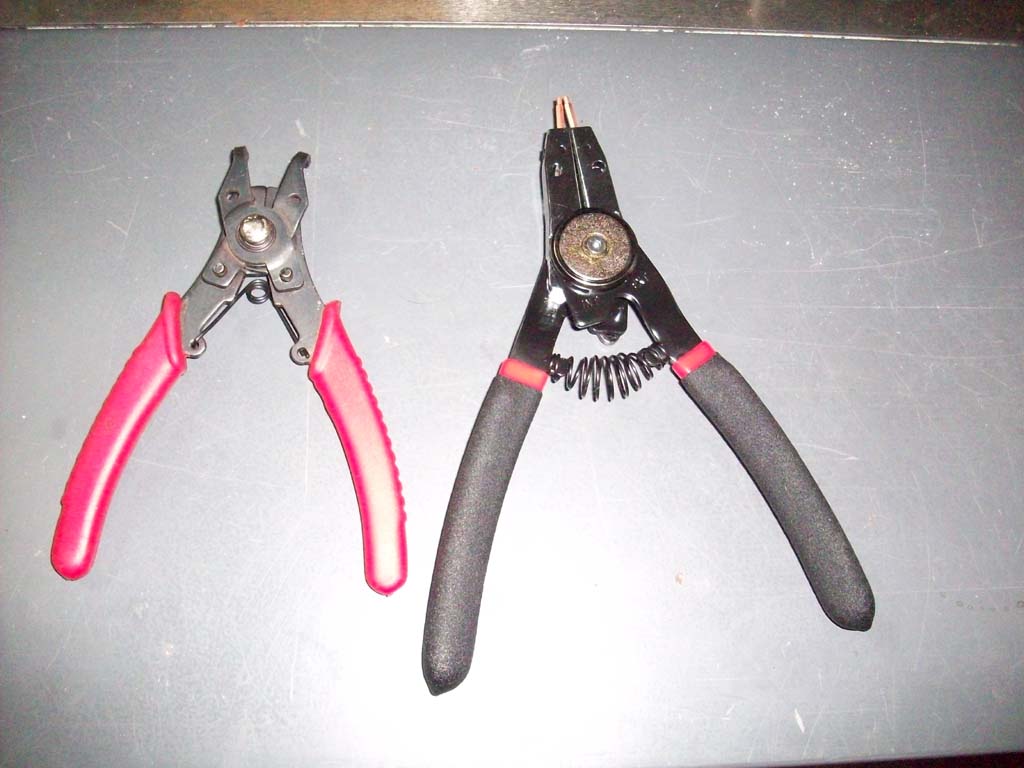
| 4. Using a large snap ring pliers remove the snap rings from the housing. The washers may just fall out, otherwise you can use a small pic or screwdriver to get them to come out. |
 |
 |
 |
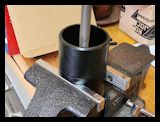
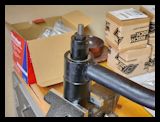
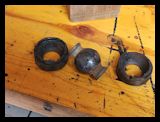
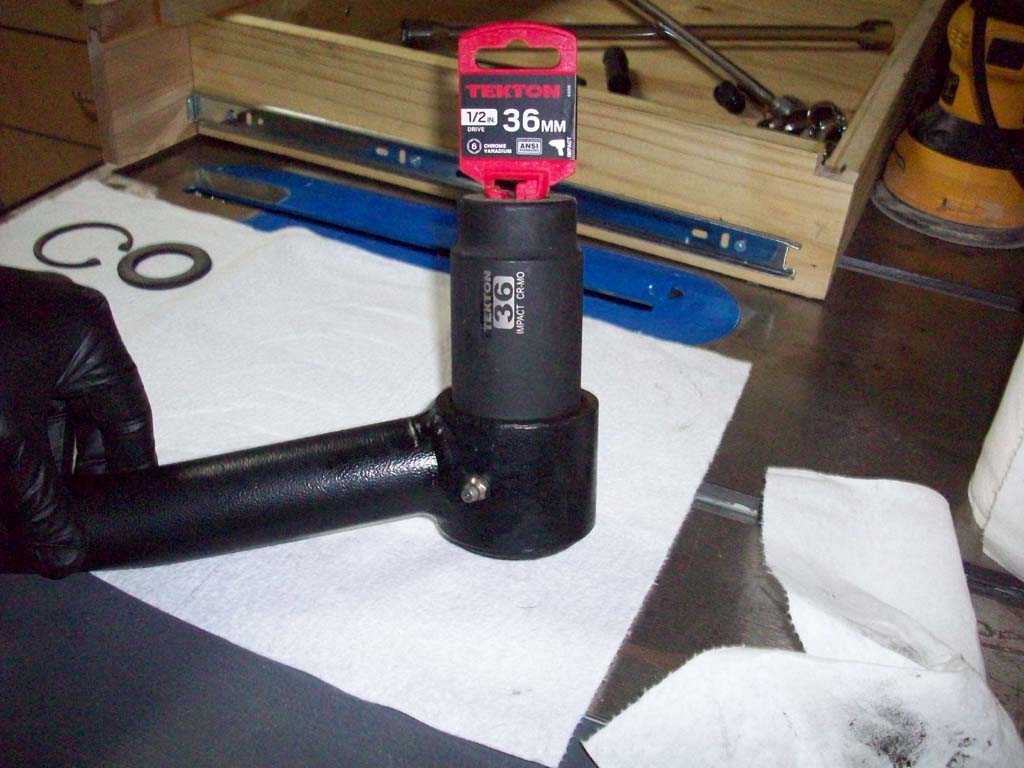
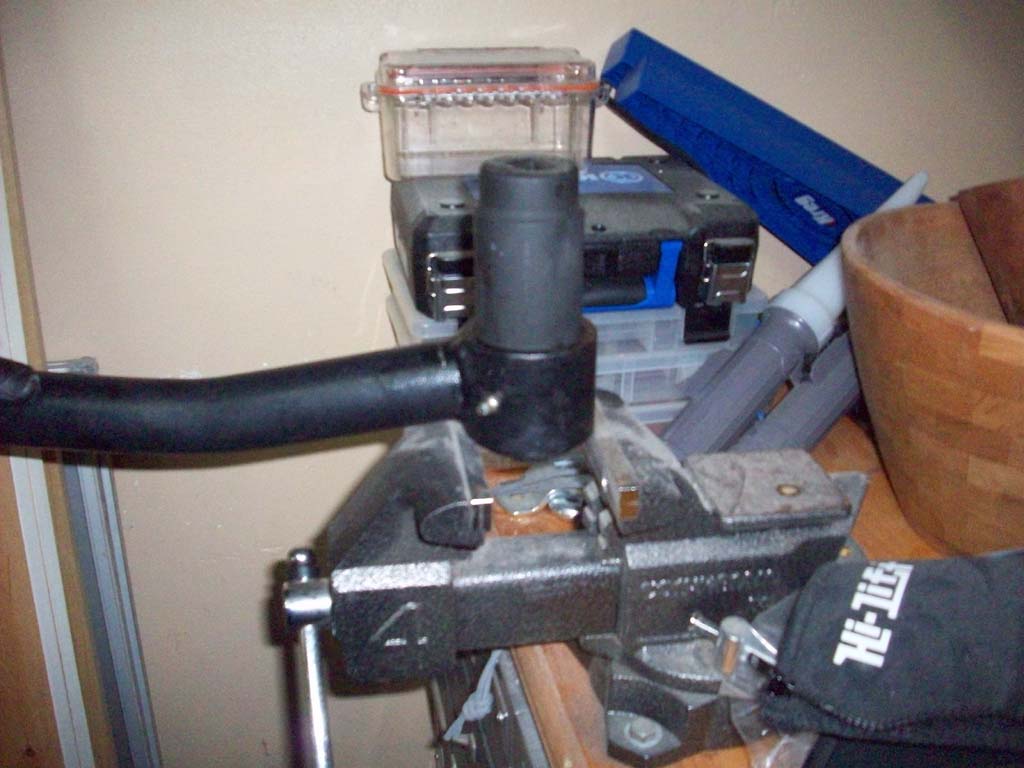
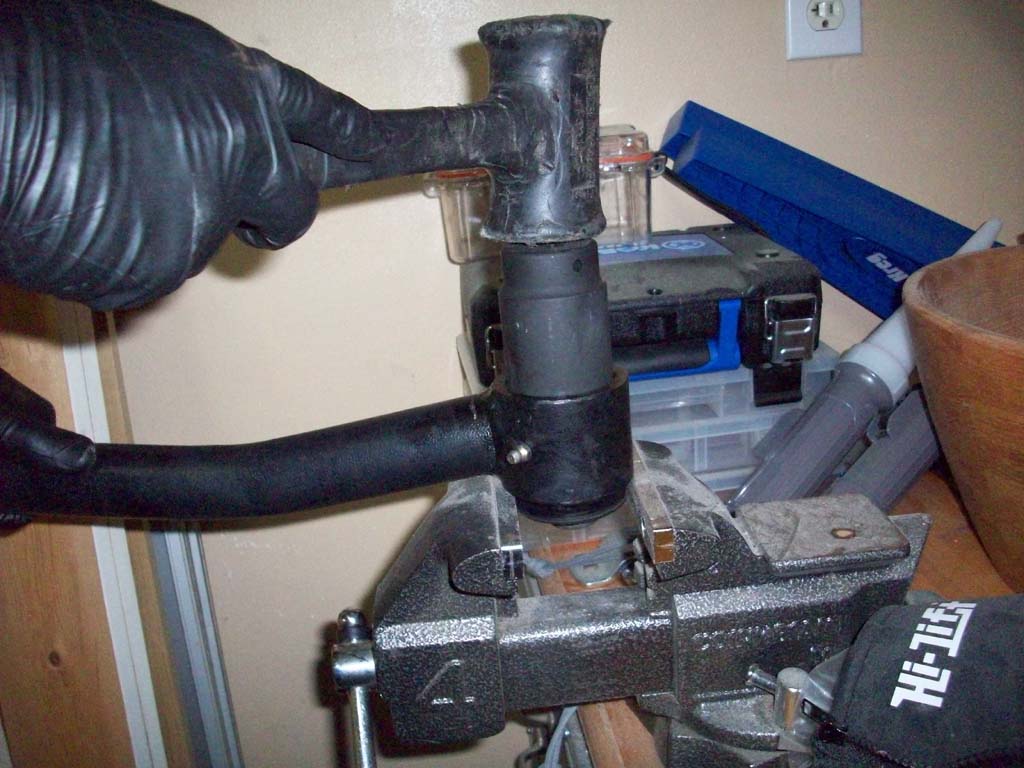
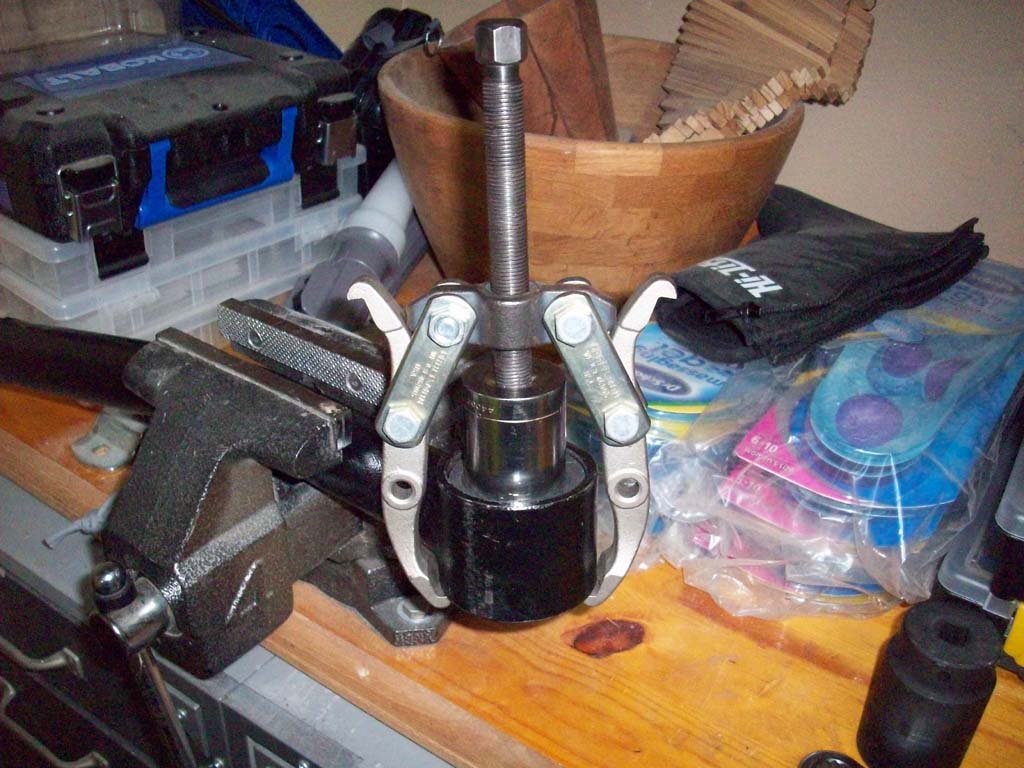
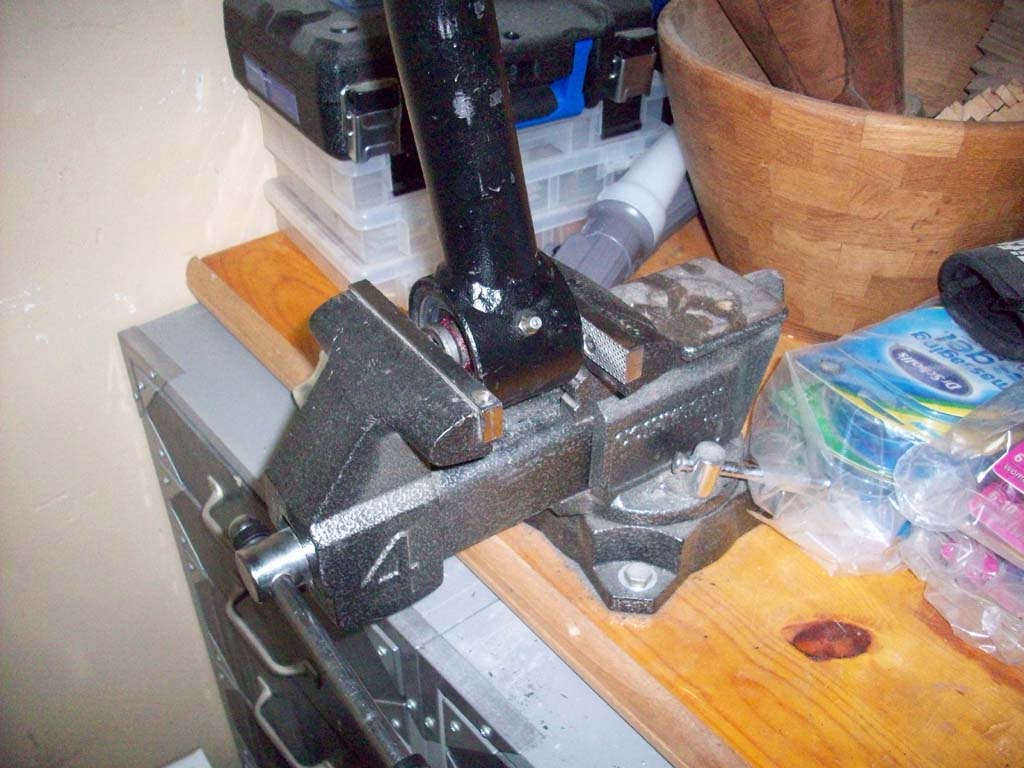
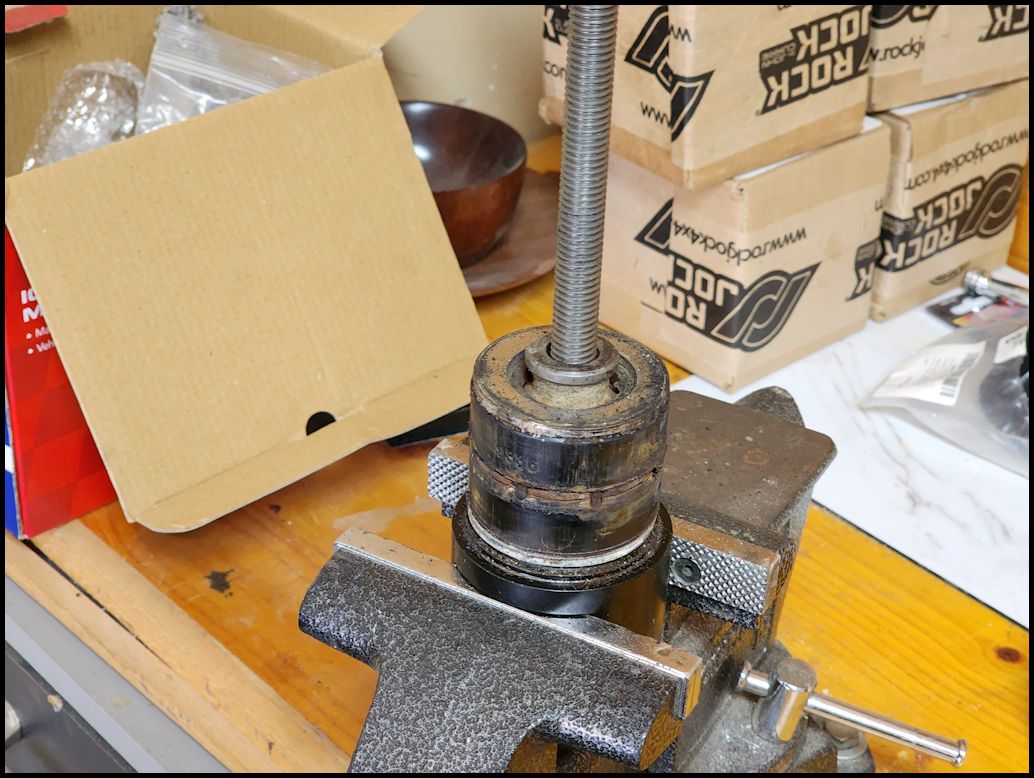
5. I used a 32mm socket, dead blow hammer and my vice to knock the bushings out of the housing.
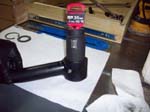
Note: Currie makes a tool to remove/install the Johnny Joint from/into the housing and I highly recommed spending the money to get it if your doing more than just one joint. It will save a lot time and agravation. |
 |
 |
 |
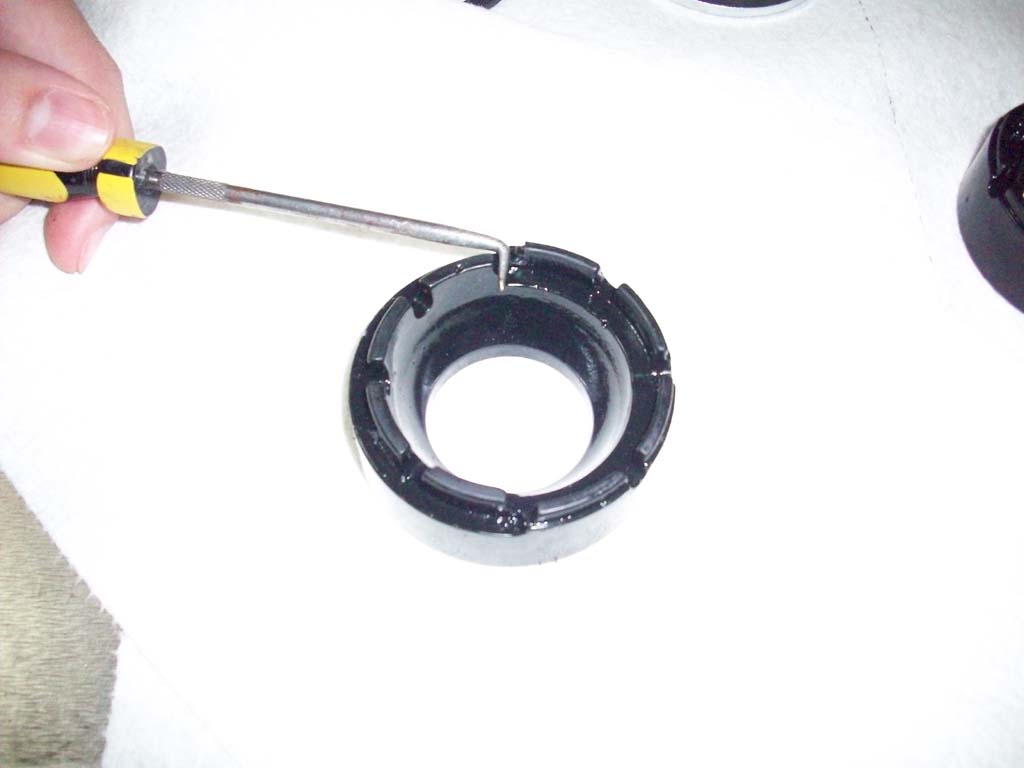
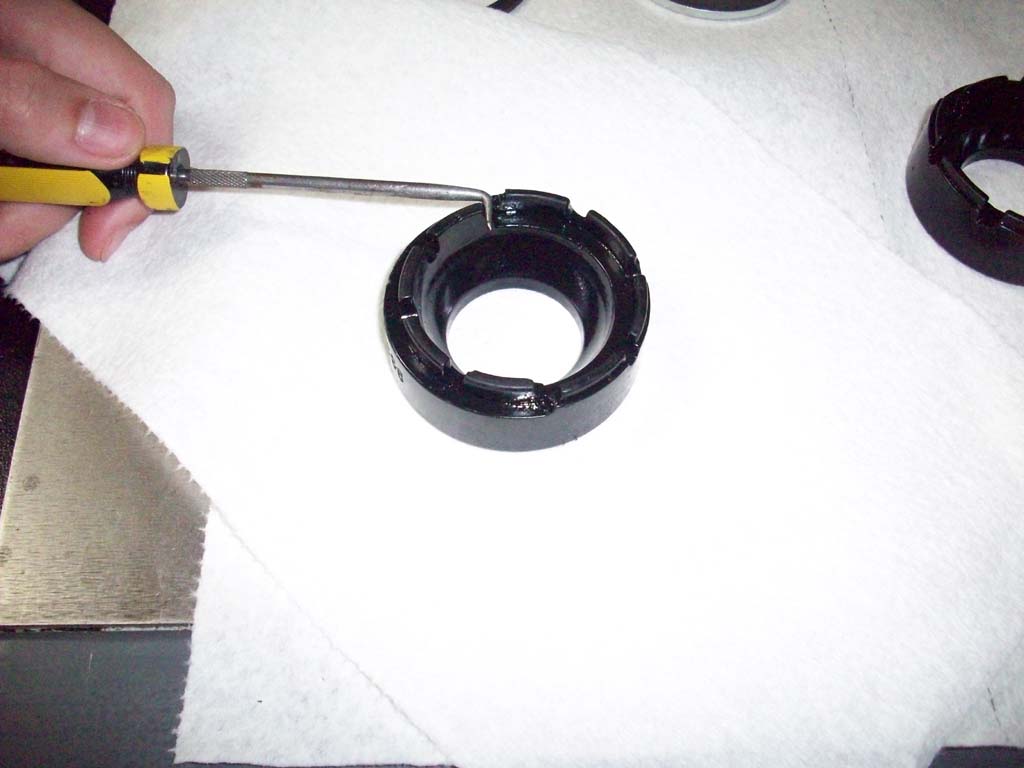
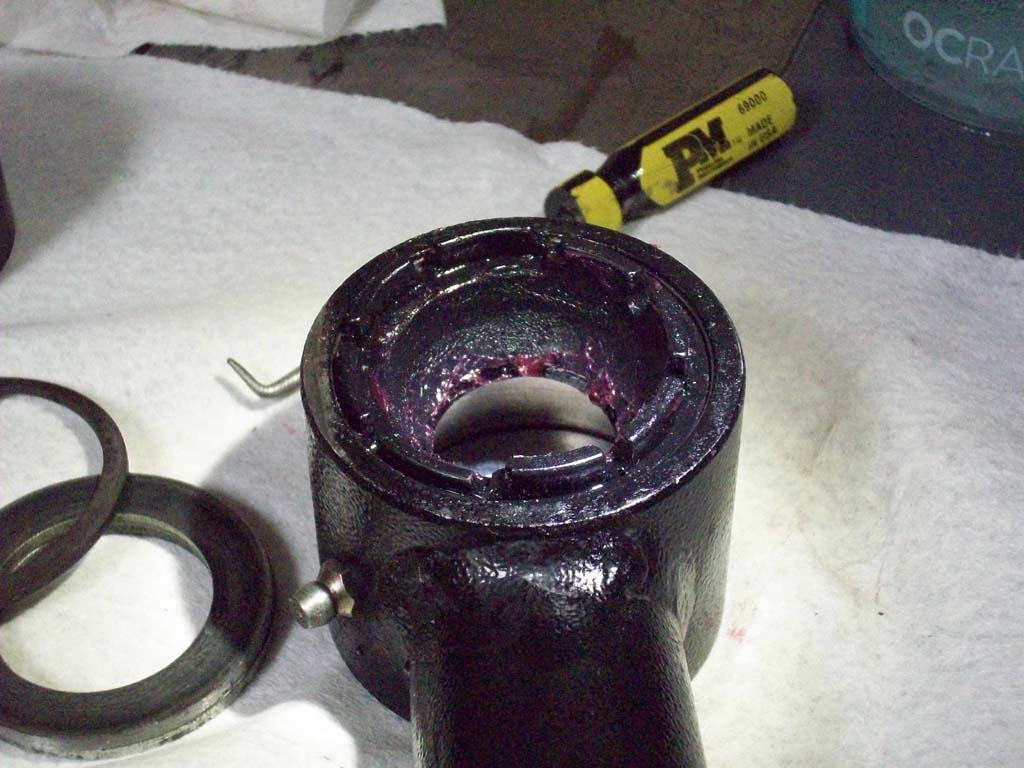
| 6. Once you have everything removed, clean off the old grease from the Johnny Joint and housing. I used a pic to get the grease and dirt out of the snap ring slot. Make sure the slot doesn't have any debris in it otherwise the snap ring can have problems seating properly. |
 |
 |
 |
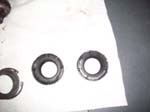
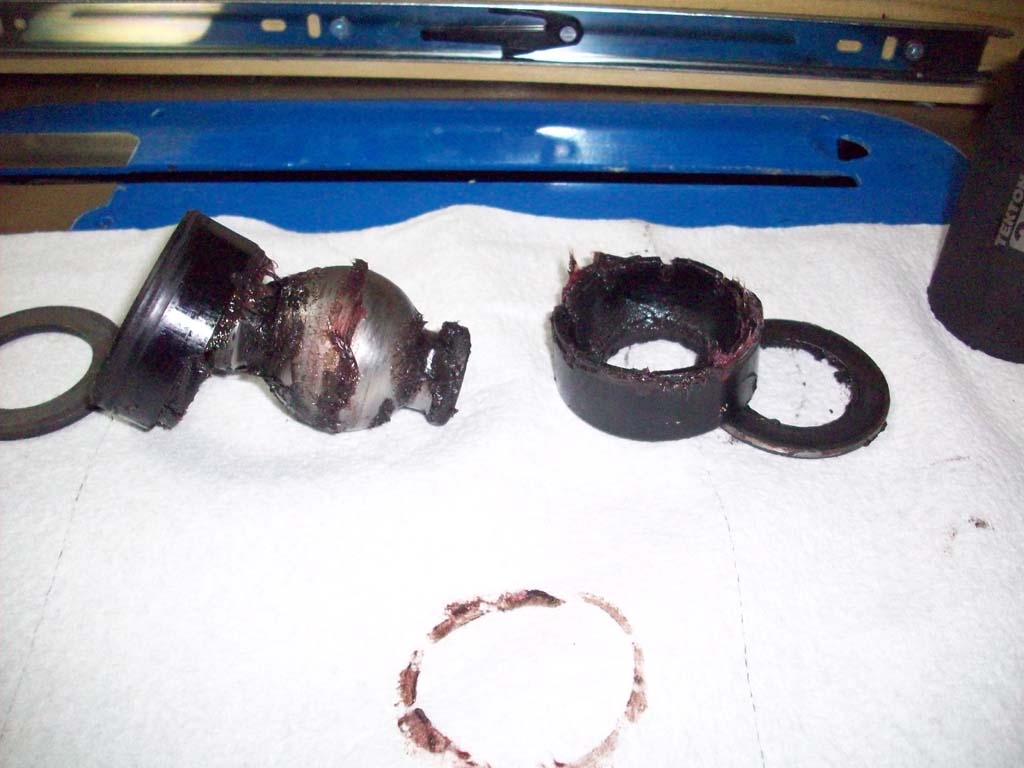
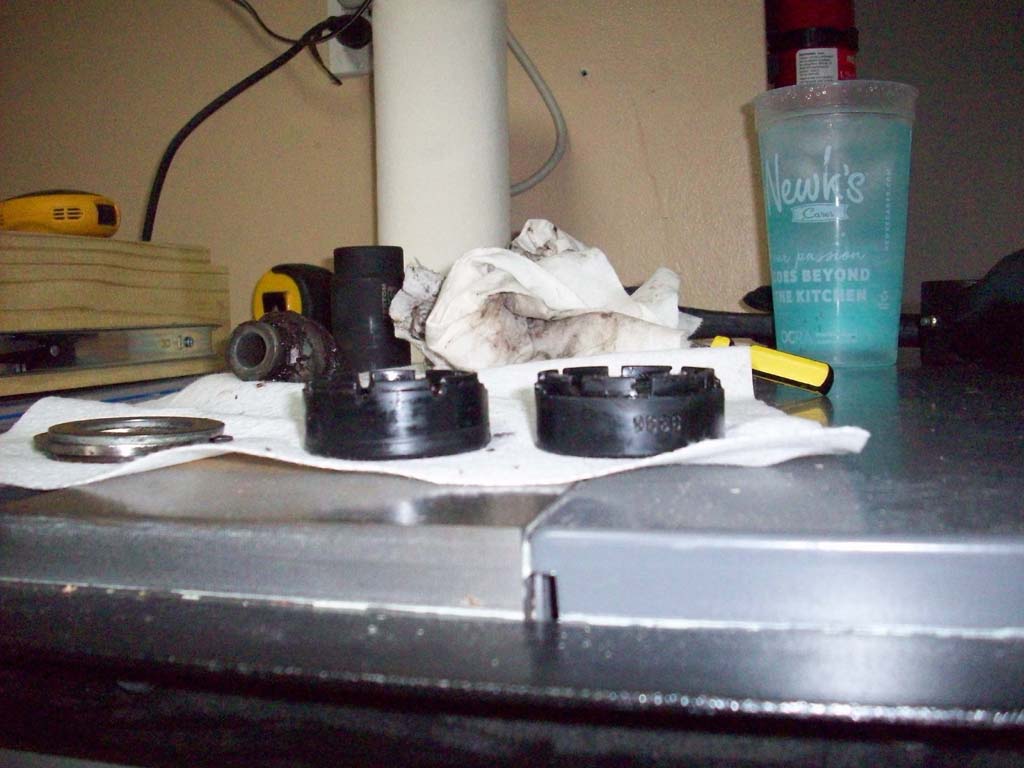
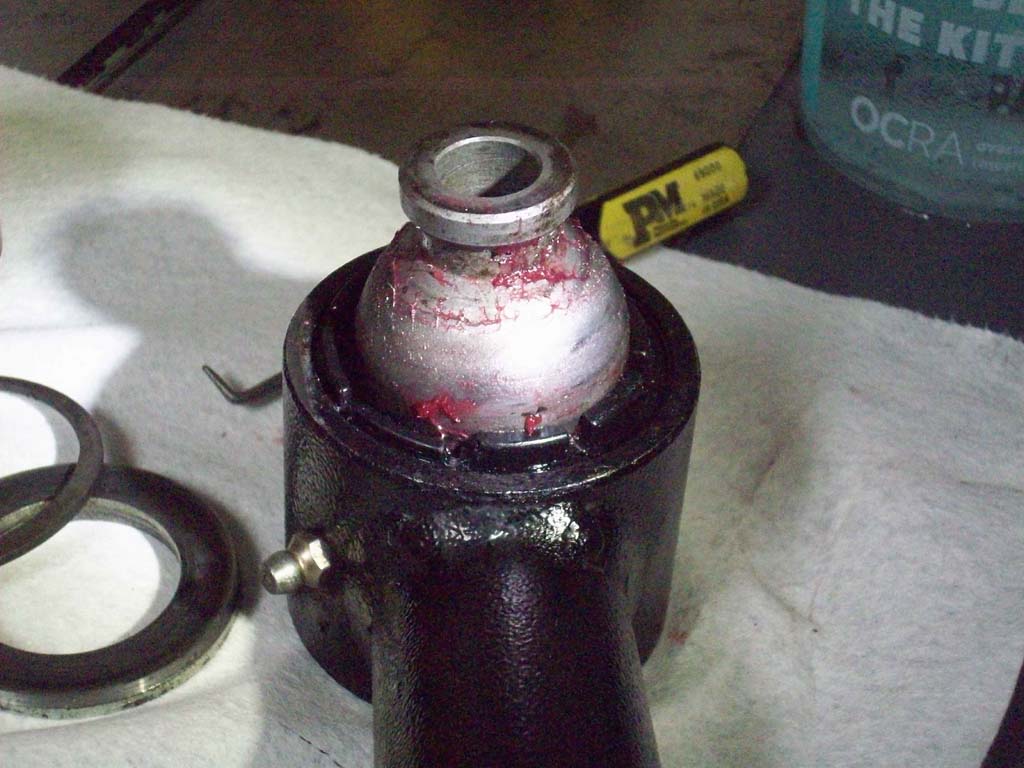
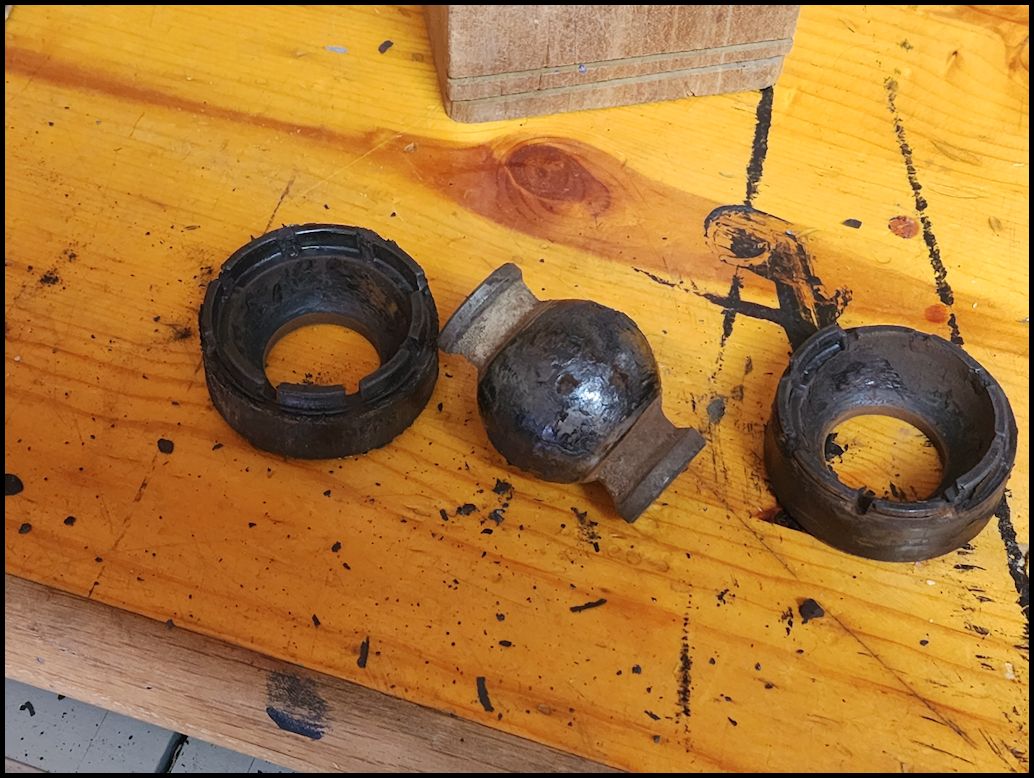
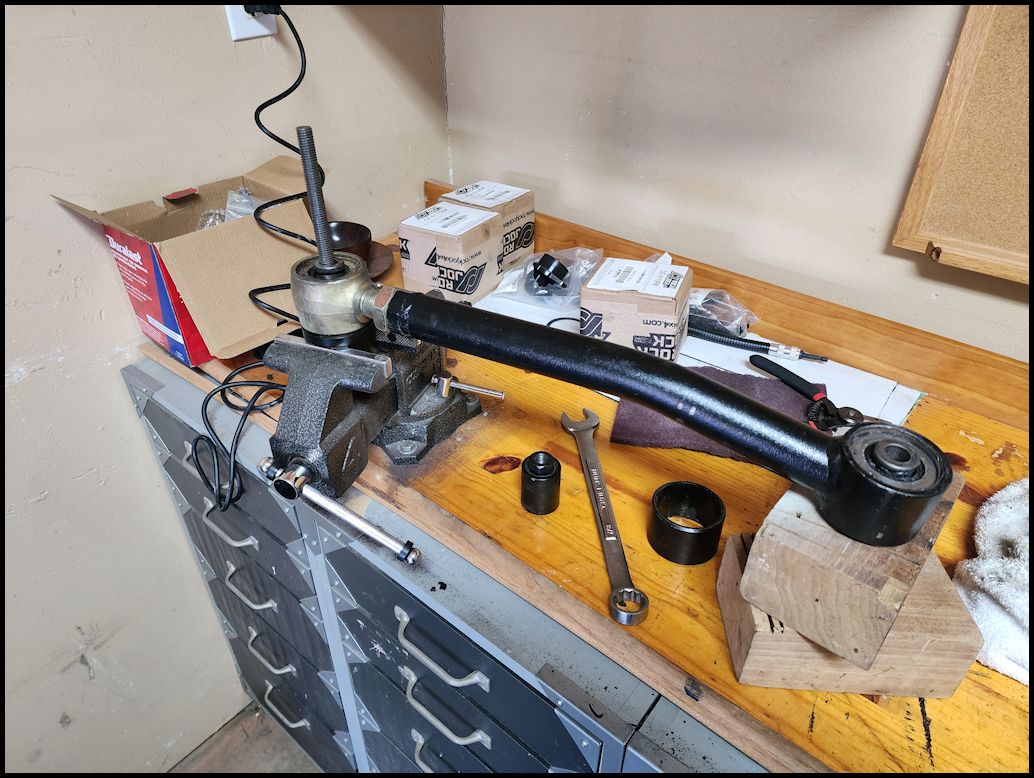
| 7. Clean up the old bushings and ball joint. Take a good look for any noticeable cracks or bad damage to it. The joint may have some light rusting or galling. Make sure you file down any points. My joint was in really good condition for being 12 years old. |
 |
 |
 |
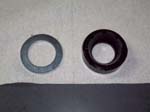
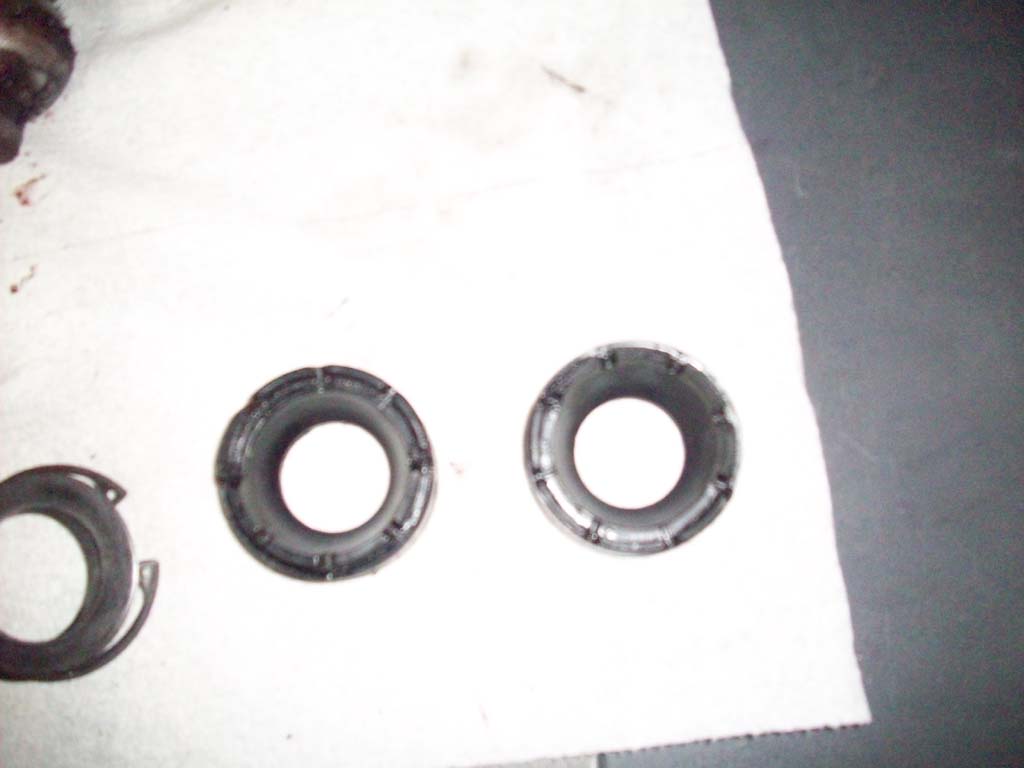
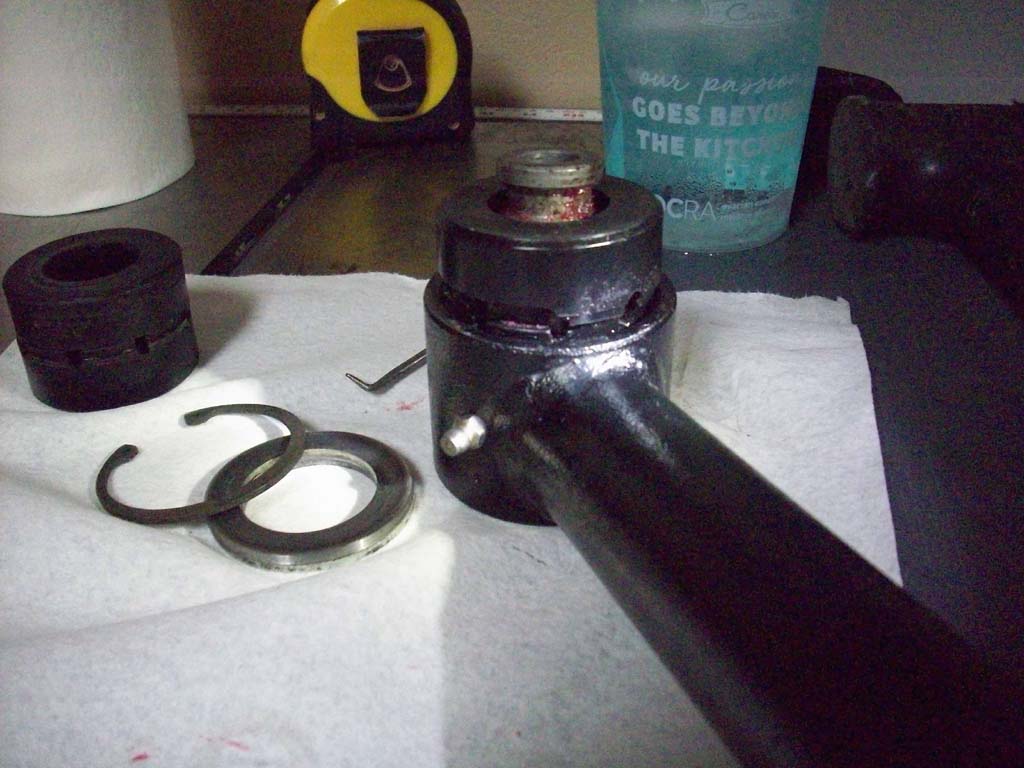
| Comparison after cleaning it all up. New is on the top. I probably could have reused the old bushings since I couldn't see any damage at all, just a snap ring that popped out of it's groove. I did keep the old set as an emergency spare. |
 |
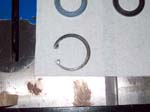
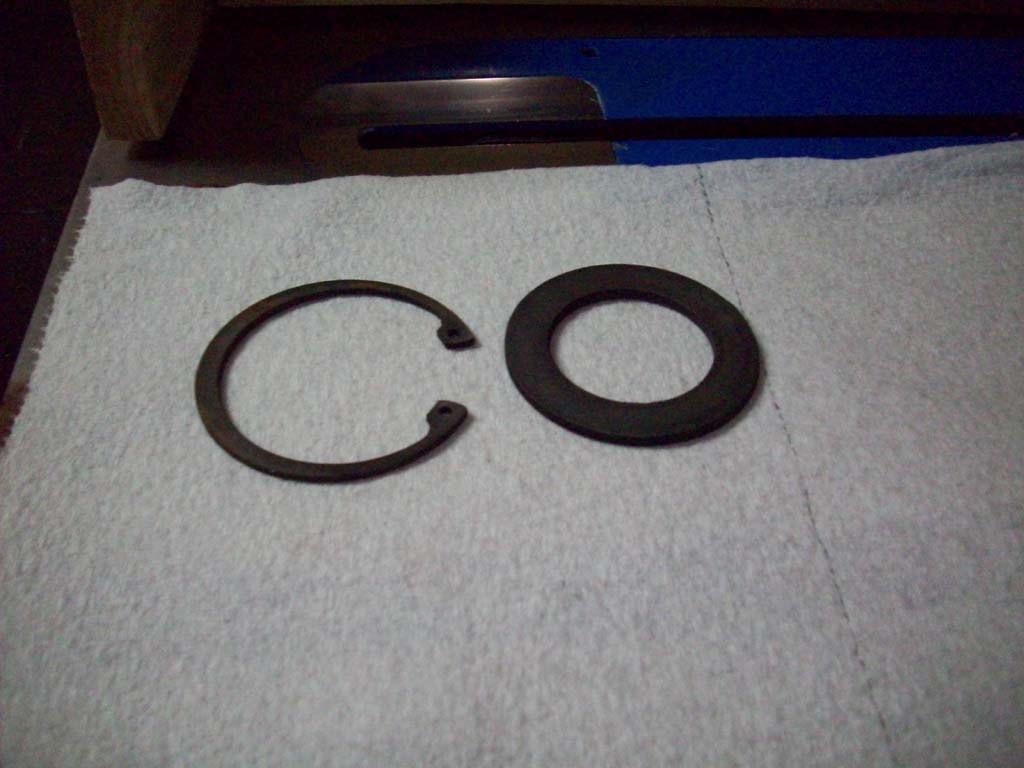
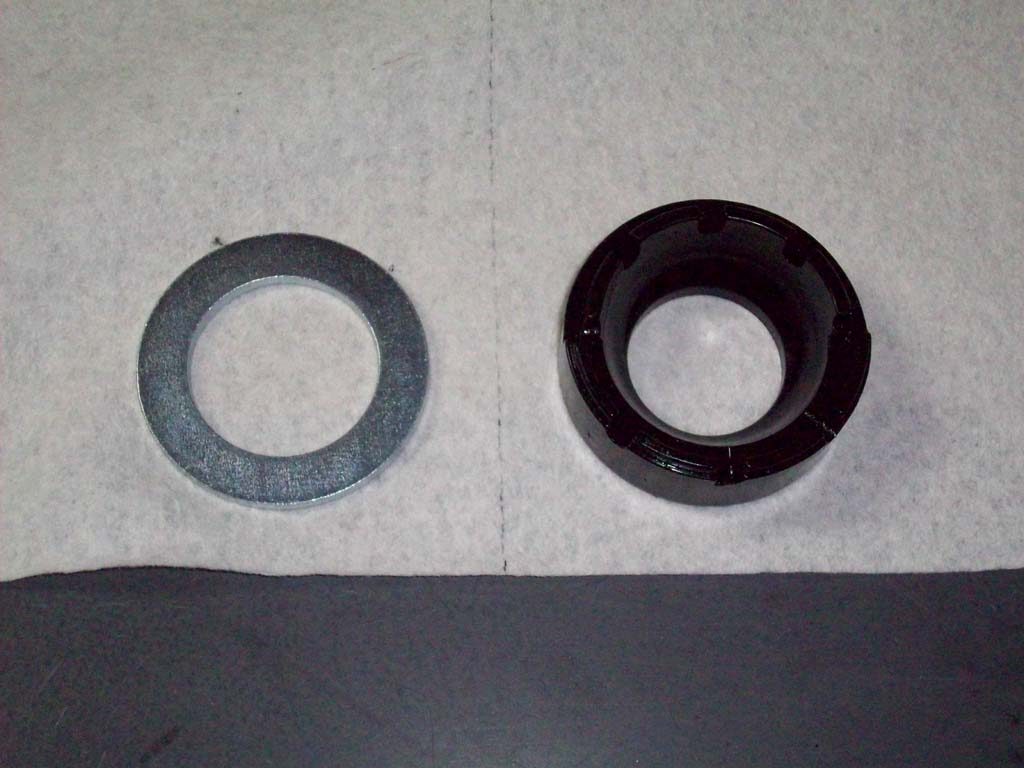
| NOTE: The snap ring and washer have a sharp edge and smooth edge from being pressed out during manufacturing. When installling either of these you need to make sure that the sharp edge goes towards the outside. |
| 8. Drop a washer into the inside of the housing and make sure it sits flat against the lip of the housing. |
 |
 |
 |
| Note: The bushings nest inside of each other. They have both inner and outer flanges and lock together when they are in the right orientation. |
 |
 |
 |
| Note: The bushings have grease slots in them, and it is possible to cover up the grease fitting in the housing so that you won't be able to grease the bushing. While Currie doesn't seem to show that this is important I did find that aligning them allows better grease into the bushing. |
 |
 |
 |
| 9. Slide half of the bushing down into the housing. You may need to use the ball joint to push it down until it seats against the washer and snap ring. I used a deadblow hammer to tap the joint down and into place. Double check to ensure that the grease slot lines up with the hole in the housing. |
 |
 |
| Alternatively, you can assemble the entire joint. Carefully align it with the grease fitting on the outside of the housing and push it all the way in. I used a 32mm socket and dead blow to tap it into place. |
 |
| 10. Line up the other half of the bushing and tap into place. I used a 32mm socket and dead blow to tap it into place. |
 |
 |
| 11. Set the other washer into place on top of the bushing. |
 |
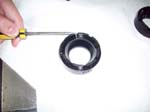
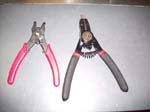
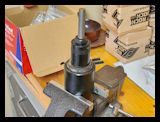
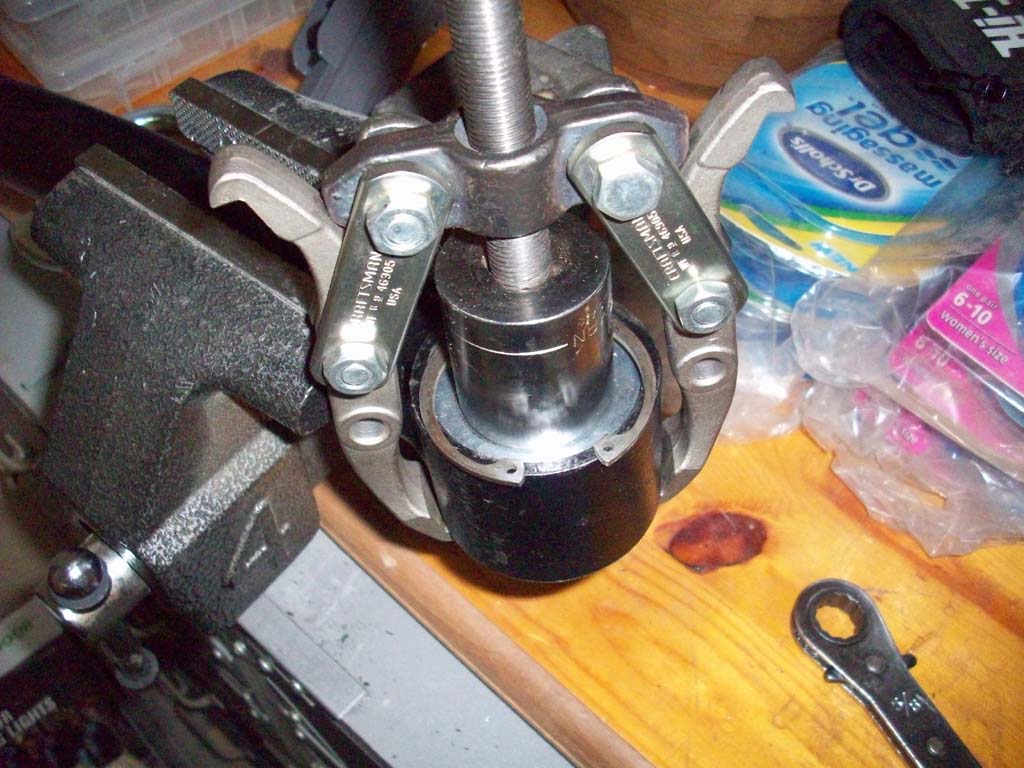
| 12. This is where having the Currie Johnny Joint tool really comes in handy. You will need to press the Joint down into the housing enough to install the snap ring into the groove. I used a gear puller and 1 3/16" socket to press the bushing down and then install the snap ring with the snap ring pliers. The small pliers in the picture were not strong enough to close up the snap ring and install it, so I grabbed my larger pair and it went right in. |
 |
 |
 |
| It's all about having the right about of leverage to close up the larger snap ring to get it to fit into the slot. |
 |
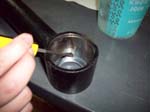
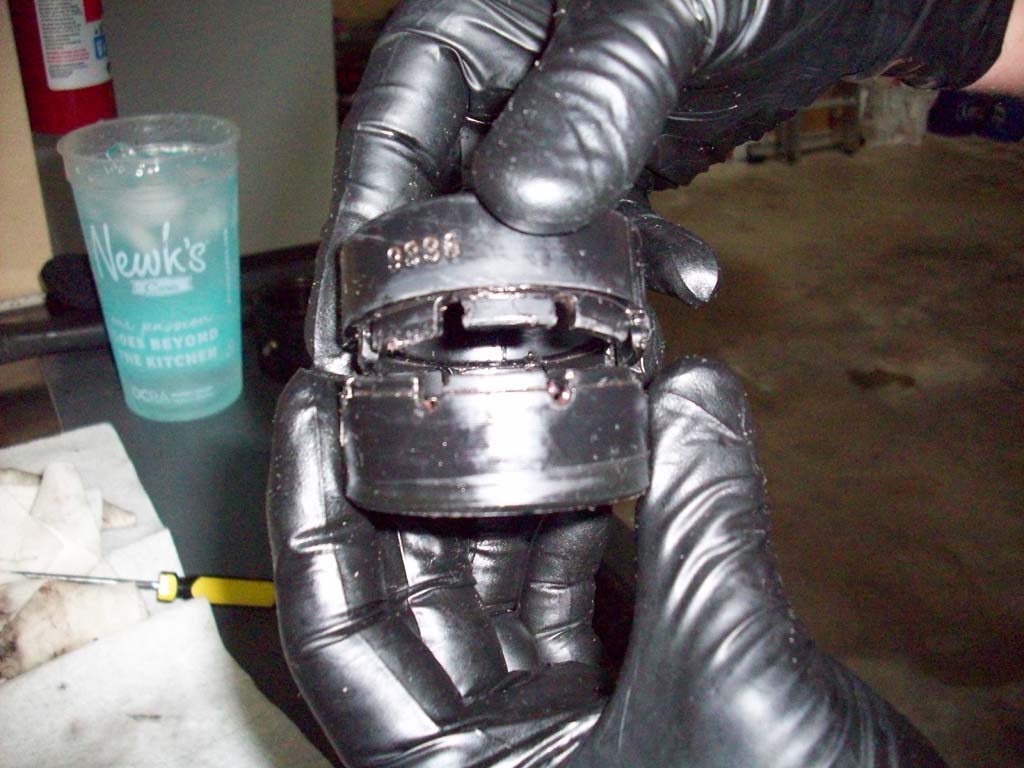
| 13. I placed the joint into the vise, gave it another pump of grease and moved it around to check freedom of motion and spread a little grease around. |
 |
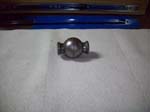
| Assembled Joint |
 |
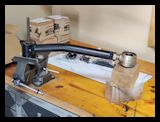
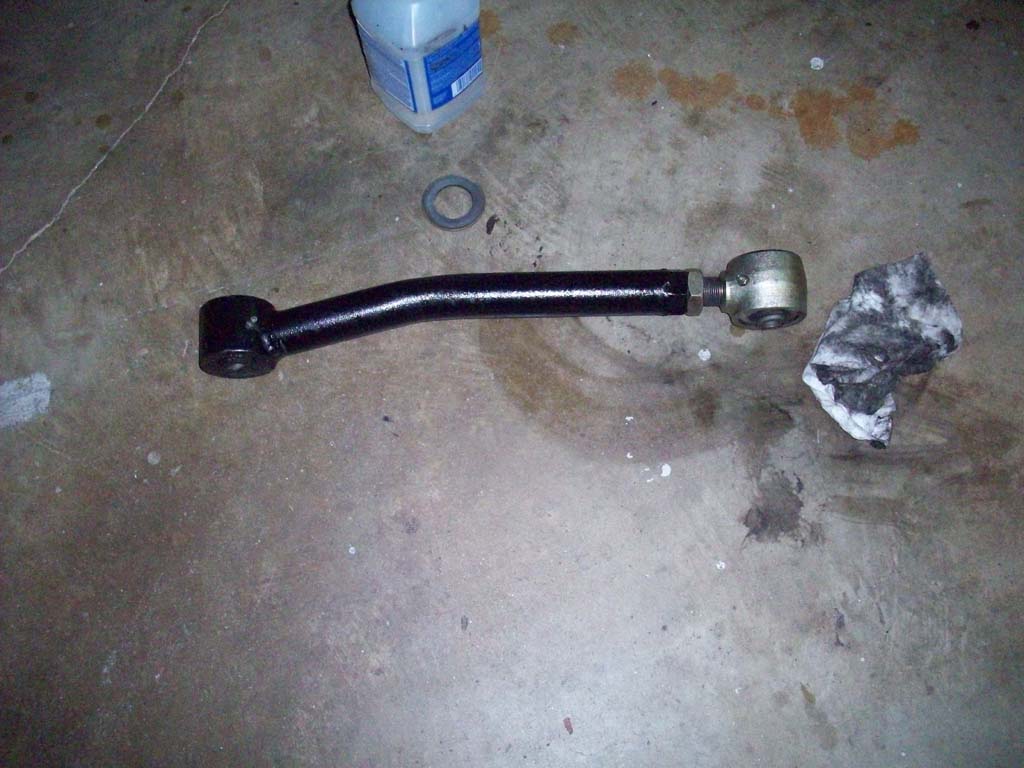
| 14. Reinstall the control arm into the Jeep. Reinstall the tires and remove the jack stands and blocks. |
| |
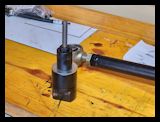
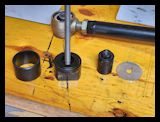
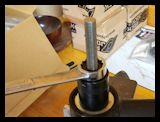
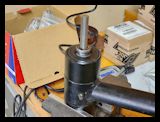
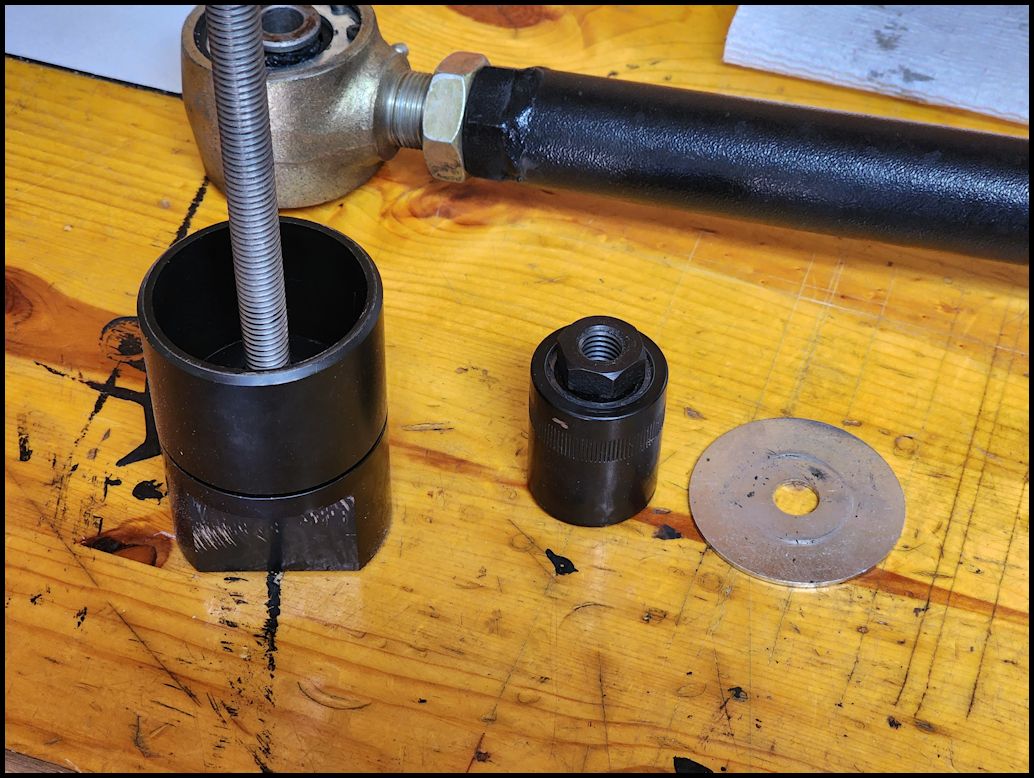
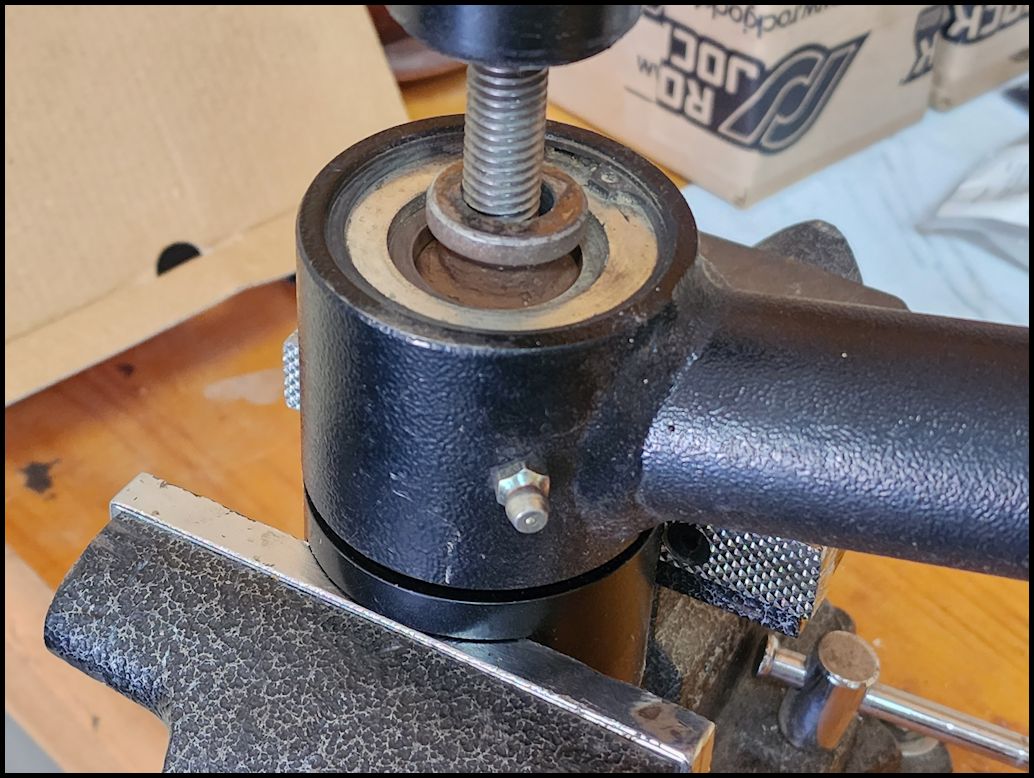
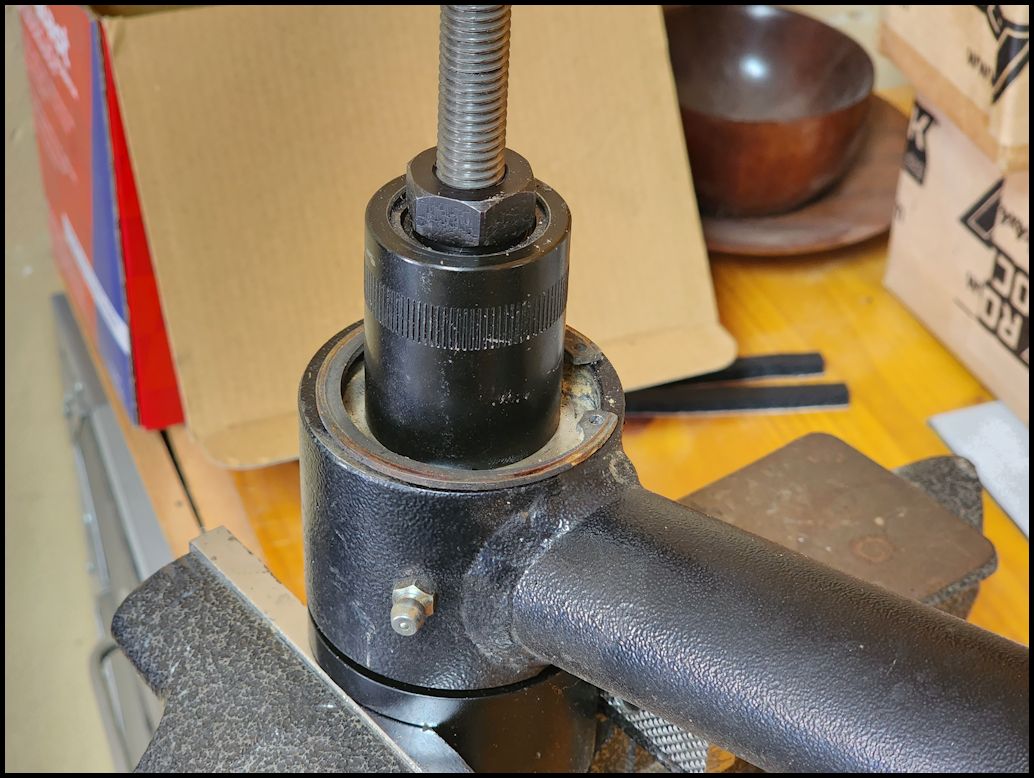
| Using the Rock Jock Tool: |
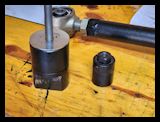
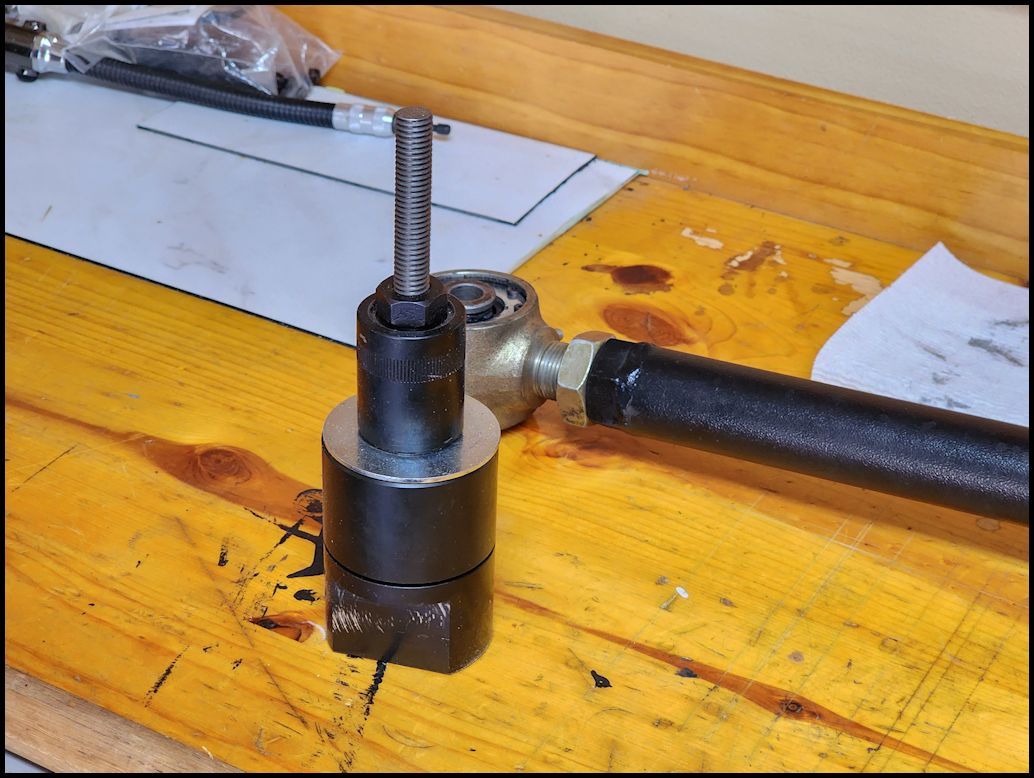
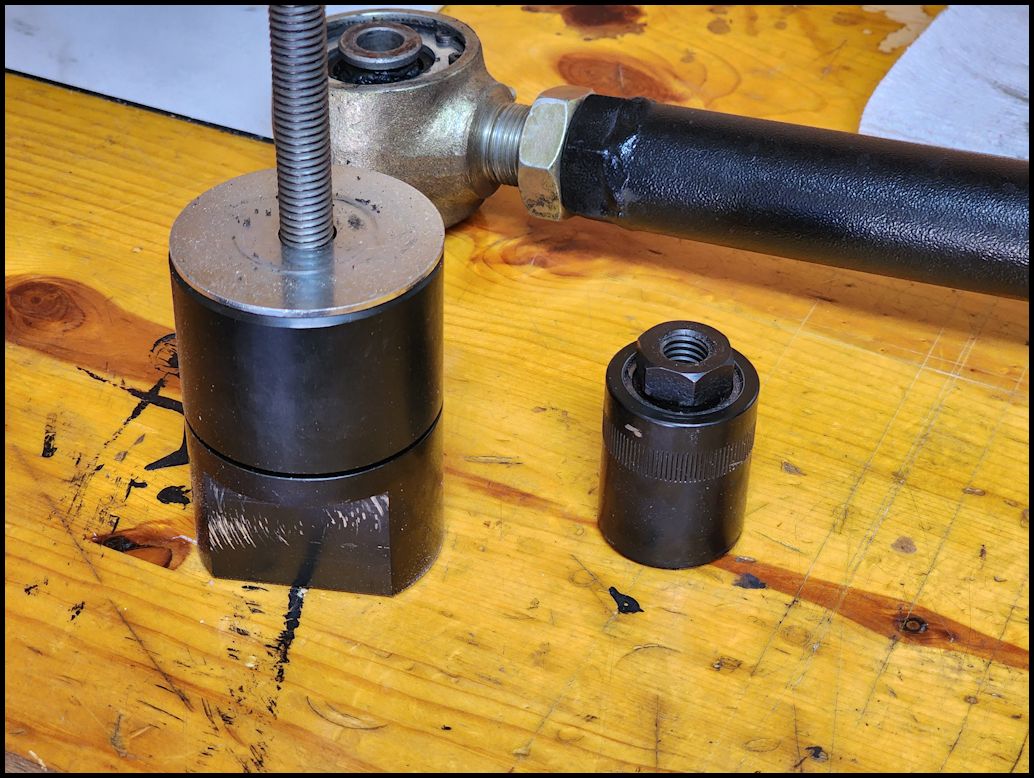
| 1. You will need to disassemble the tool before you can use it to disassemble the Johnny Joint. Remove the press nut from the threaded shaft and then remove the washer holding the sleeve onto the base of the tool. The washer isn't used for anything other than holding the sleeve in place on the base. Remove the sleeve. |
 |
 |
 |
 |
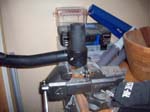
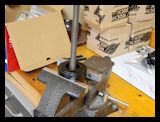
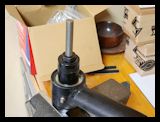
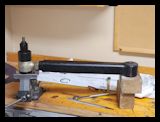
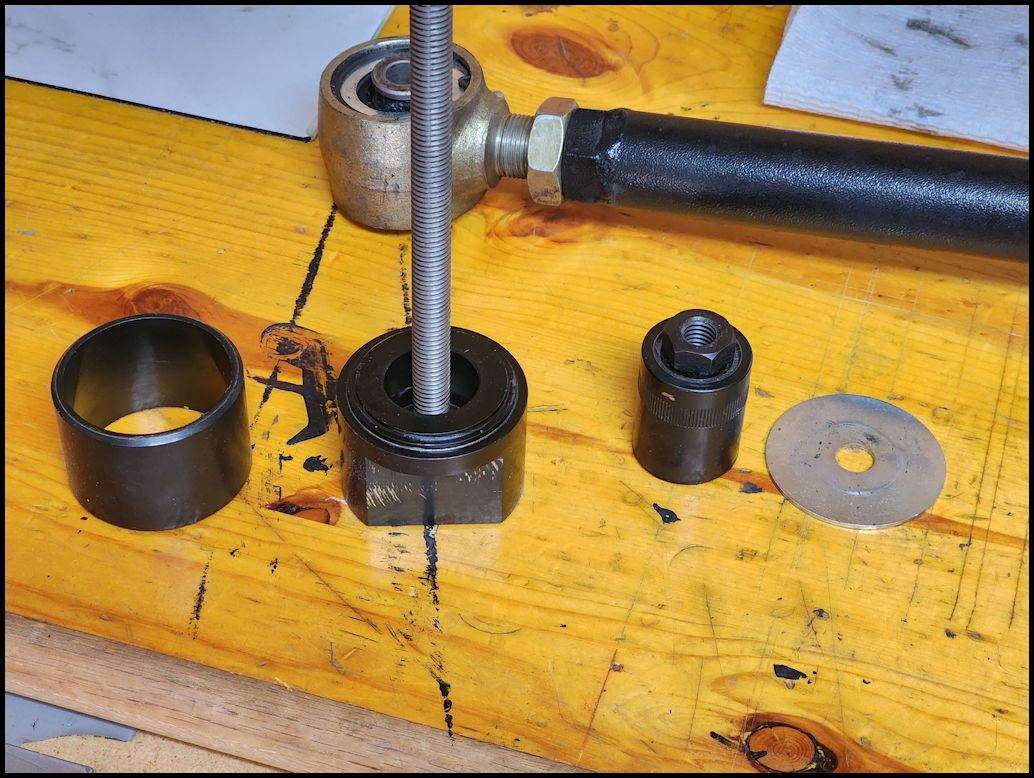
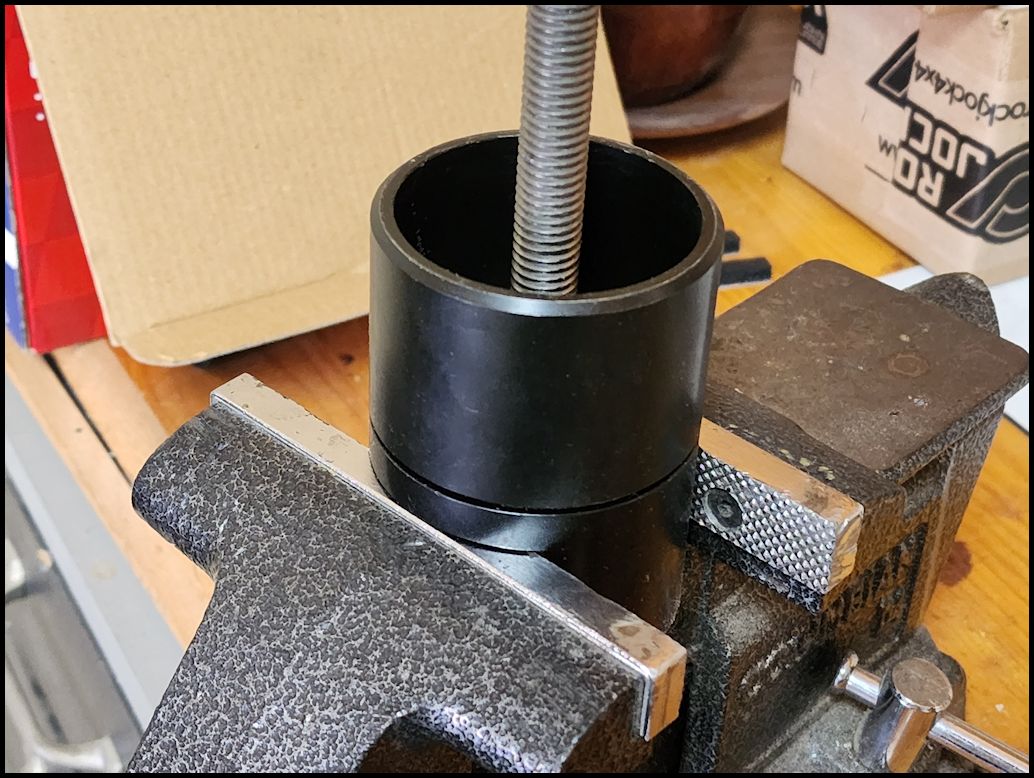
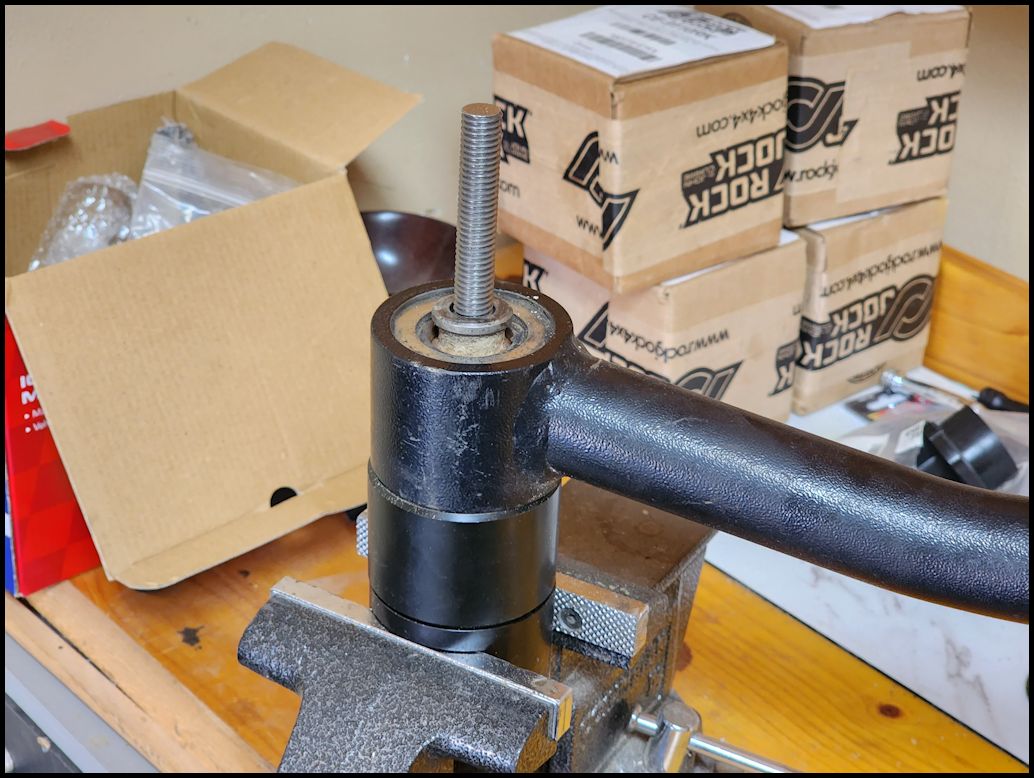
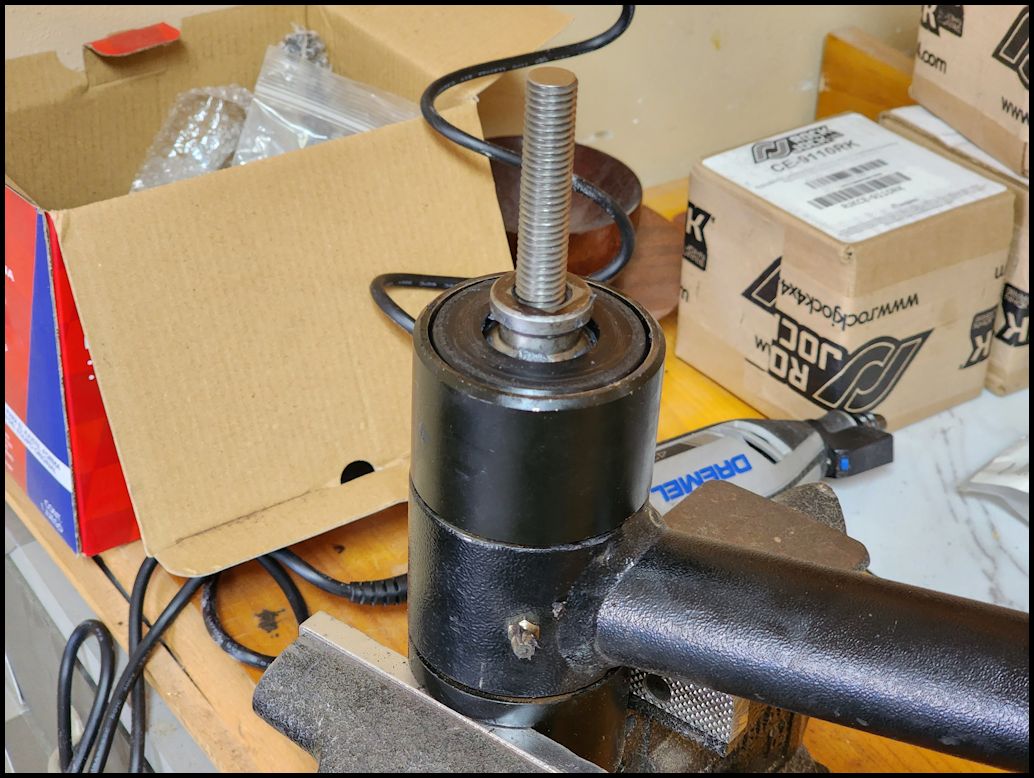
| 2. Install the base of the tool in a sturdy bench vise. |
 |
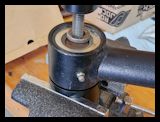
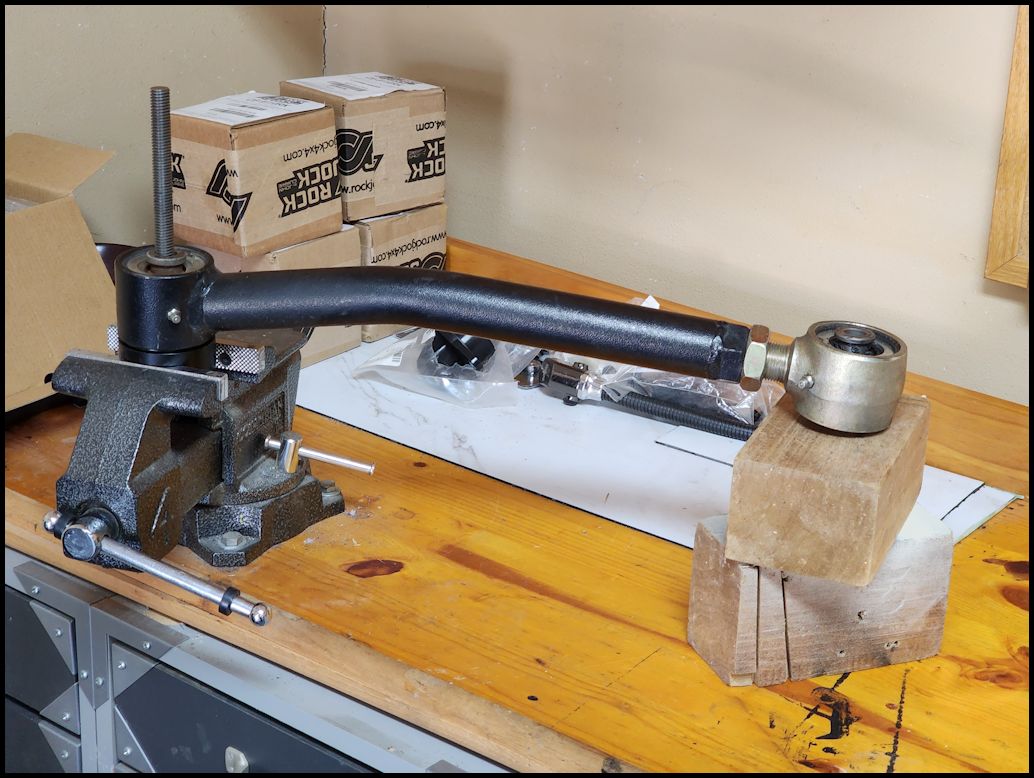
| 3. Slide the Johnny Joint that you need to disassemble over the threaded rod of the tool. Make sure that the snap ring side is facing up. The outer edge of the Johnny Joint will go over the machined shoulder of the base. You should support the other side of the control arm to keep the arm level. This isn't necessary, but it makes taking the joint apart easier. |
 |
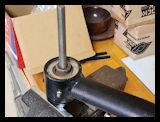
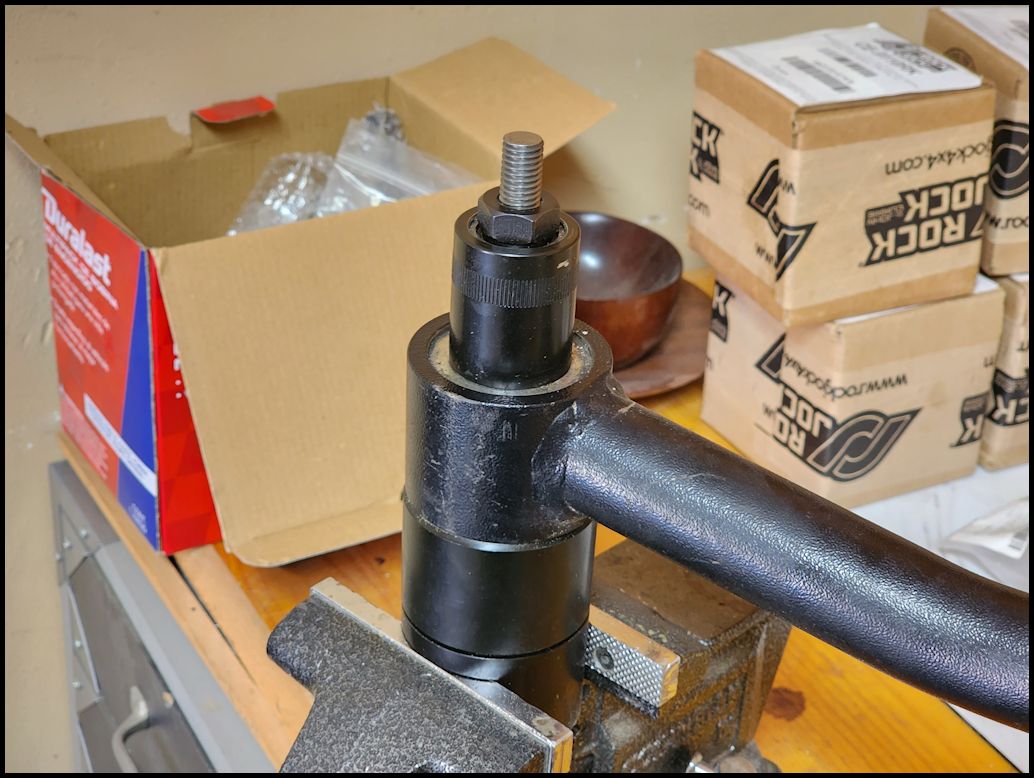
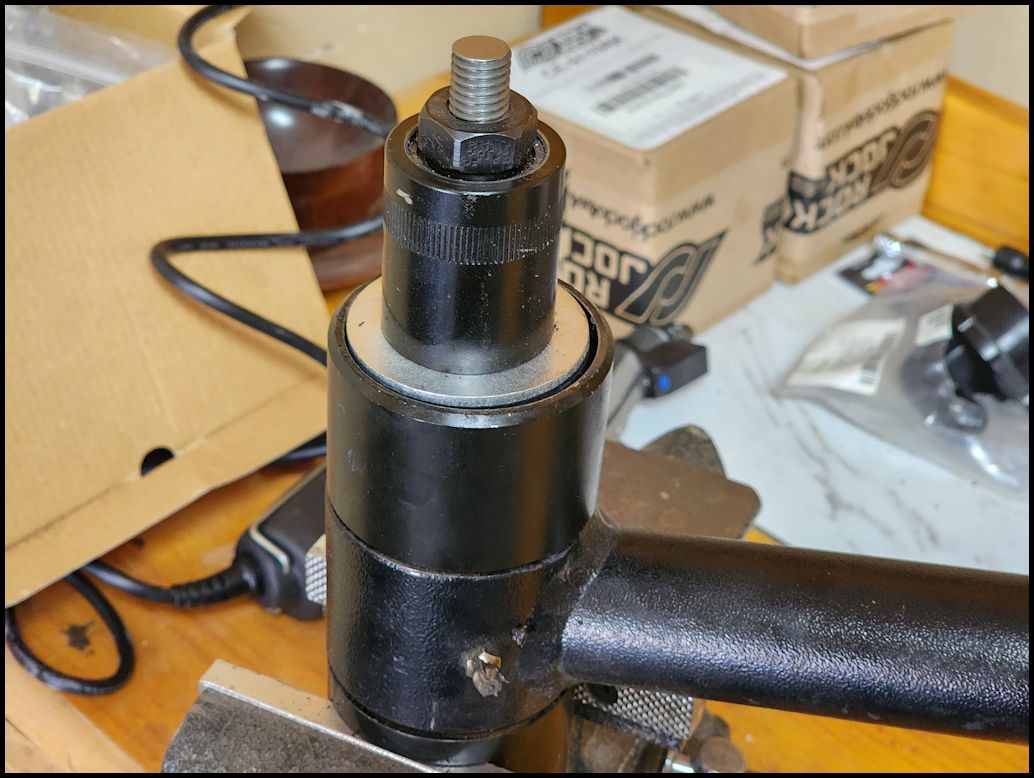
| 4. Spin the press nut on by hand until it contacts the washer in the Johnny Joint. The press nut has a machined shoulder that will engage the washer. You may need to wiggle the joint a little to get it to go in. |
 |
 |
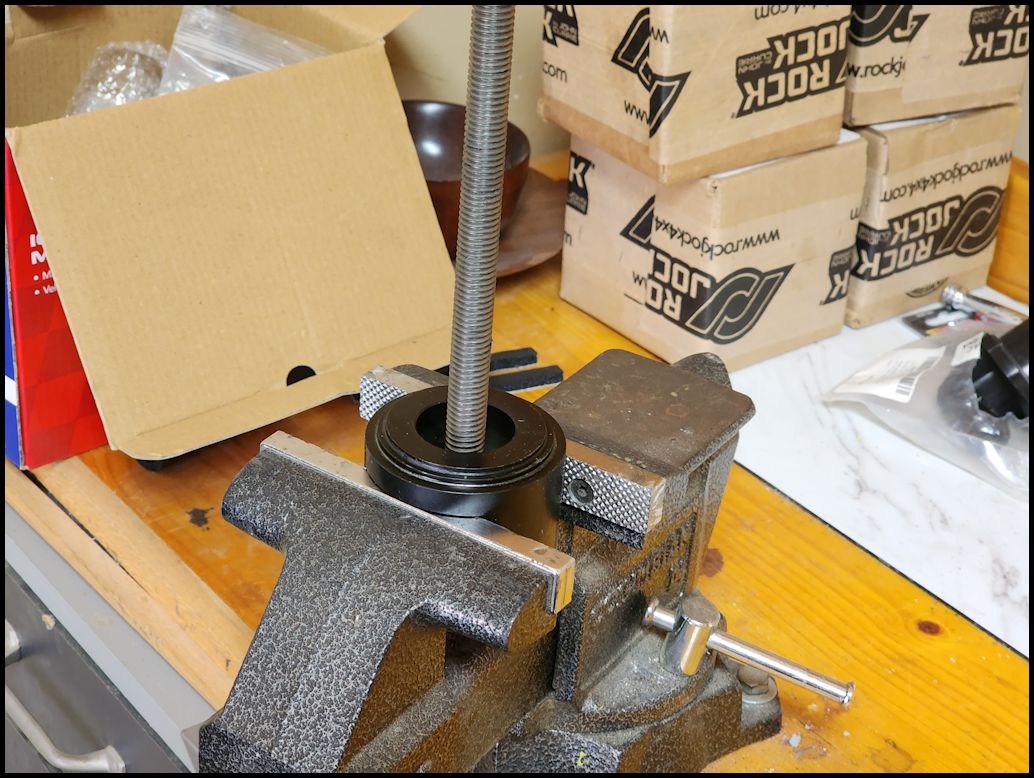
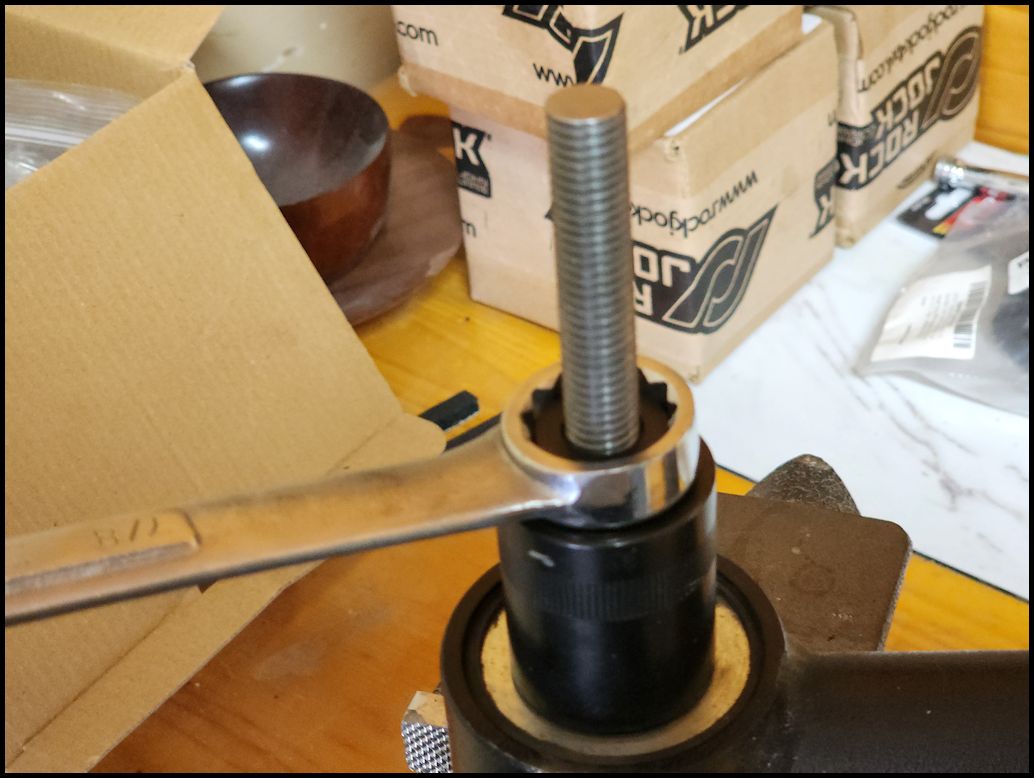
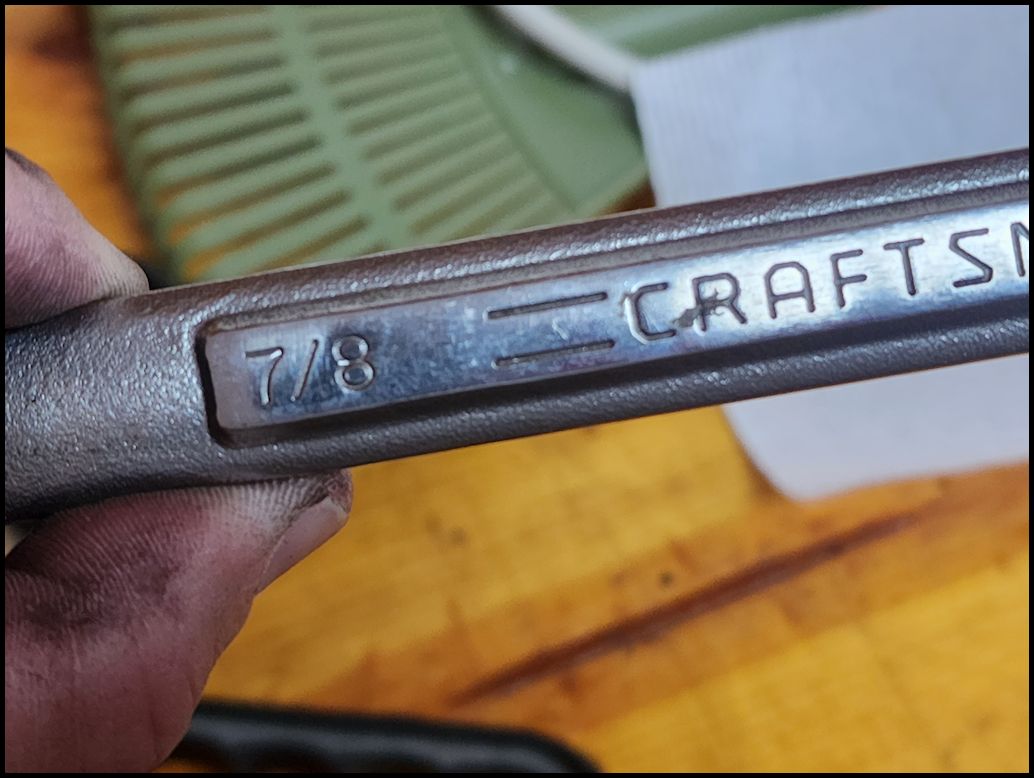
| 5. Tighten the press nut just enough to release tension on the snap ring. You will need a 7/8" combo wrench. |
 |
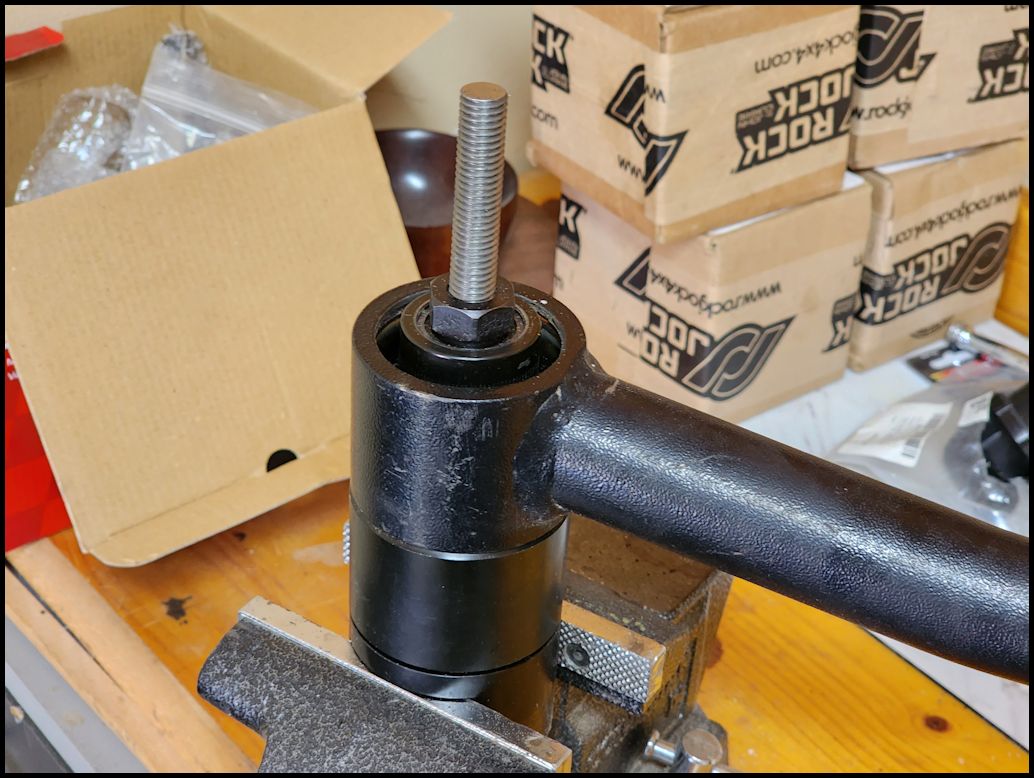
| 6. Remove the snap ring with a good set of snap ring pliers. The snap ring will have a lot of tension when it comes out, but if it comes out of the tips of the snap ring pliers it won't really go anywhere because of the press nut. |
 |
 |
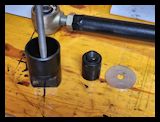
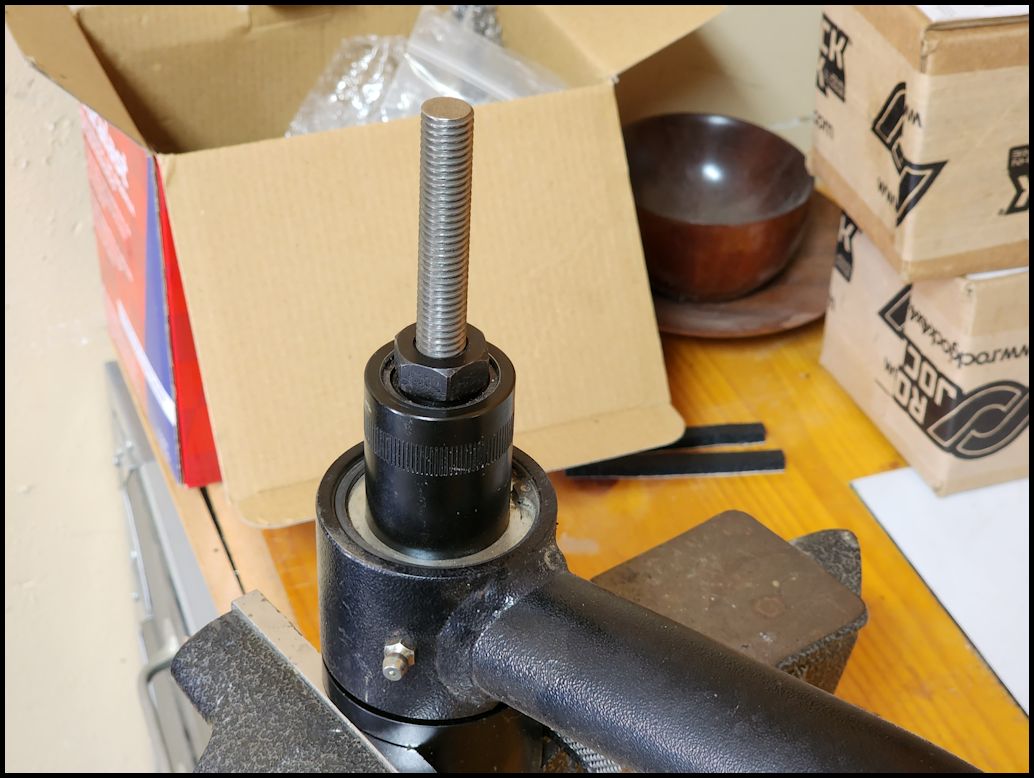
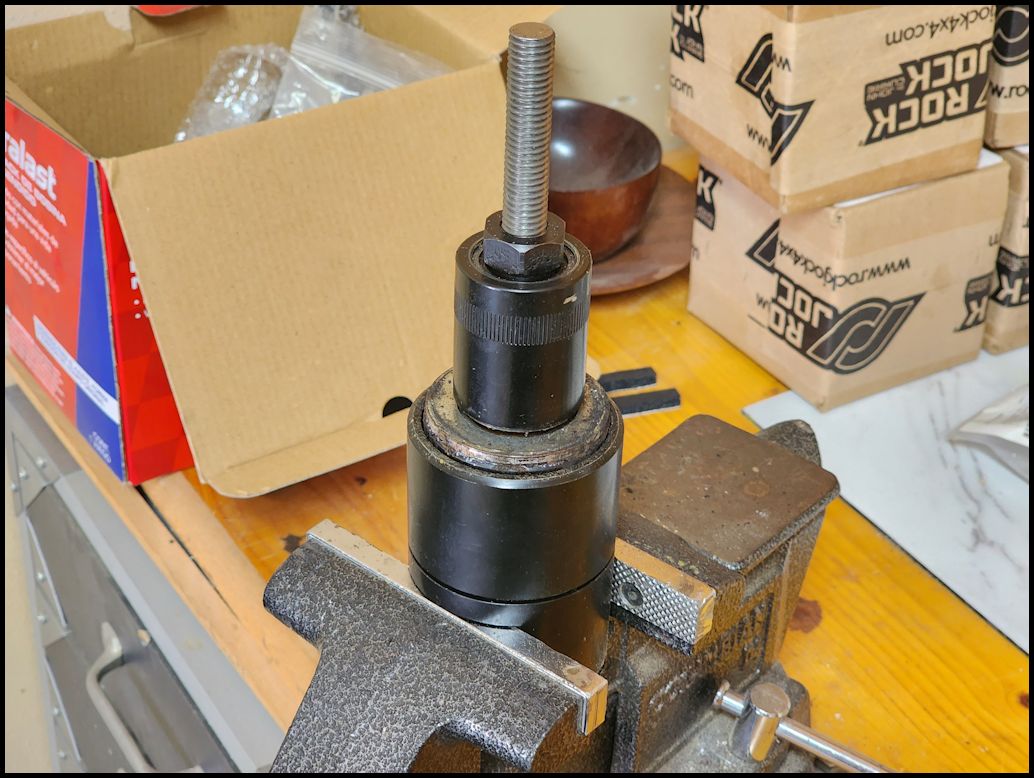
| 7. Remove the press nut from the threaded rod |
 |
| 8. Remove the Johnny Joint from the threaded rod of the tool. |
|
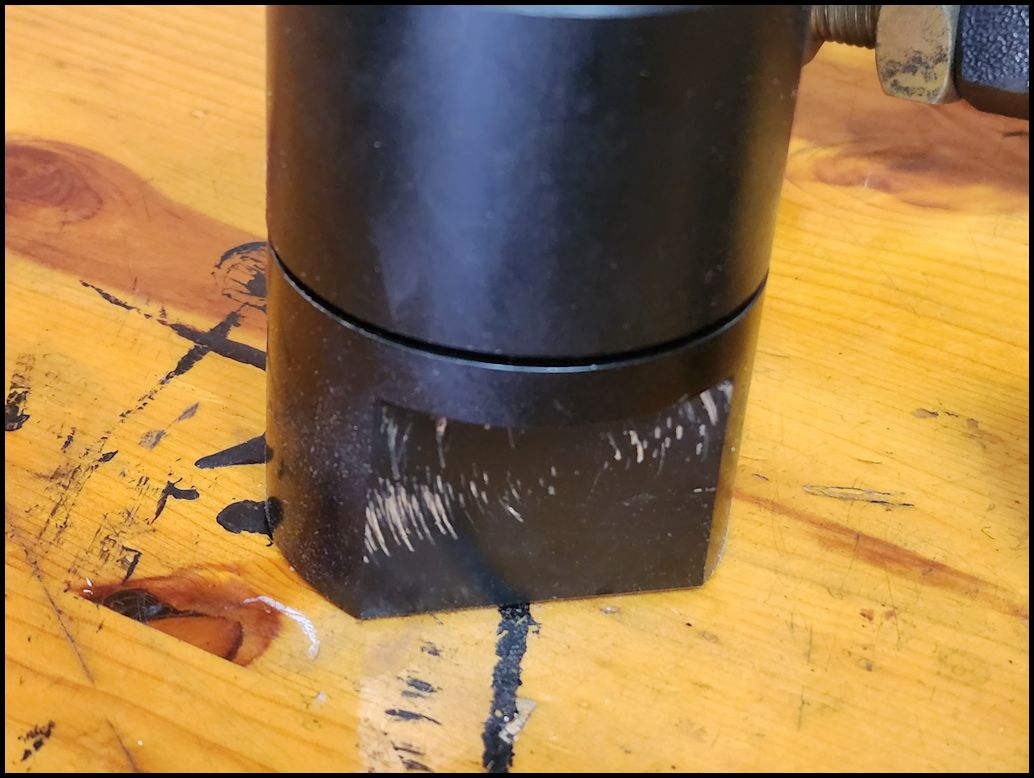
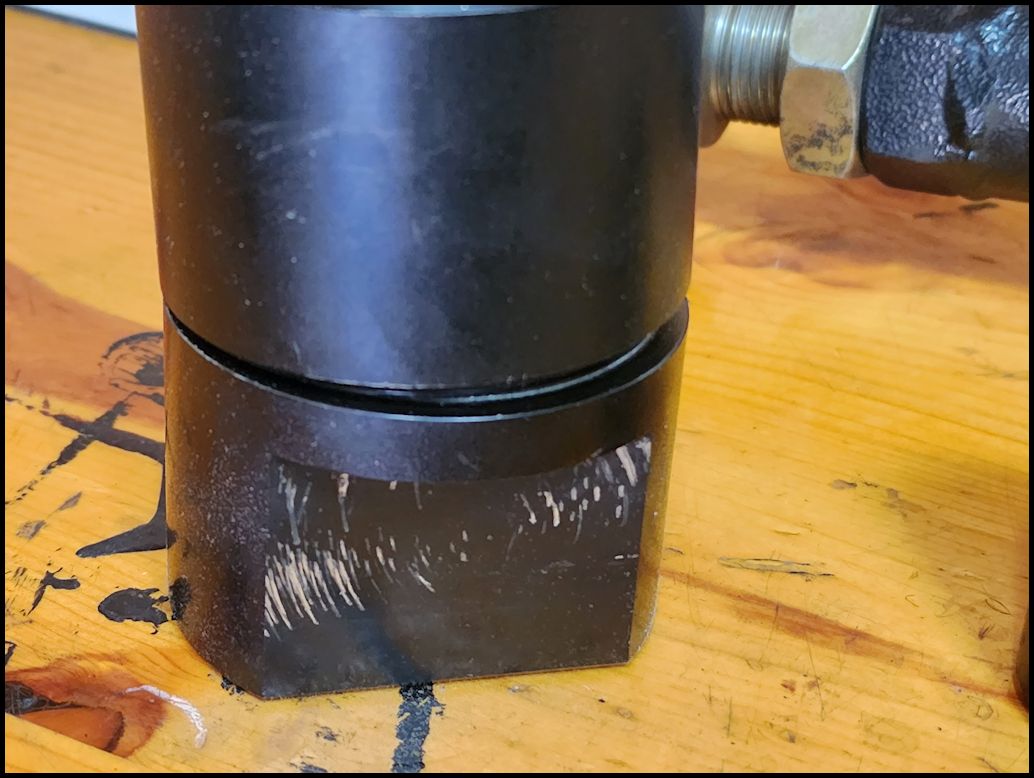
| 9. Install the sleeve over the threaded rod and onto the base. The base has two machined surfaces on it. The sleeve is tapered, with a large side and a small side. The small side goes down. This is basically opposite of the way the tool arrived assembled. Easy to tell which side is which. The large side will fit all the way down and the small side won't. |
 |
 |
 |
| 10. Flip the joint over and install the Johnny Joint over the threaded rod onto the top of the sleeve. The joint will have the snap ring side down. |
 |
| 11. Spin the press nut on by hand until it contacts the washer in the Johnny Joint. The press nut has a machined shoulder that will engage the washer. You may need to wiggle the joint a little to get it to go in. |
 |
| 12. Tighten the press nut and slowly drive the internals of the joint out of the housing and into the sleeve. You will need a 7/8" combo wrench. |
 |
| 13. Pull the arm off of the sleeve and set it aside. |
 |
| 14. Remove the press nut from the threaded rod, remove the sleeve and the internals of the Johnny Joint. |
 |
| 15. Clean the joint. (Step 6 and 7 above). |
 |
| 16. Grease the inside of the Johnny Joint housing and install it over the threaded rod and onto the base. Make sure that the snap ring groove is on top. Support the other end of the arm to keep the housing flat on top of the base. |
|
| 17. Place a washer into the housing. Make sure the sharp side is down and that it sits all the way flush with the machined lip at the bottom of the housing. |
|
| 18. Grease the center ball and preassemble the bushing over it. Make sure the bushing halves interlock. |
|
| 19. Put the sleeve over the threaded rod and on top of the housing. Small side down. I did find it easier to fit the internals into the sleeve. You will be able to tell which side is the small side. Then slide everything over the threaded rod. |
 |
| 20. Place a washer over the top of the bushing. Sharp side up (away from the bushing). Spin the press nut on by hand until it contacts the washer in the Johnny Joint. The press nut has a machined shoulder that will engage the washer. You may need to adjust the washer a little to get it to go in. |
 |
| 21. Tighten the press nut with a 7/8" combo wrench to press the bushing assembly down into the housing of the Johnny Joint. The rubber bushing will want to deflect as you force it into the housing, so keep an eye on the sleeve and see if it starts to raise on one side. You may need to back the press nut off and realign the bushings and sleeve. It can be a little intimidating the first time, but the bushings are fairly forgiving if you get them wedged. I have actually had to flip the joint over and press the bushing back out because I got it jammed and didn't want to damage it. |
 |
| 22. Remove the sleeve and tighten the press nut to compress the bushing just enough to expose the snap ring groove. The snap ring goes in sharp side out. Install the snap ring into the groove with the snap ring pliers. I have used a flat tip screwdriver to tap it down into the groove. |
 |
| 23. Remove the press nut from the threaded rod and remove the rebuilt joint from the threaded rod. If your doing more joints you can just repeat the steps on the rest of the joints. I like to take a little extra time and remove the Johnny Joint tool from the vice and clamp the Johnny Joint into the vice so I can give it a good greaseing before I move onto the next Joint. This does take a little extra time, but it also ensures that the joint you just rebuilt is greased prior to reinstalling on the Jeep. |


