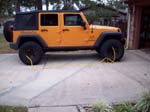
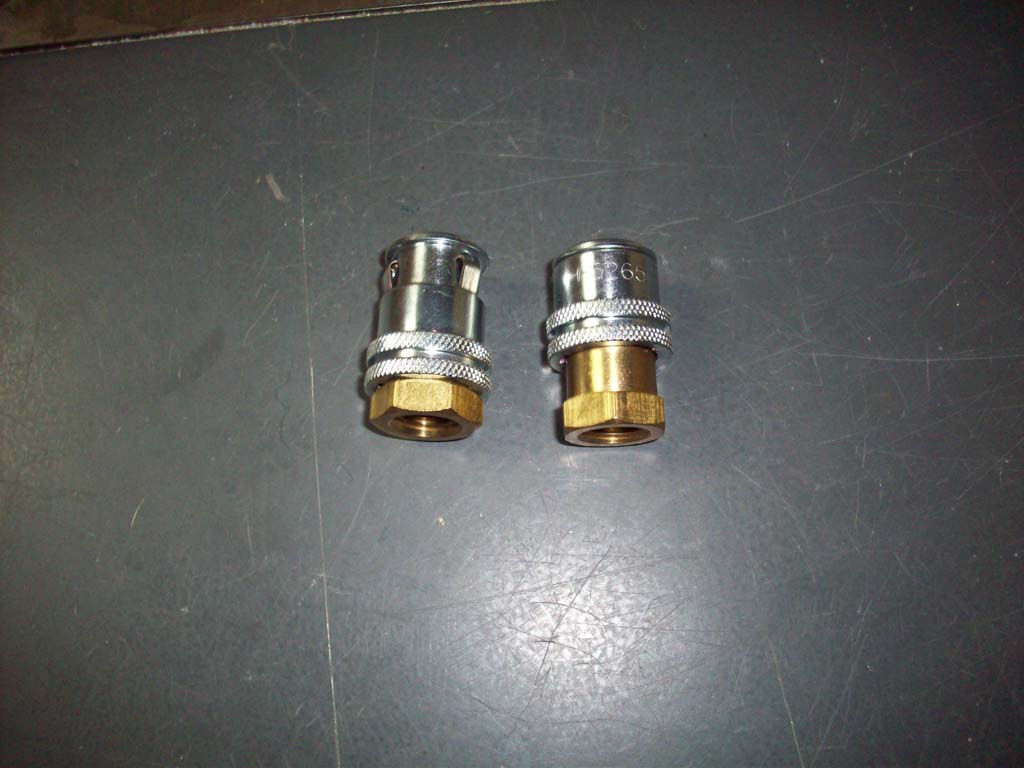
Did I really need to build a system to air up all 4 tires at the same time? Probably not, but I had done a system to do 2 at a time earlier, so why not fill up all 4 at once. My thought pattern was that if the compressor died while I was filling up tires, at least they would all be at the same pressure. In reality he who fills up the fastest still waits for he who fills up the slowest. The nicest thing about this system is being able to air down quickly all at once and all to the same pressure. Now, I have worked with air systems for many years and found that brass stands up to the elements better than most of the regular steel or aluminum parts. You can get some industrial stainless steel fittings, but they are even more expensive. The one items you really want to pay attention to is the quick disconnect coupling. Look for the 6 ball bearing connector vice the 3 ball bearing connector. The 6 provides a better grip on the plug connector. I also use universal quick disconnects to allow for any air hose to be connected to the fitting if I'm not using my own setup. I typically use the industrial plug connectors simply because they fit more of the quick disconnects out there that I might run into if someone wants to borrow a hose line for their system. The links will take you to Amazon so that you can see what I purchased. Sometimes it was cheaper at Amazon, sometimes cheaper at Lowes or Home Depot.
| Parts: |

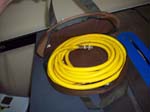
Bucket Boss cable bag |

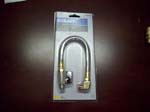
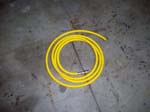
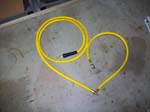
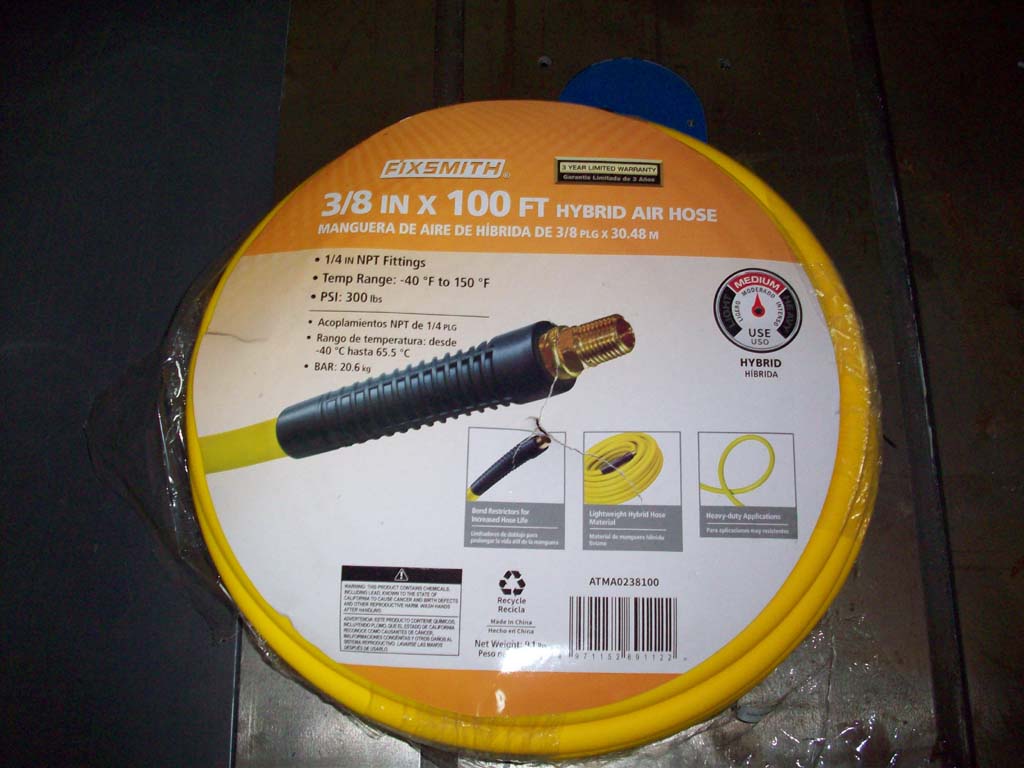
Air Hose |
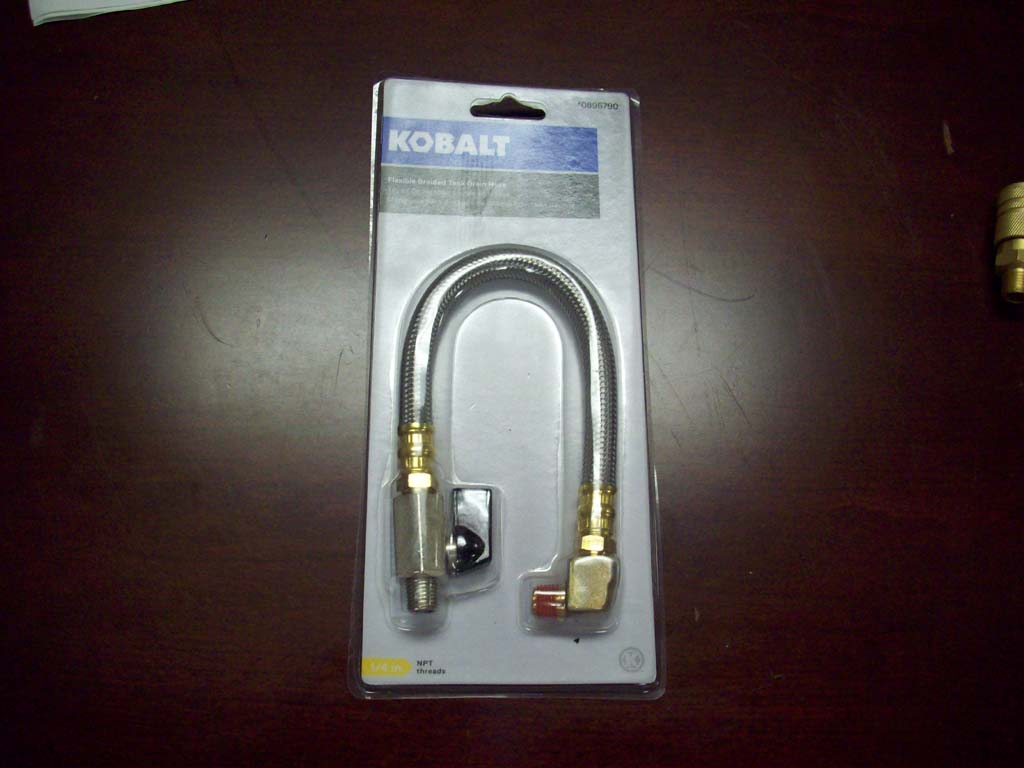
Air Tank drain hose extension |
3-way air manifold |
FPT 1/4" plug connector |
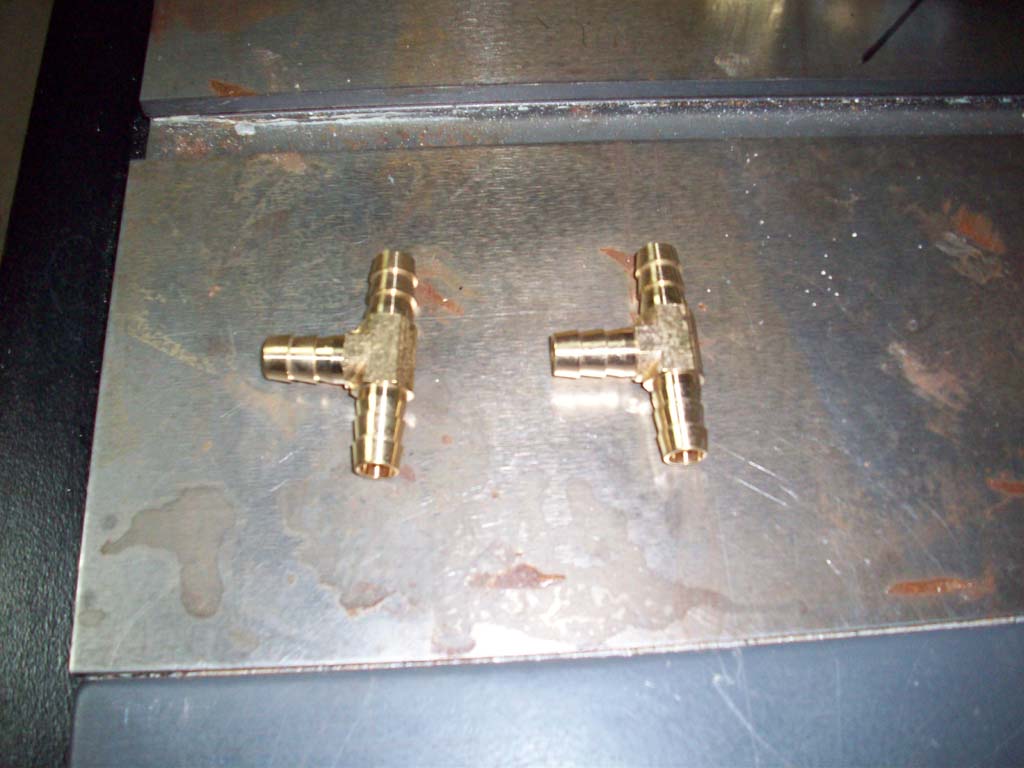
3/8" barbed T connector |
Ferrule and 1/4" MPT 3/8" barbed fitting |
 |
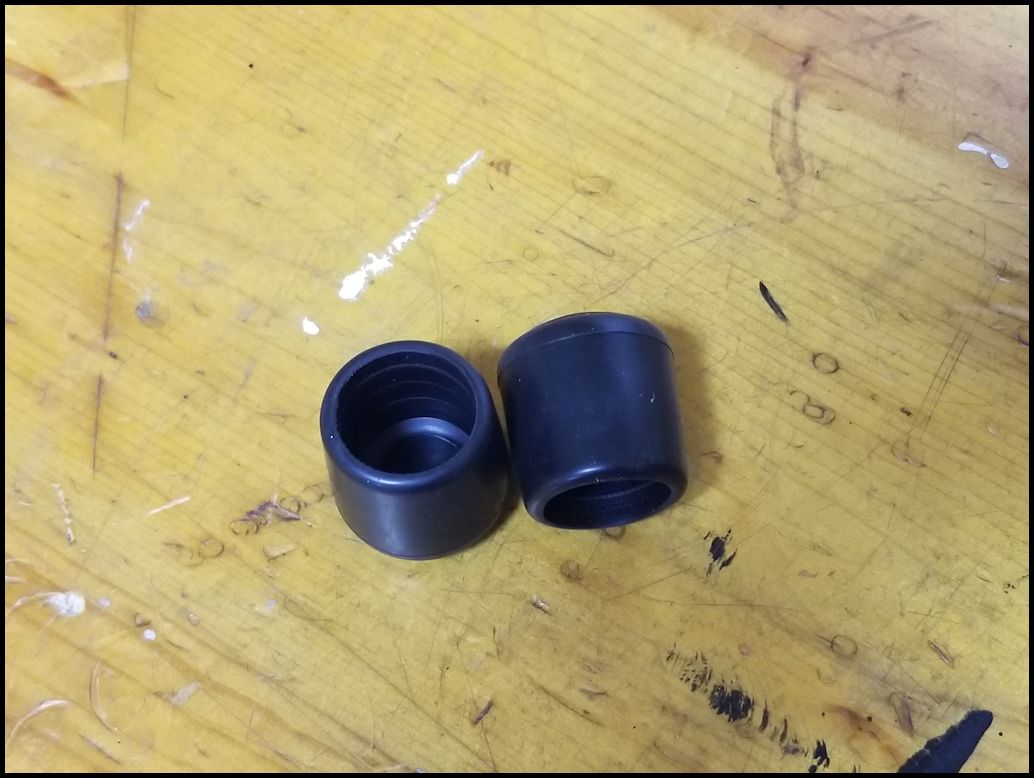
7/8" rubber chair tips |

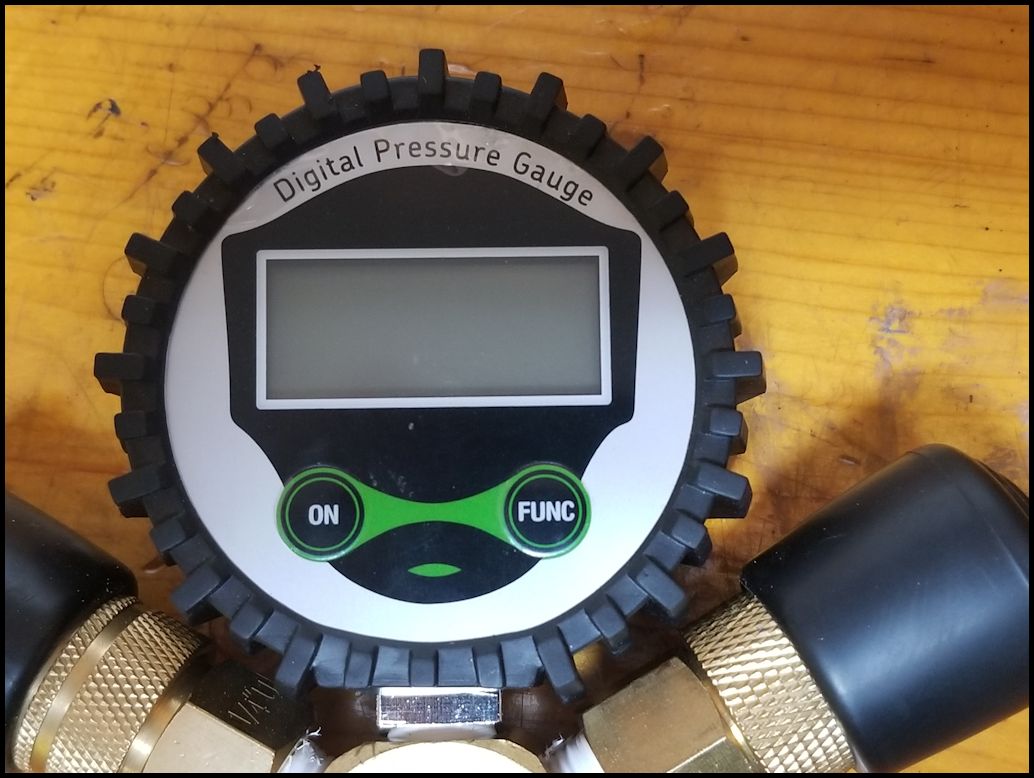
Air Gauge |

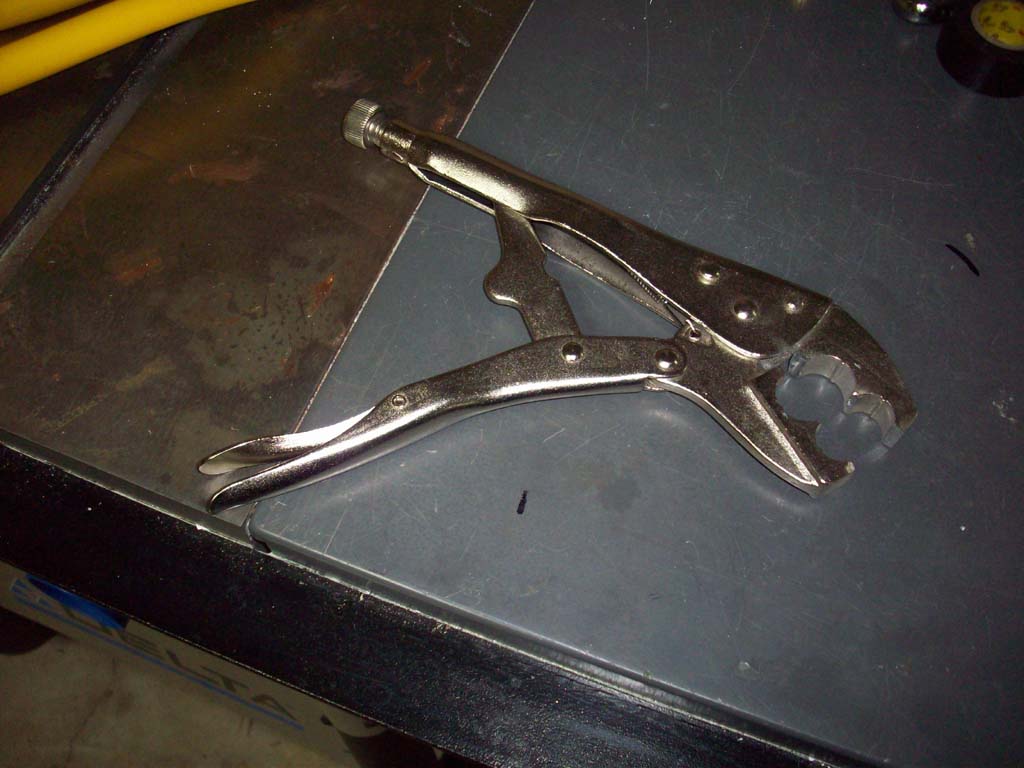
Ferrule Crimper |
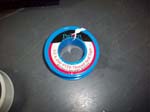
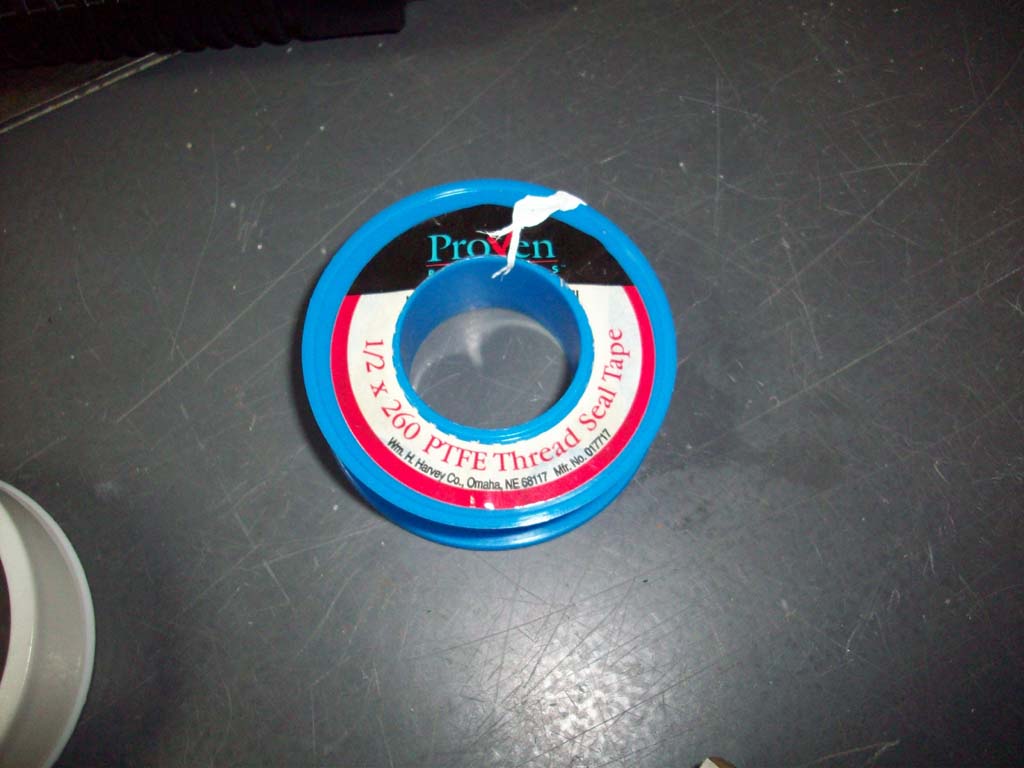
Teflon tape |
| |
| Air Hose Fabrication: |
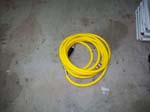
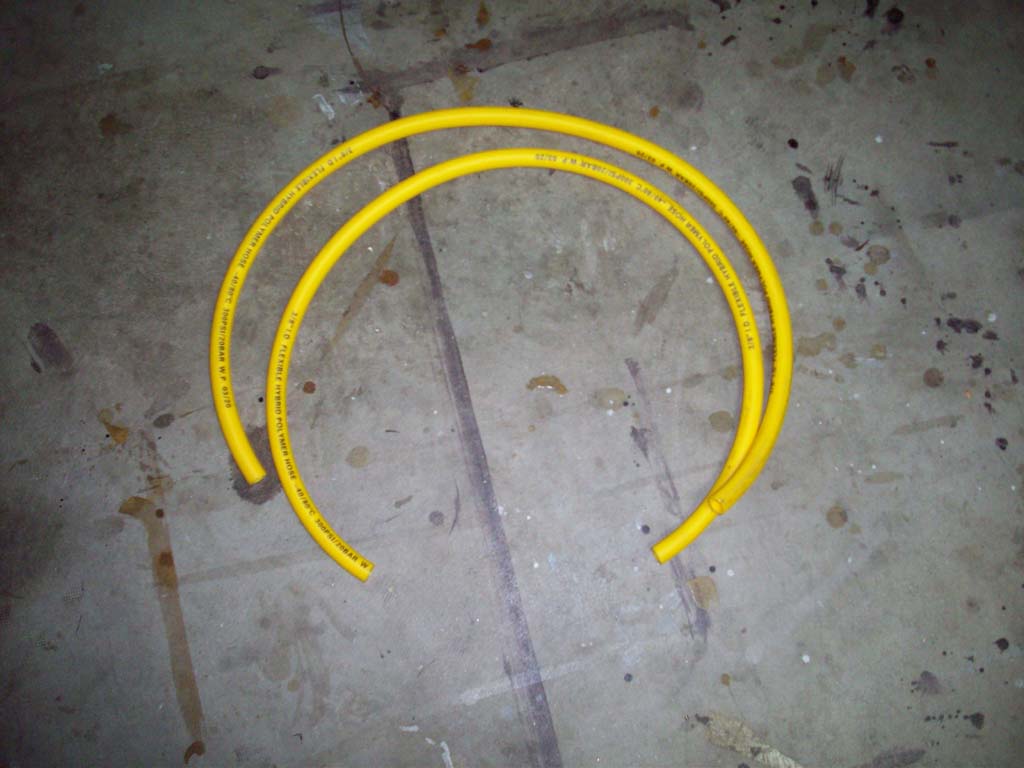
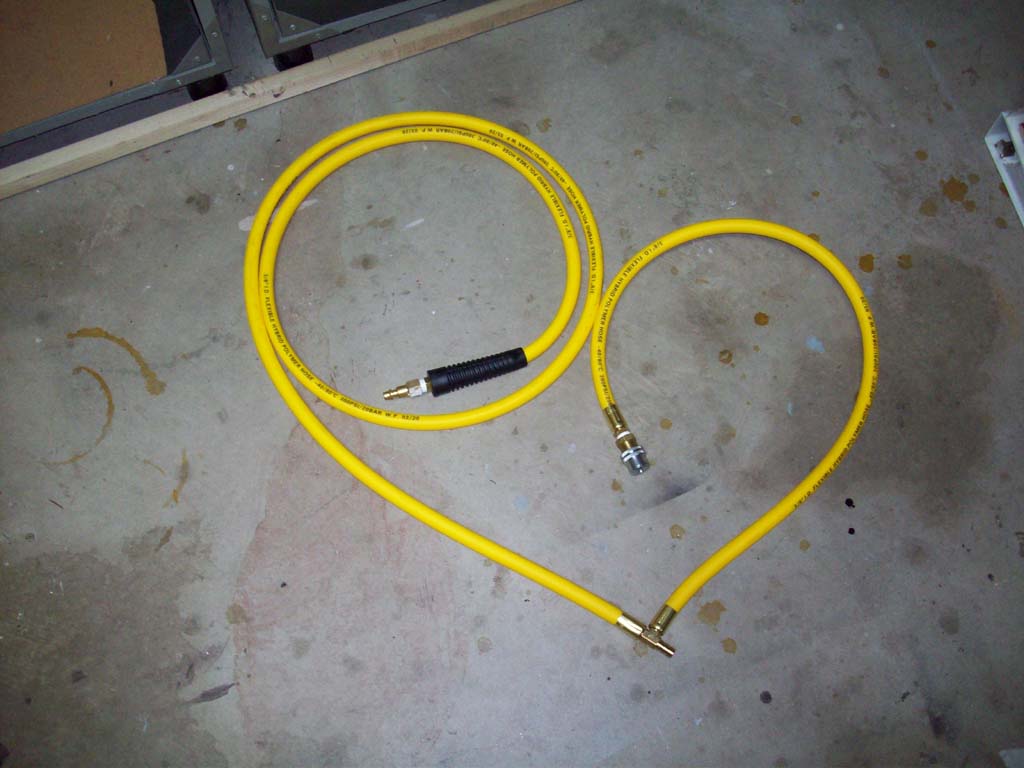
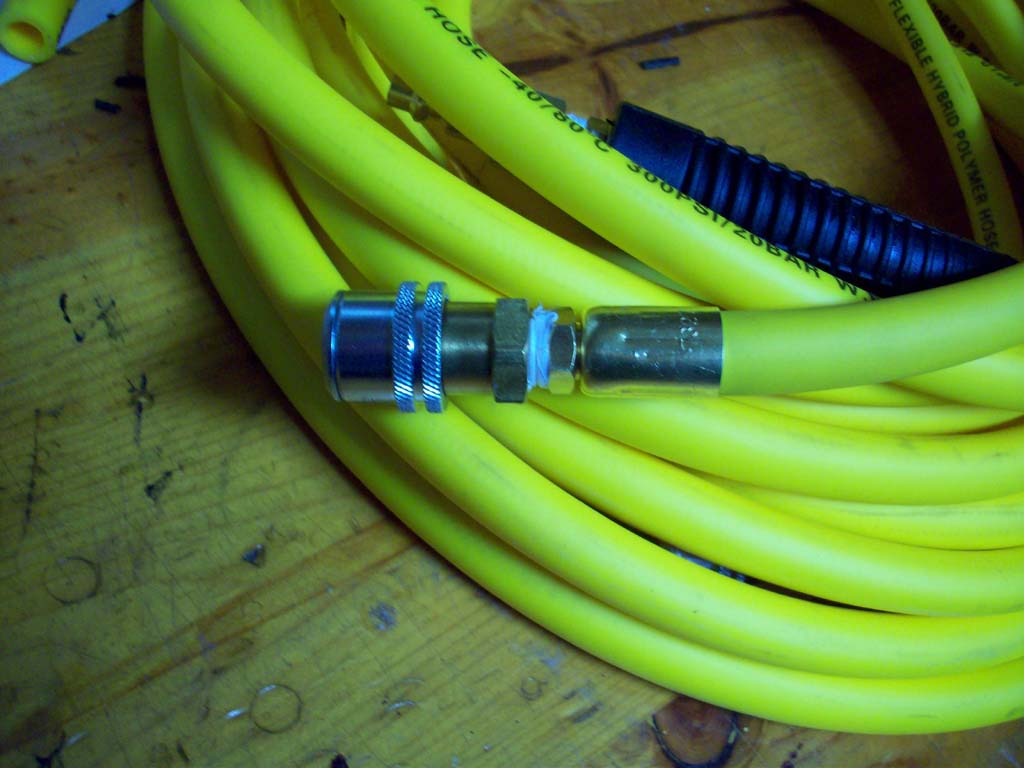
| Hoses typically come in 50' or 100' lengths. I purchased a 100' length since I was going to use the other 50' for a friends Gladiator system. Planning your hose lengths based upon the 50' length is the goal. Now while 50' seems like a lot, you can actually come pretty close, especially if you have a Jeep Gladiator and your hose connection is in the front of the vehicle. So the first part of figuring out this project is seeing where your hose fitting is and then planning your hose layout. Remember the distance between the front and rear tires on a 4 door jeep is nearly 10 feet. My connection is in the front on the driver side. I decided to make both hoses the same length so I didn't have to worry about what was the passenger side and what was the drivers side, I could just take them out and plug them in. My setup used the following lengths. Two (2) eight foot (I used the ends that had the strain relief and 1/4" MPT fittings installed), Two (2) three foot, and two (2) 12 foot sections for a total of 46 feet of hose. The 8 foot sections would come from the air mainifold to the T-connector, from the T-connector I would have a 3 foot section go to the front tire and an 8 foot section go to the rear tire. |
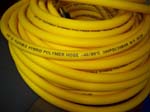
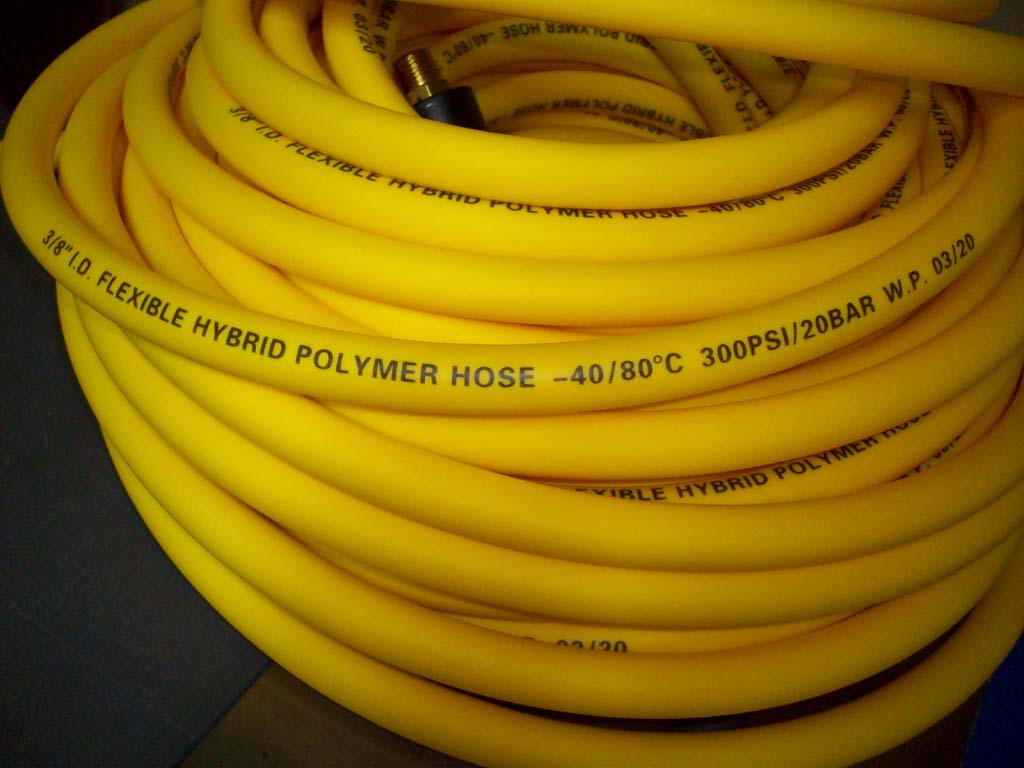
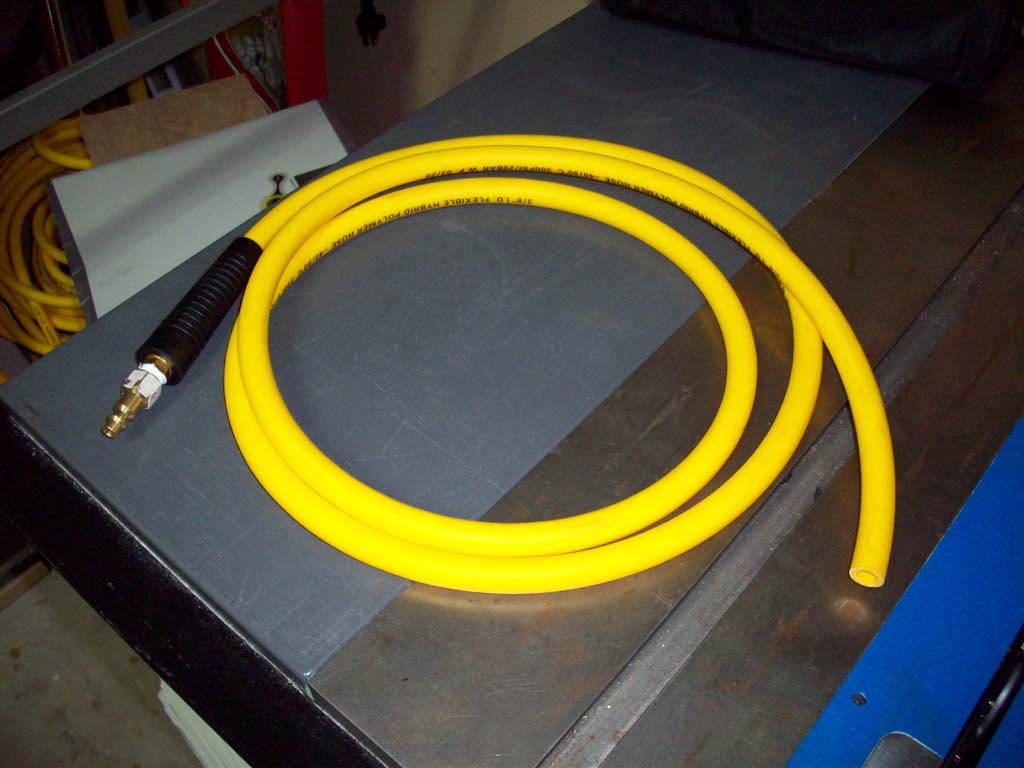
| The hose I used is a 3/8" flexible hybrid polymer hose rated for -40 to 80 degrees C, or -40 degrees F to 176 degrees F. You can pick these up at most big box hardware stores, but they charge almost as much for 50 feet as you can get 100 feet for on Amazon. The hose wears well, cleans up easily after you get it dirty, and remains very flexible through a wide range of temperatures. |
 |
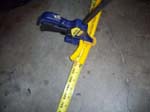
| Simple way to cut equal lengths is to use a simple clamp and tape measure. Clamp the hose end at the length you want on the tape measure and then cut them both off. You can use a razor knife, sharp scissors, or a nylon brake line tube cutter for this. I used both ends at a starting point because I wanted to use the installed strain reliefs and 1/4" MPT fittings as the sections that would come off the manifold and go to the T fitting for the tire valves. |
 |
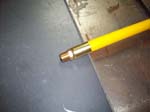
| Both ends of the hose had strain reliefs already installed with a 1/4" MPT end. I choose to cut 8 feet of hose off of both ends to use what was already installed as the section that went to the air manifold. The strain relief would ensure that the hose didn't form a kink with the ends were connected to the manifold. |
 |
 |
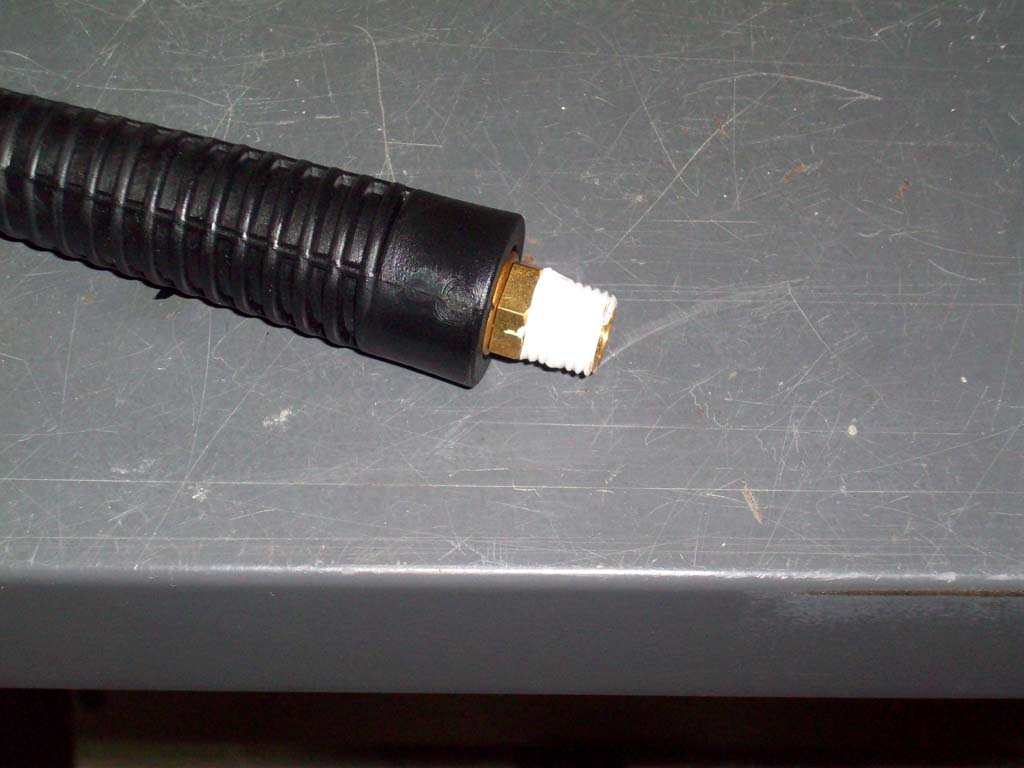
| Apply teflon tape to the end of the hose. |
 |
 |
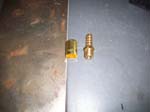
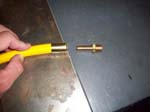
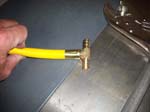
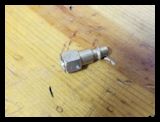
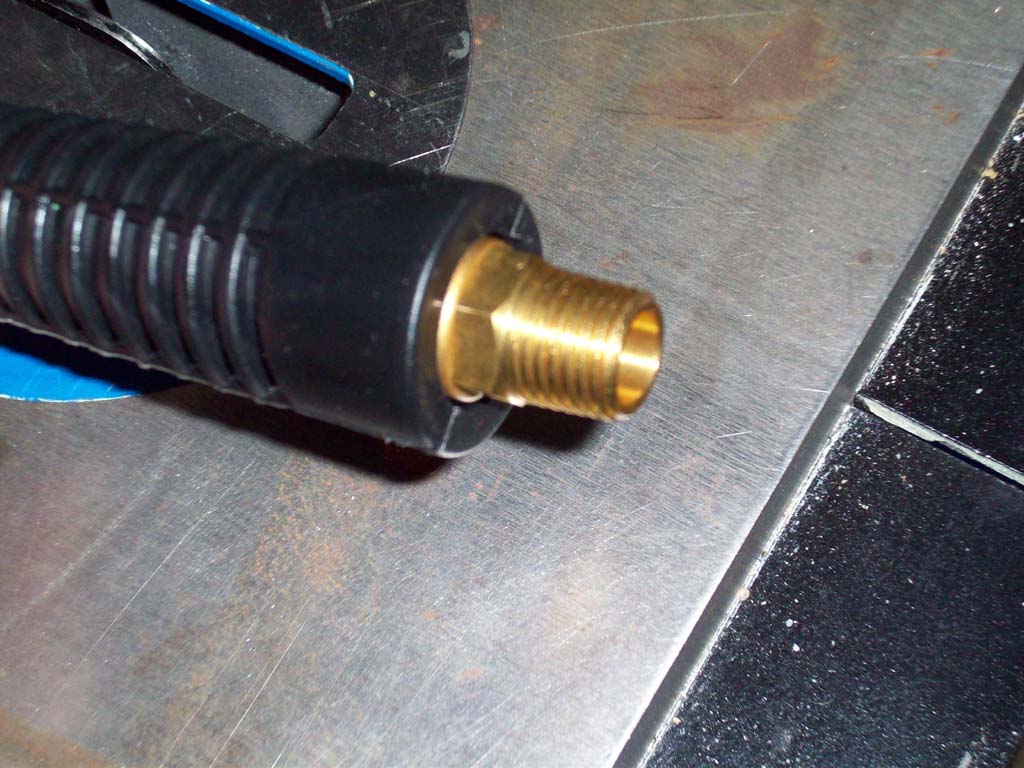
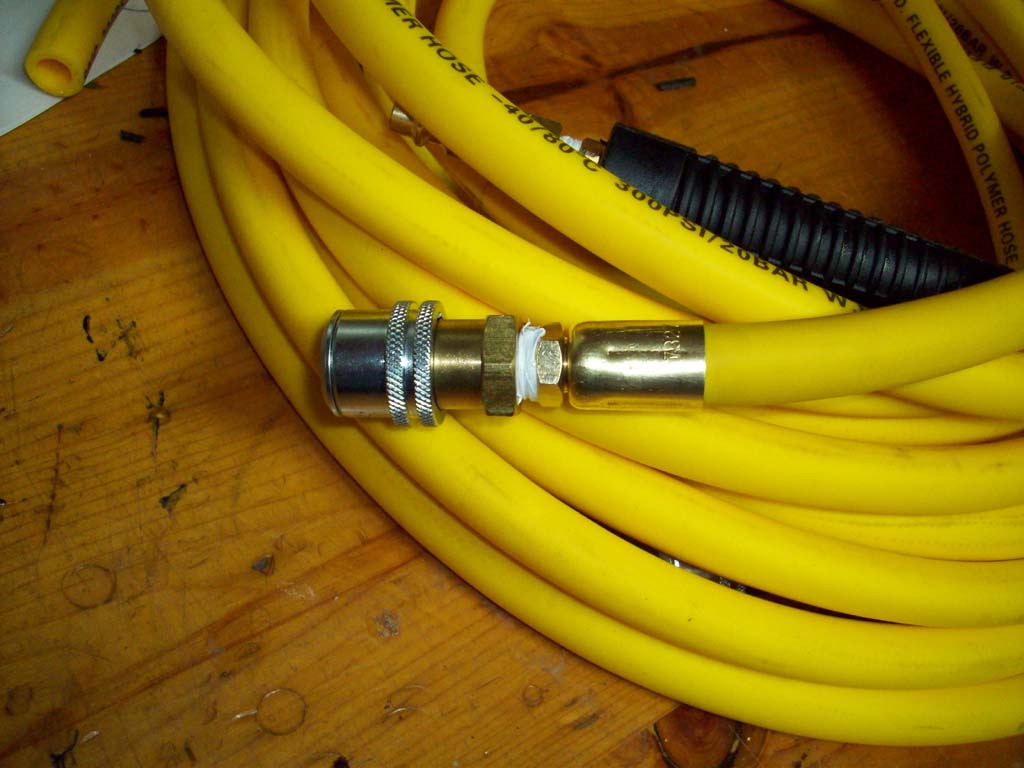
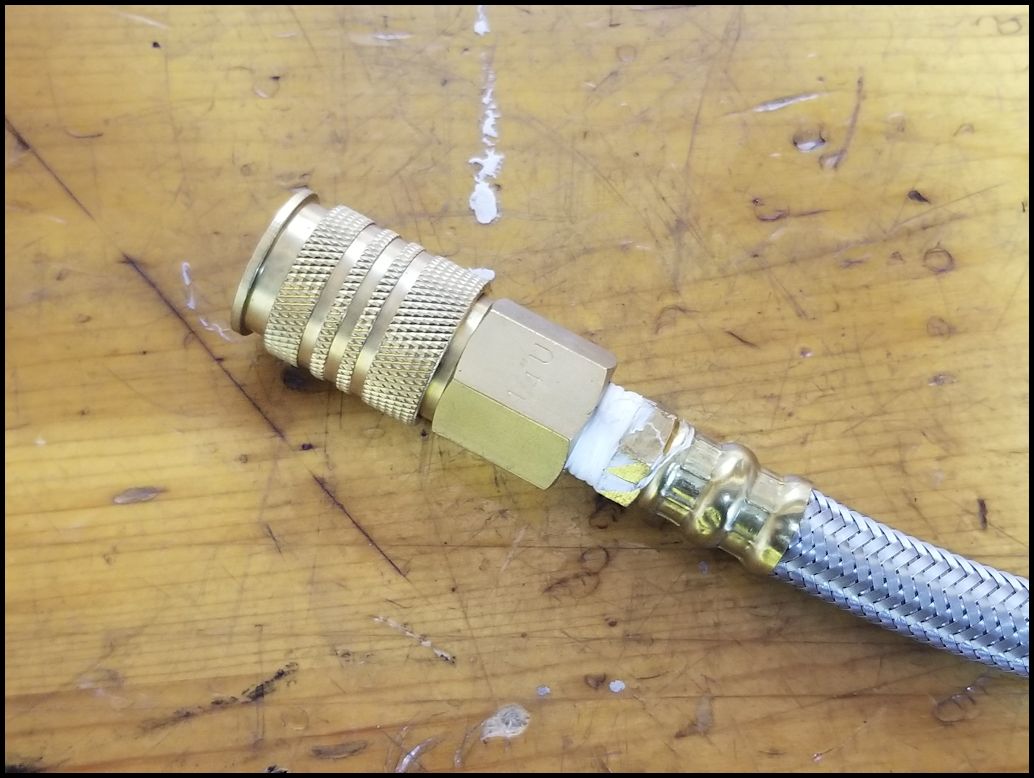
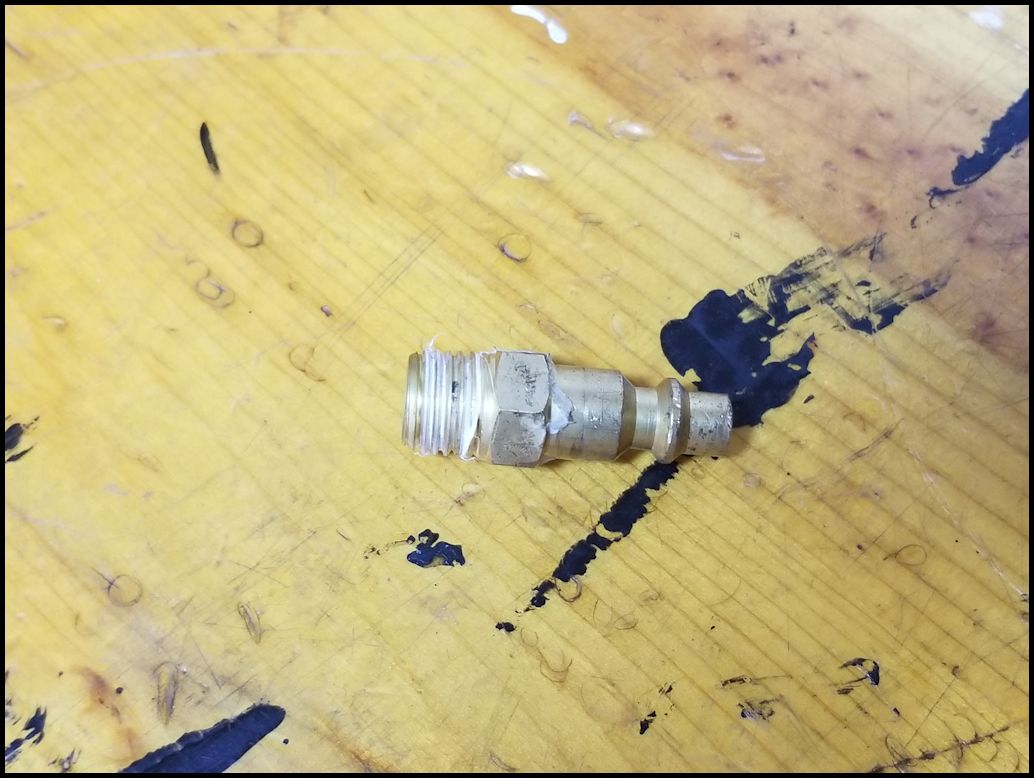
| Install the 1/4" FPT brass plug connector onto the MPT end of the air hose with the strain relief. You will need a 9/16" and a 5/8" combo wrench. |
|
 |
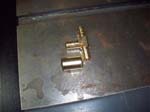
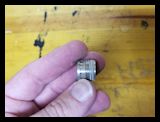
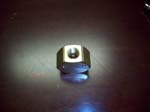
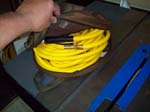
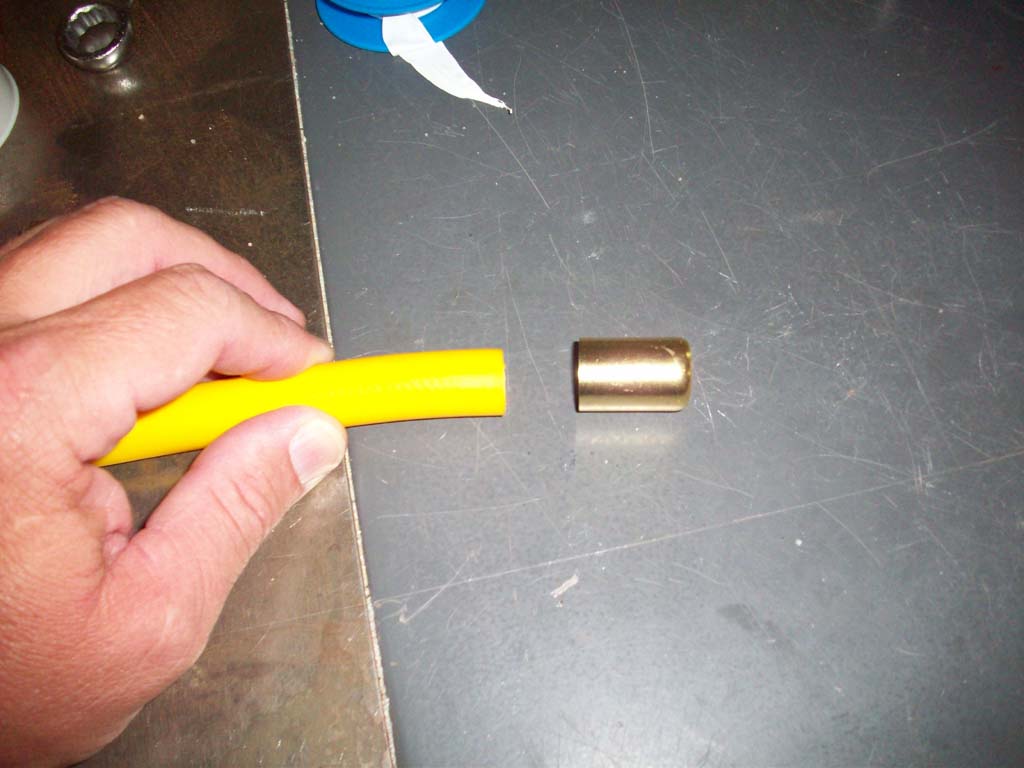
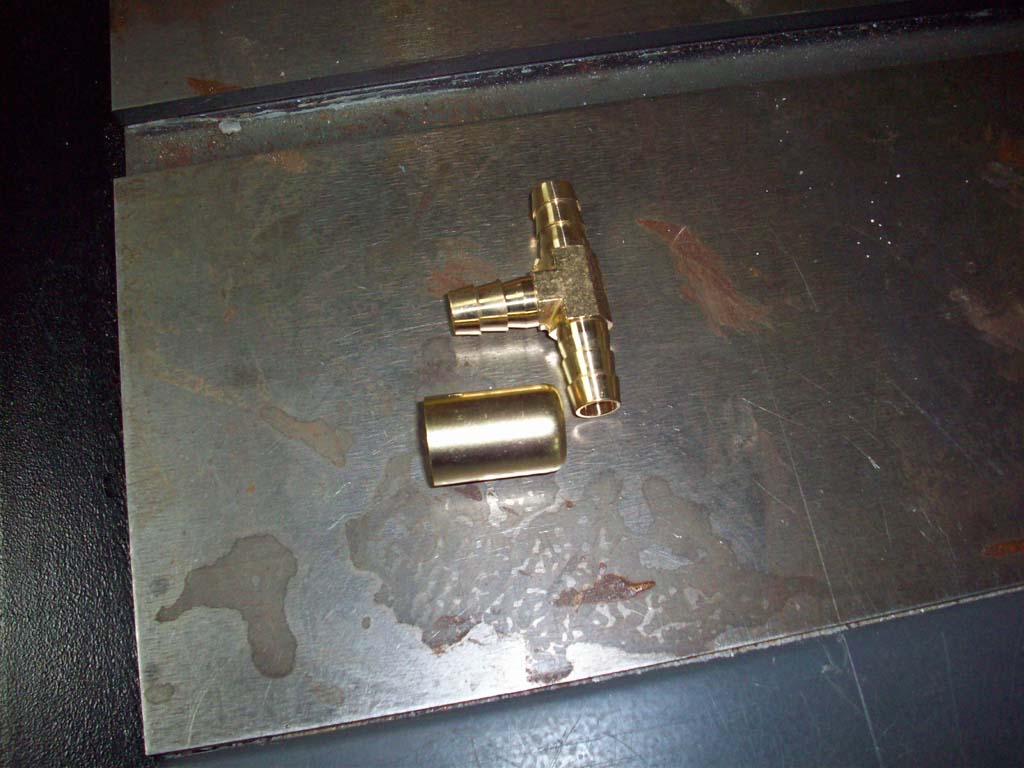
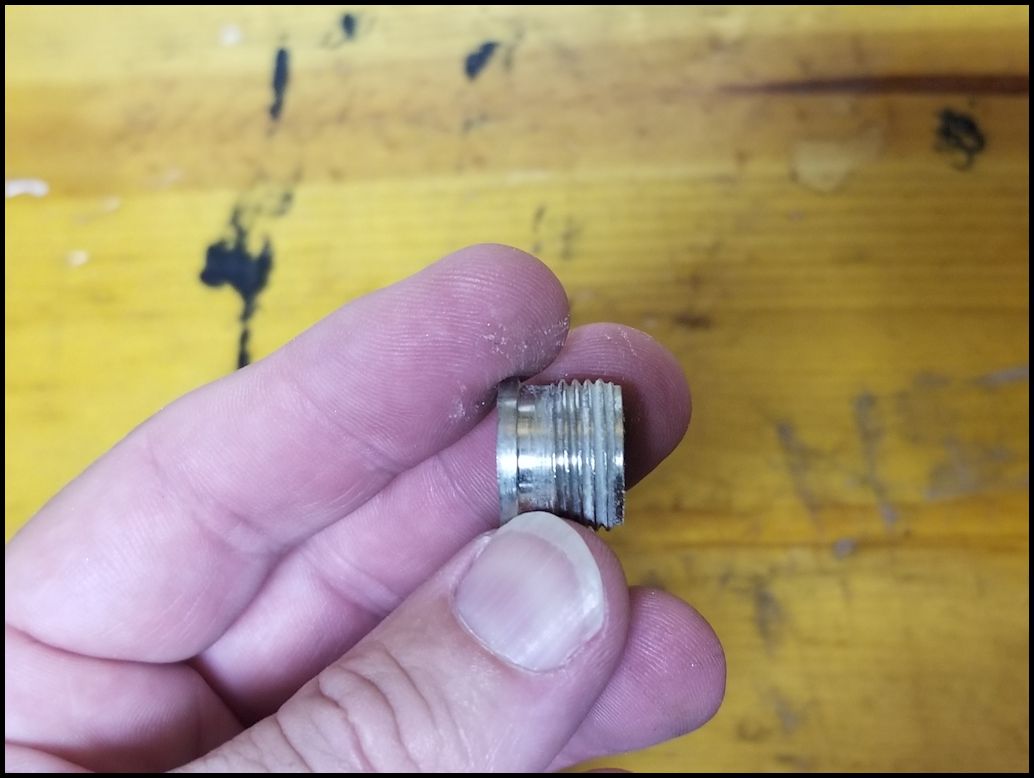
| Next, we will assemble the tire valve connections onto the other four hoses. There are a few ways that you can do this, but all of them will use a barbed 1/4" MPT air hose fitting. There are a few ways that you can secure the fitting in the hose. You can use a hose clamp, a ferrule, or a side crimp clamp. The hose clamp only requires a flat tip screw driver or nut driver to tighten the screw, but it leaves a strip of metal hanging out and a large worm screw on the side. It works, just not pretty. The side crimp clamp requires a side crimp tool to clamp them down. This does leave a wing of metal sticking out of either side of the clamp. An option that looks like a professional made hose is to use the proper size ferrule and a ferrule crimping tool. One last option is to use a push on barbed connector. I've typically heard them refered to as an Anderson push on barbed connector. I know they are expensive, and from experience can be a pain to get seated properly into a hose, but once they are in they look really good, and don't come out without tearing up the hose. None of these connection methods are impervious to abuse, and most rely on the barbs holding onto the inside diameter of the hose. I choose to use ferrules to make up my hoses, so I pick up a cheap ferrule crimp tool from Amazon. Note: I do have access to a professional crimp machine at work, but not everyone does and this is a DIY. If you choose to use hose clamps, or side crimp clamps, just use those instead of the ferrule. The assembly will be the same for the most part. |
| I used a ferrule and a 1/4" MPT 3/8" barbed fitting. Remember we are only doing this on one end of the two short hoses and the two long hoses, not on the hoses that we just put the plug connectors on above. |
|
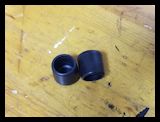
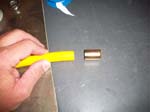
| Slide the ferrule over the the end of the hose. Make sure is sits flat against the end of the hose. It should just slide over the hose and not be lose where the hose flops around inside the ferrule, or so tight that the hoses is squashed as it goes into the ferrule. |
 |
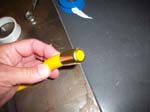 |
| Insert the 1/4" MPT 3/8" barbed fitting into the end of the hose. This should be a tight fit as it goes in. I found that it is easier to install these in the hybrid hose than regular rubber hoses. The barb should be fully seated into the hose a pressing down against the top of the ferrule. |
 |
 |
| Using the ferrule clamp tool. Place the ferrule into the correct size opening on the tool and then clamp down. This will leave a slight indentation into the ferrule. I rotated the ferrule 90 degrees and clamped down again. I repeated this a couple times in each location to ensure the ferrule had a good grip on the hose. I tried a couple different option of 90 degrees, 45 degrees and 60 degrees apart. All of them seemed to hold the same amount. |
|
 |
 |
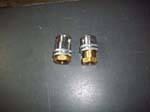
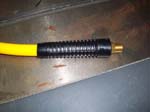
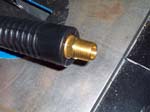
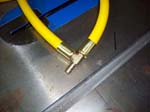
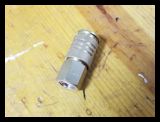
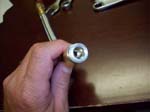
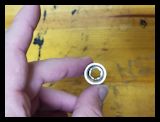
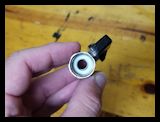
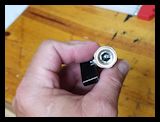
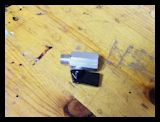
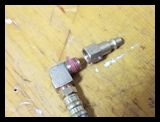
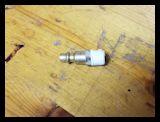
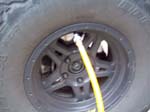
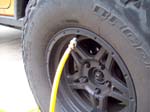
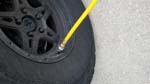
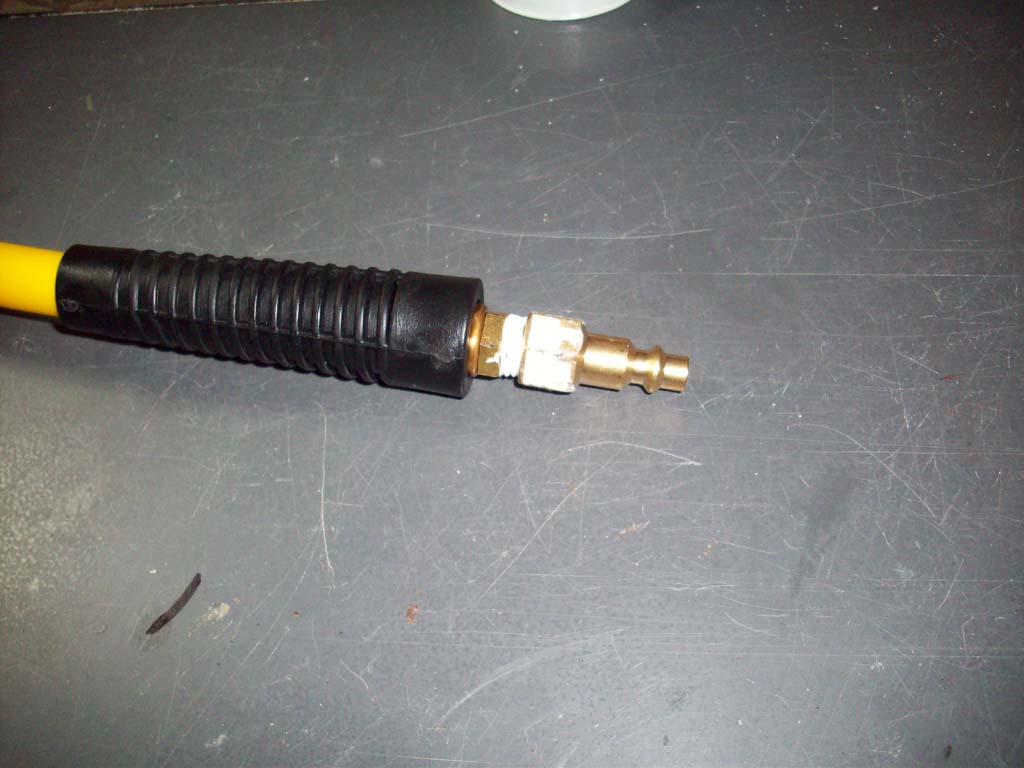
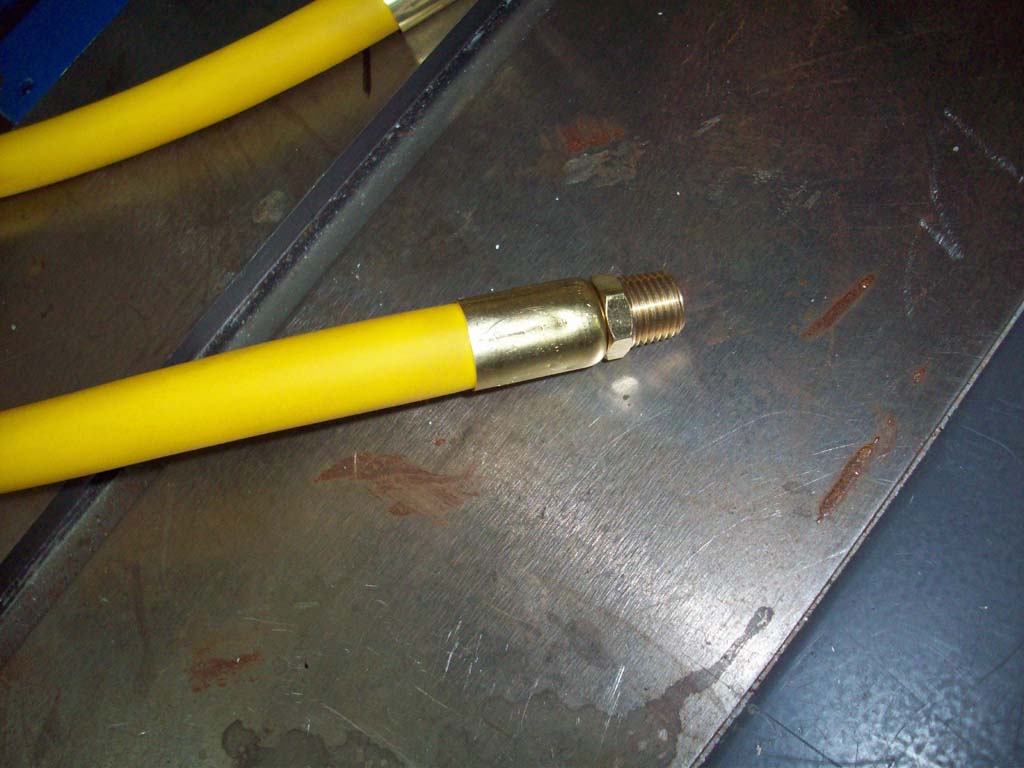
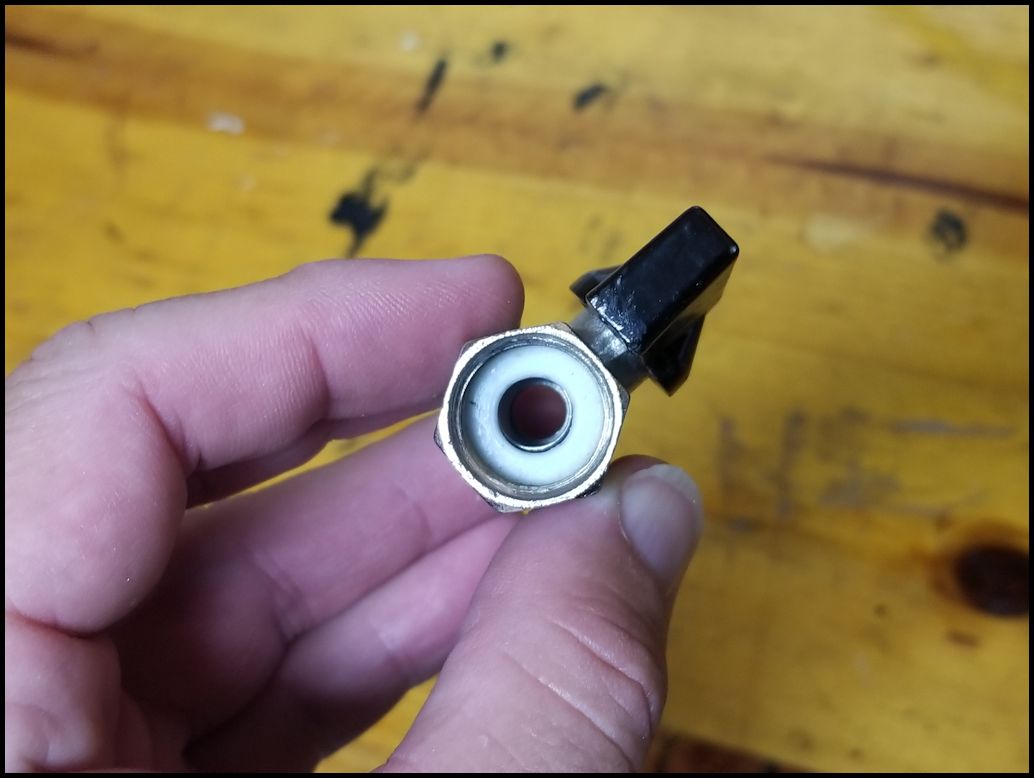
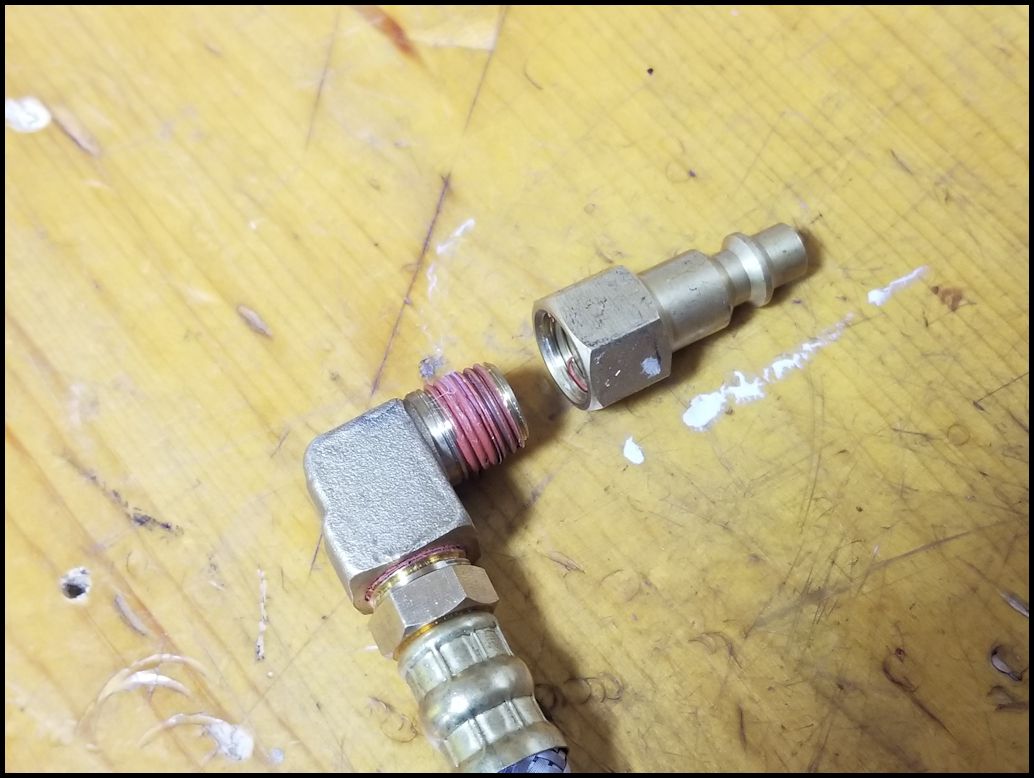
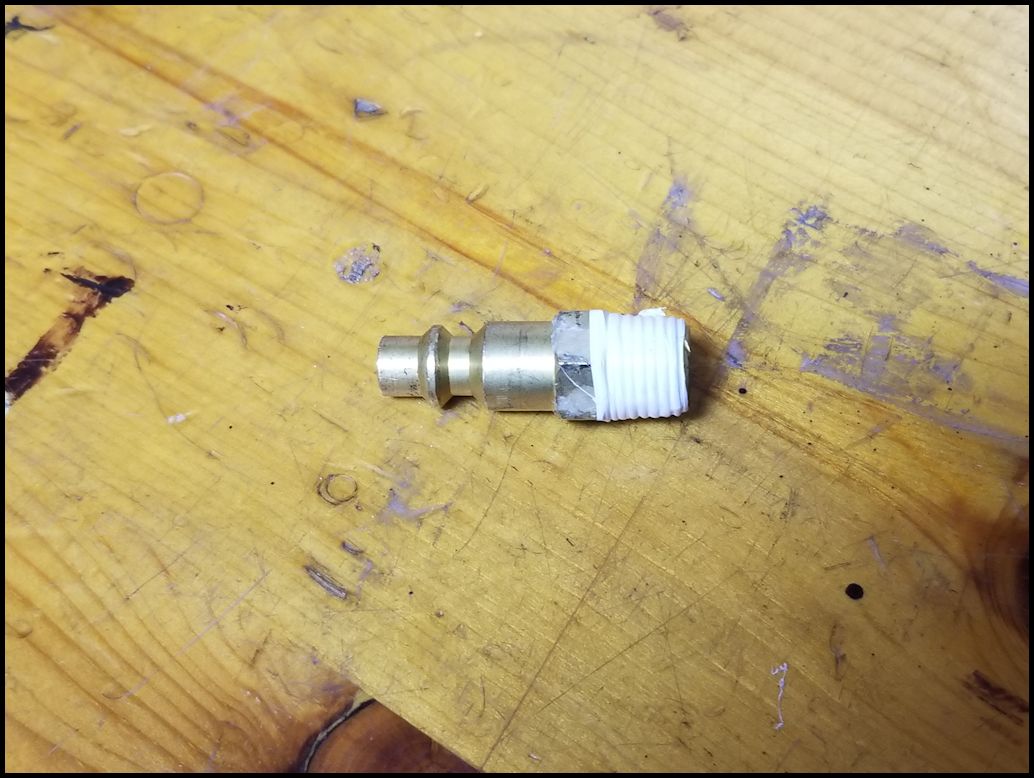
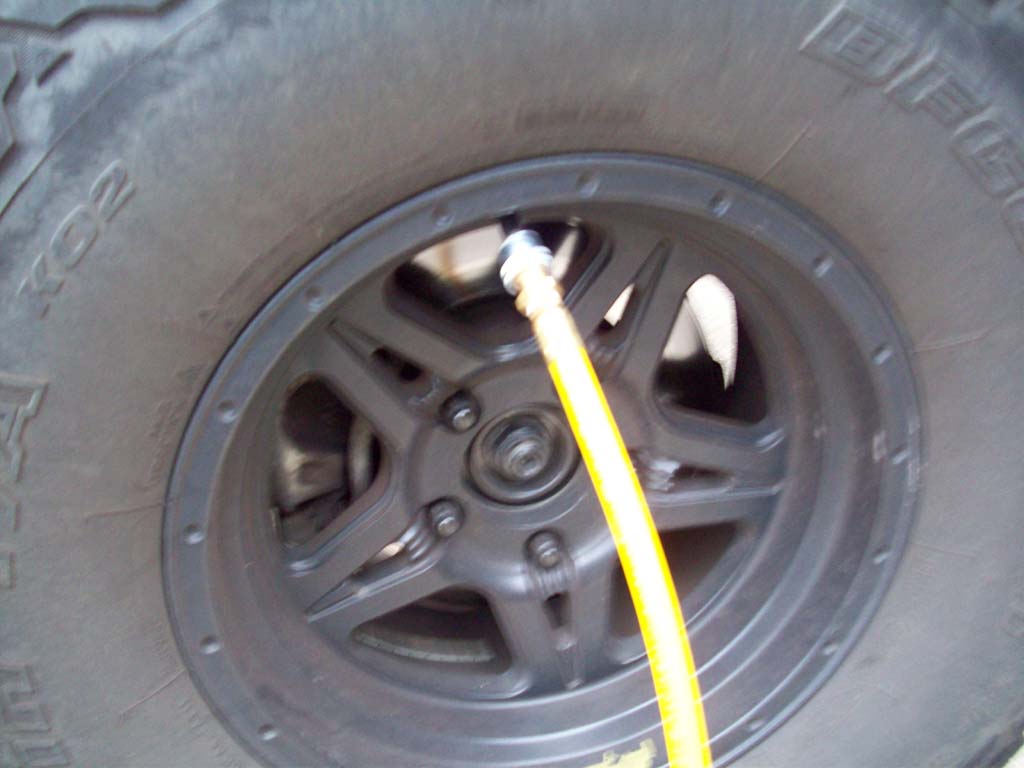
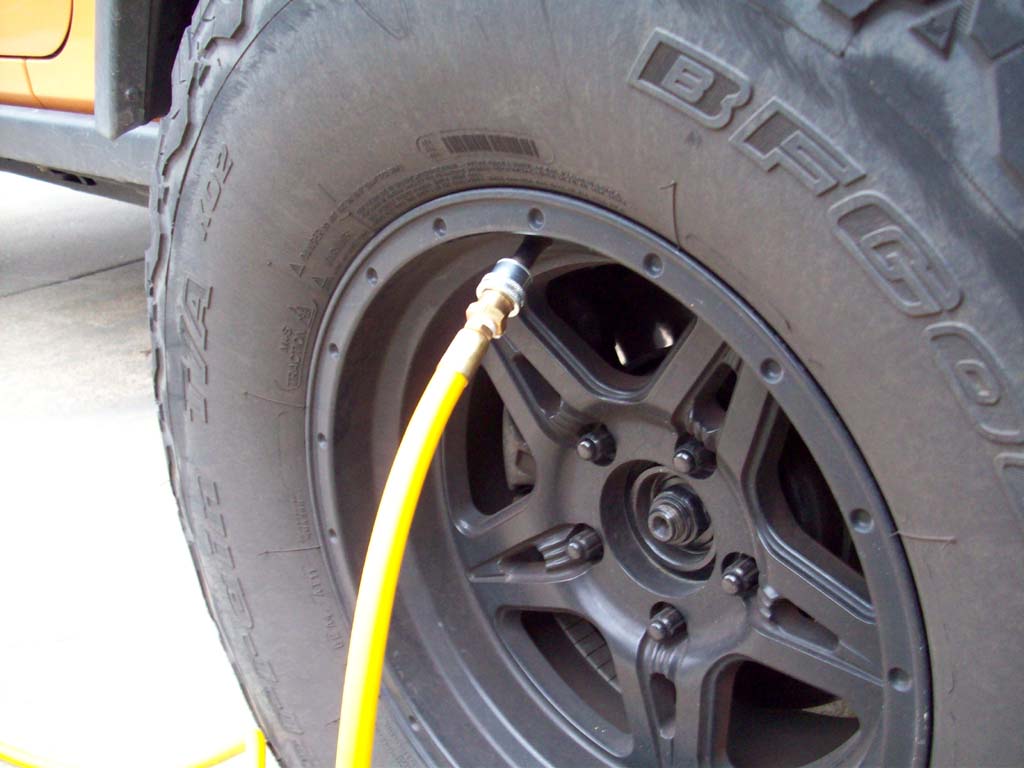
Install the Haltec H-5265 Standard Bore Lock On Air Chuck onto the 1/4" MPT hose end. You will need a 9/16" and 3/4" combo wrench. Don't forget to teflon tape the threads. |
 |
 |
 |
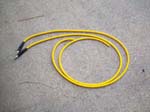
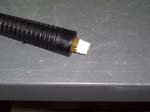
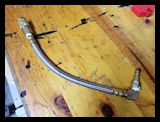
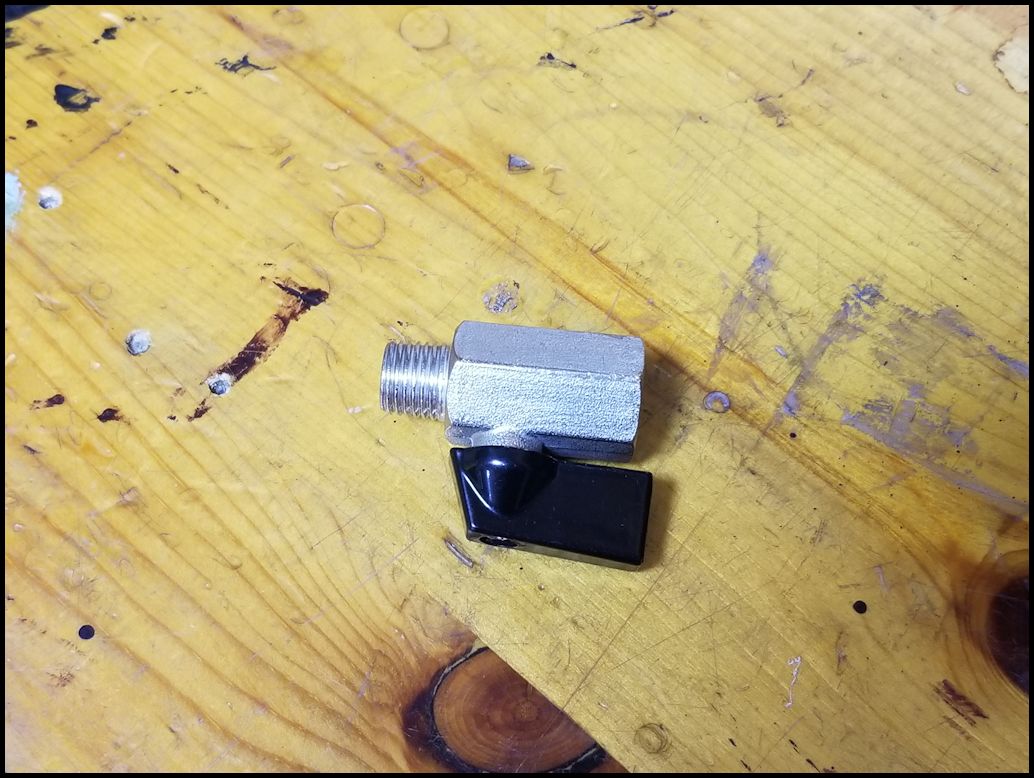
You should now have 3 sets of hoses. 1 set of short ends with a valve stem fitting, 1 set of long hoses with a valve stem fitting, and 1 set of hoses with strain relief and plug connectors.
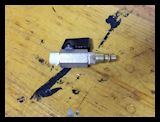
Note: Excuse the photo, I have no idea why I don't have a picture of the short hose with the valve stem connector. |
 |
 |
 |
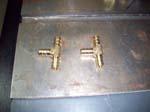
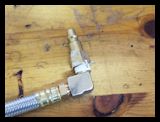
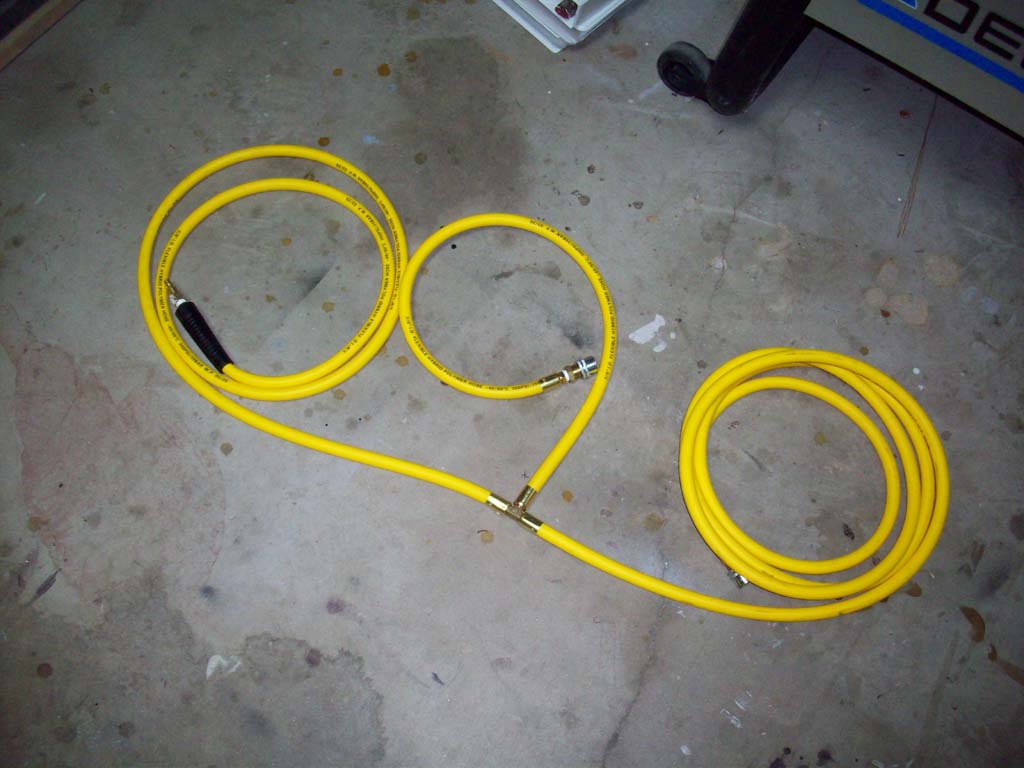
| Now assemble the left and right side hose assemblies. You will need one 3/8" barbed T's and 3 ferrule's for each side. |
 |
| Starting with the short hose, lay it down to see which way the natural curl of the hose. You will want the T fitting to lay flat with this curl. Slide the ferrule over the the end of the hose. Make sure is sits flat against the end of the hose. It should just slide over the hose and not be lose where the hose flops around inside the ferrule, or so tight that the hoses is squashed as it goes into the ferrule. Insert the 3/8" barbed T fitting into the end of the hose. This should be a tight fit as it goes in. I found that it is easier to install these in the hybrid hose than regular rubber hoses. The barb should be fully seated into the hose a pressing down against the top of the ferrule. Using the ferrule clamp tool. Place the ferrule into the correct size opening on the tool and then clamp down. This will leave a slight indentation into the ferrule. I rotated the ferrule 90 degrees and clamped down again. I repeated this a couple times in each location to ensure the ferrule had a good grip on the hose. I tried a couple different option of 90 degrees, 45 degrees and 60 degrees apart. All of them seemed to hold the same amount. |
 |
| We will repeat the above on each hose we connect. With the second hose and third hose connections, make sure they are all laying flat. I set it up so that the two long hose coil towards each other and the T fitting lays flat. |
 |
 |
 |
| This allows it to coil into a tight bundle when it is all done with the T fitting and short hose in the center of the others. |
 |
| |
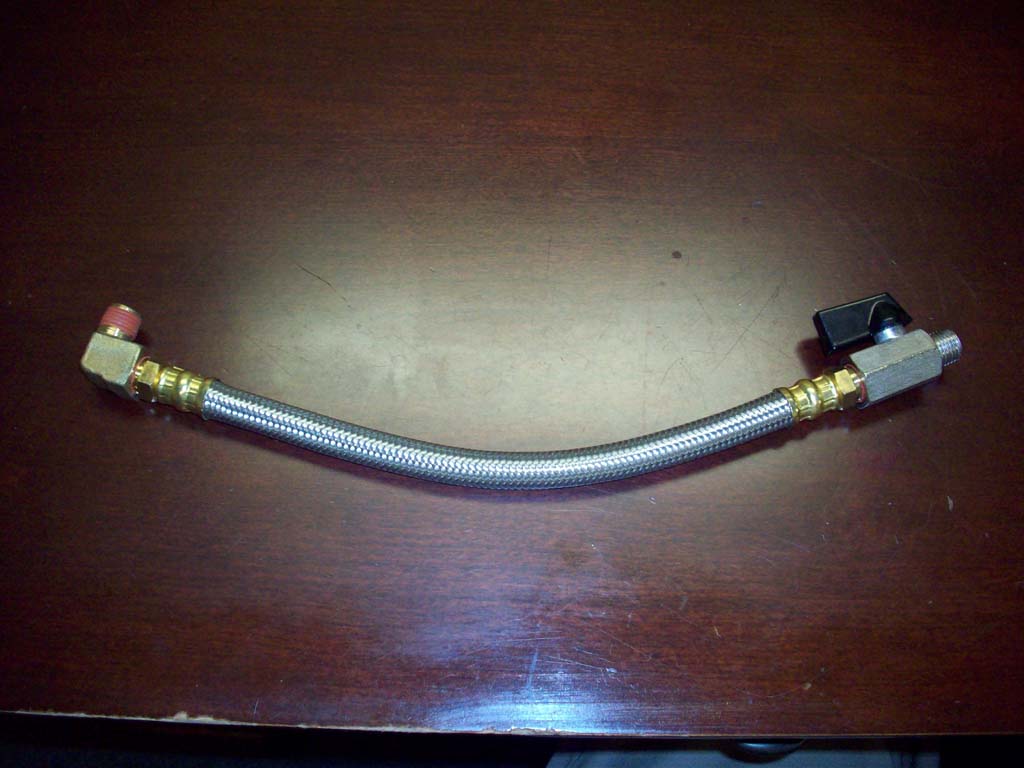
| Extension Hose Assembly: |
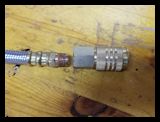
| I decided to build a short extension hose for the air manifold for a couple reasons. The air tank drain valve is a steel braided hose which provides protection from any sharp edges that it may encounter. One end has a 90 degree fitting installed so it offers a low clearance ability when plugged into a air connection located underneath or in areas that you just can plug the larger air manifold directly into. This gives me the ability to use it on other vehicles with an equipped air system that doesn't have the room for the manifold by itself. |
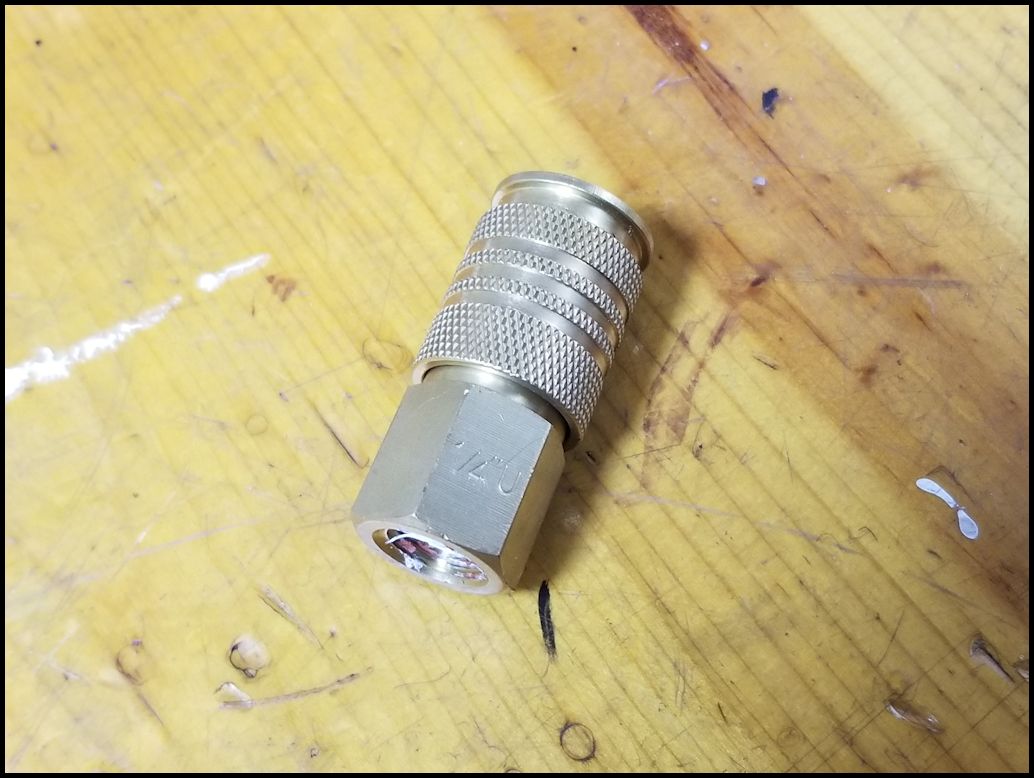
| You will need the air tank drain extension hose, one 1/4" FPT brass plug connector, and one 1/4" FPT quick disconnect air coupling. |
|
 |
 |
| 1. Remove the valve from the end of the air tank drain extension hose. You will need a 9/16" and 3/4 " combo wrench to remove the valve. |
 |
 |
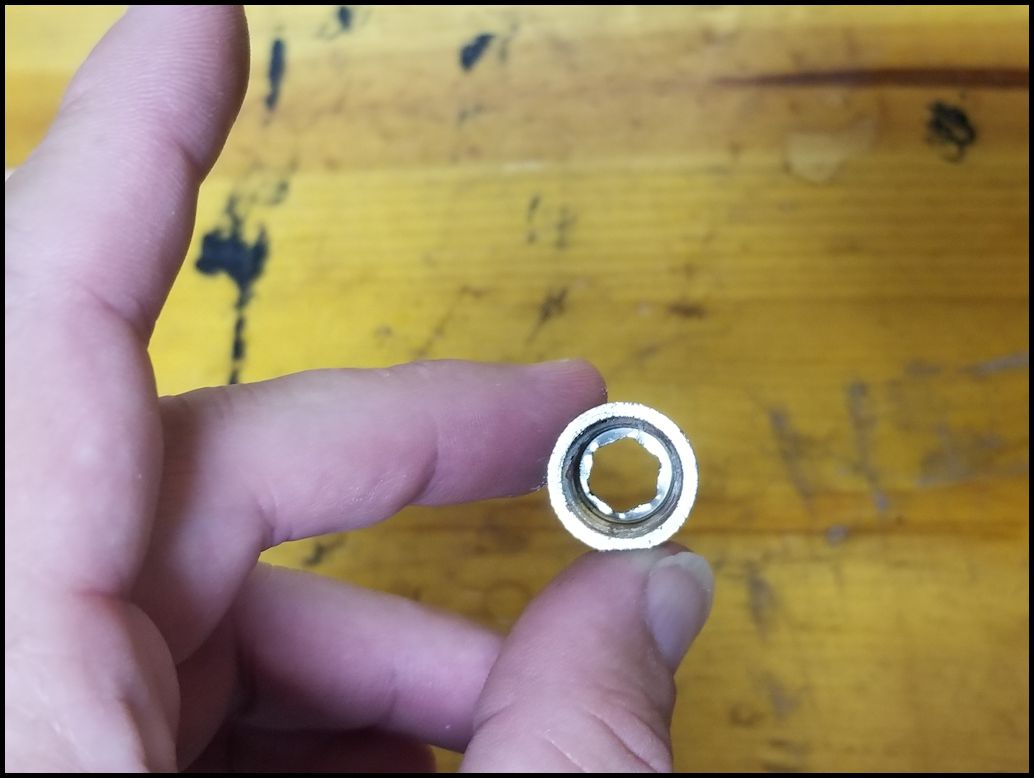
| 2. The valve had an insert to hold the seat and ball assembly inside the valve that had to be removed from the end of the extension hose with an 5/16" allen wrench and 9/16" combo wrench. I reinstalled it in the valve with a 5/16" allen wrench and 3/4" combo wrench.. |
 |
 |
 |
 |
 |
 |
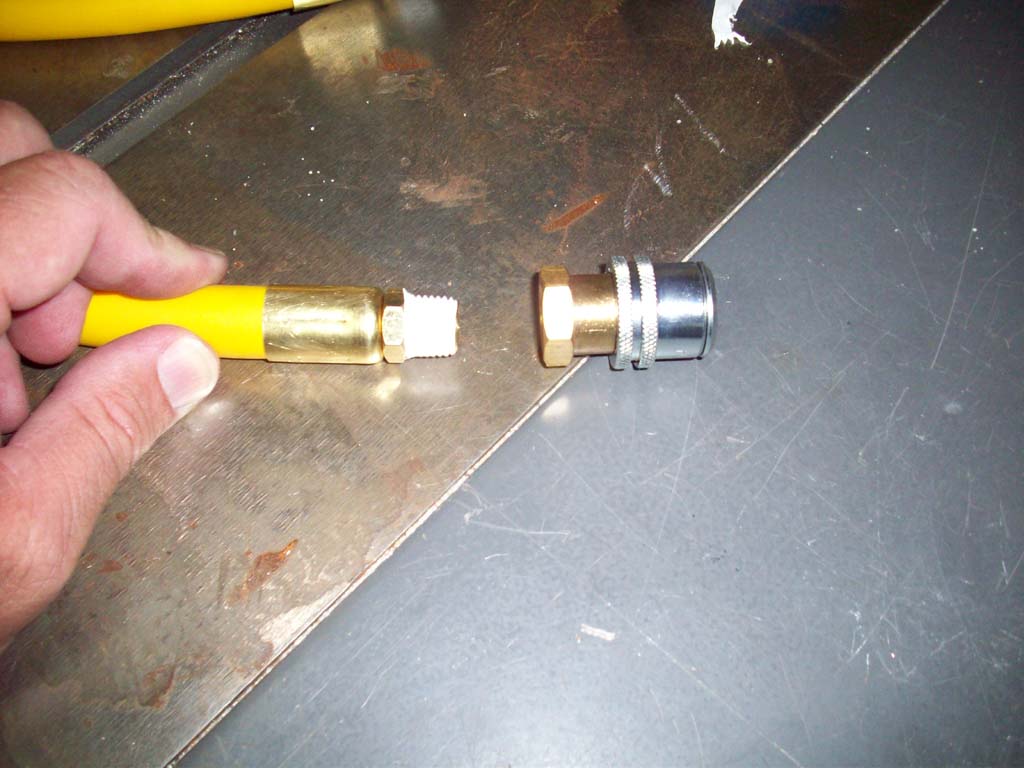
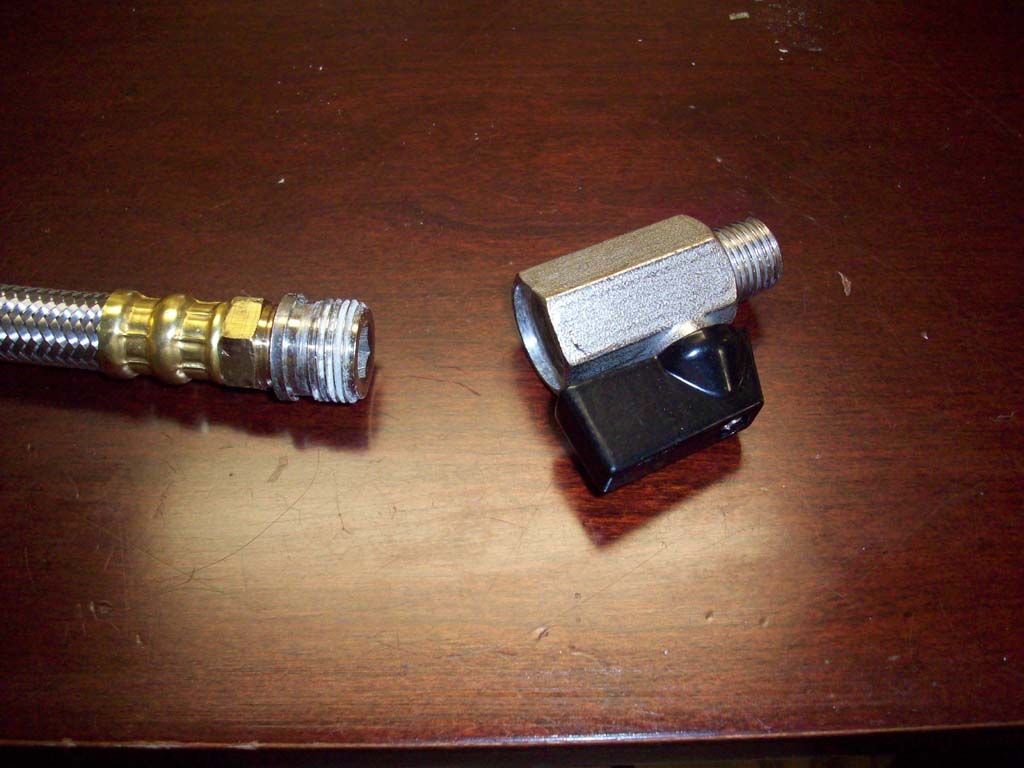
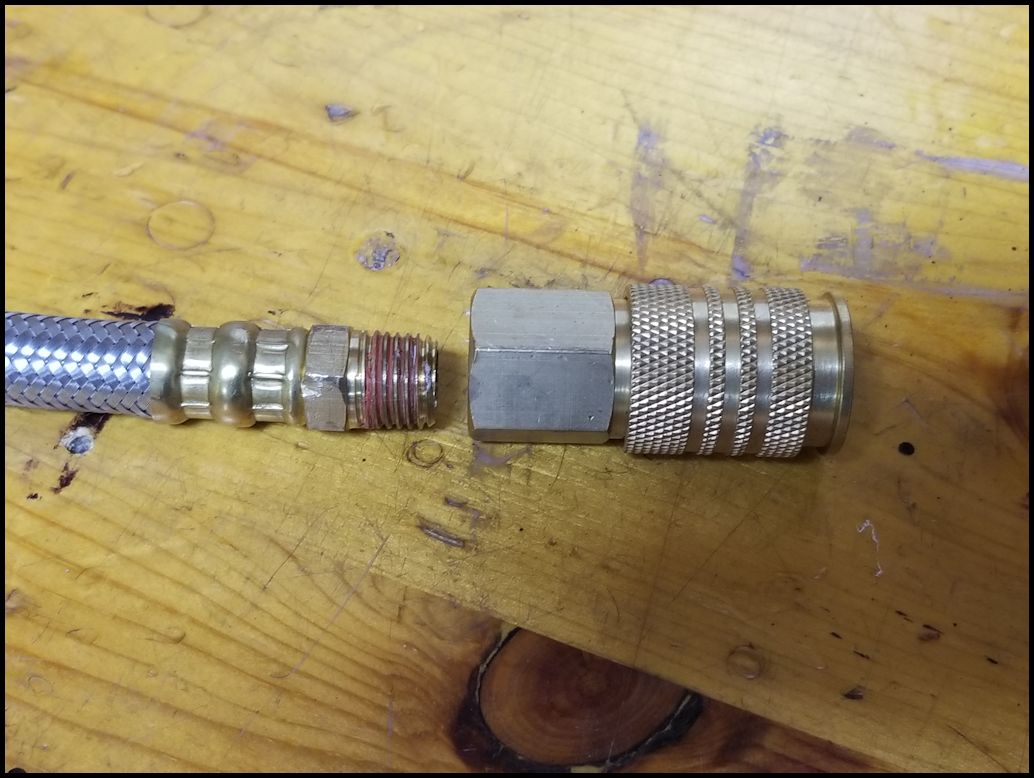
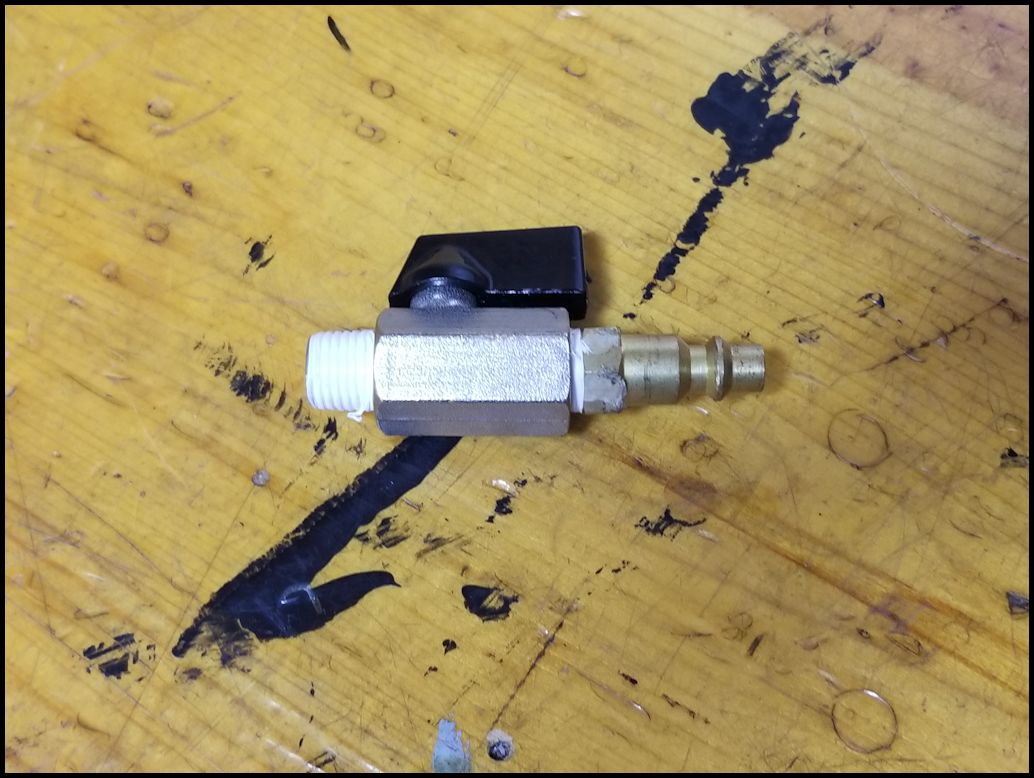
| 3. Install the Quick Disconnect air coupling on the end that you removed the valve from. You will need a 9/16" and 3/4" combo wrench. Use teflon tape on the threads for a better seal. |
 |
 |
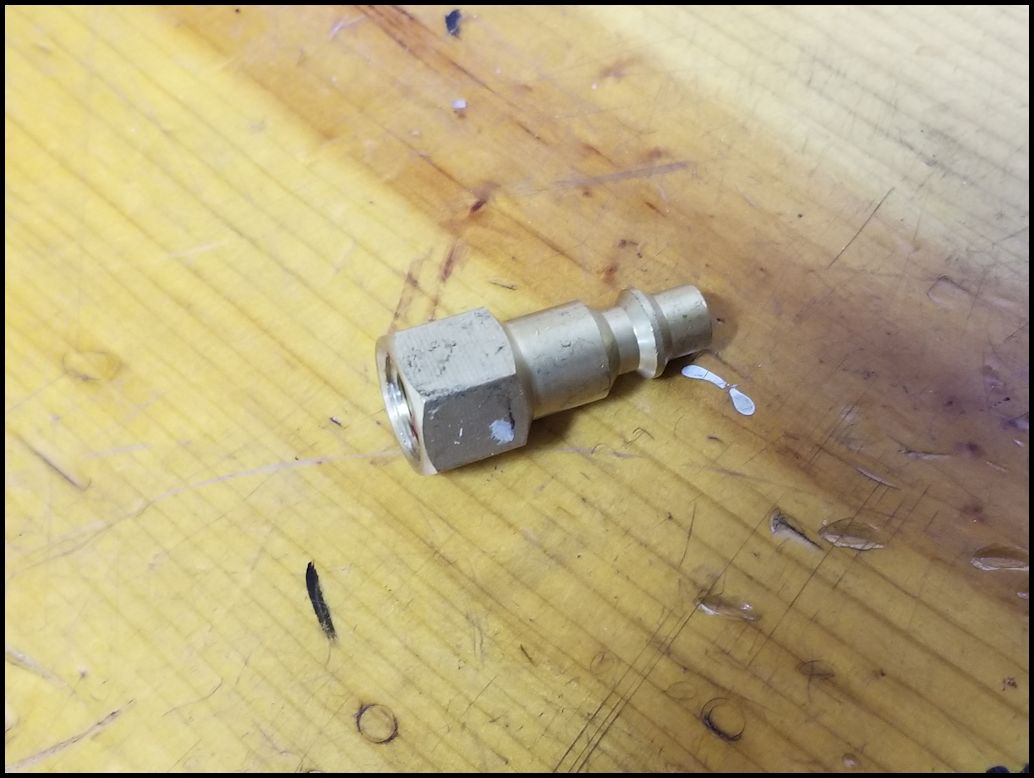
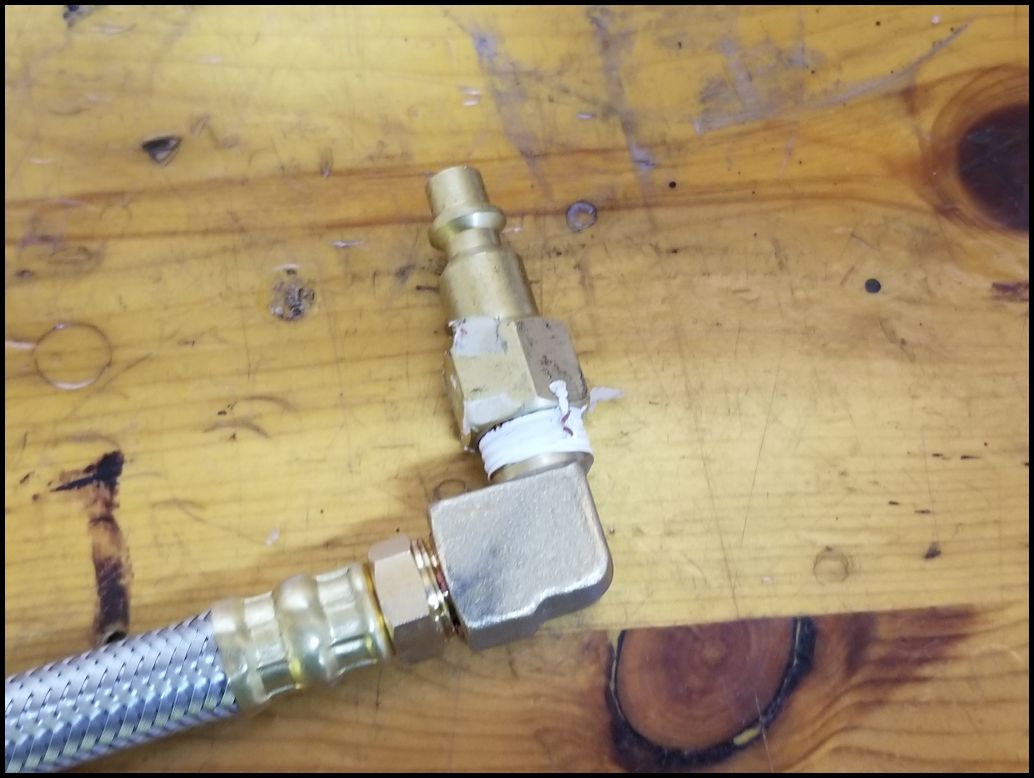
| 4. Install the 1/4" FPT brass plug connector on the 90 degree angled end. You will need a 5/8" and 11/16" combo wrench. Use teflon tape on the threads for a better seal. |
 |
 |
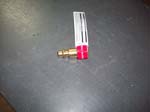
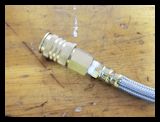
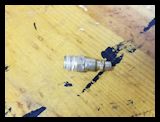
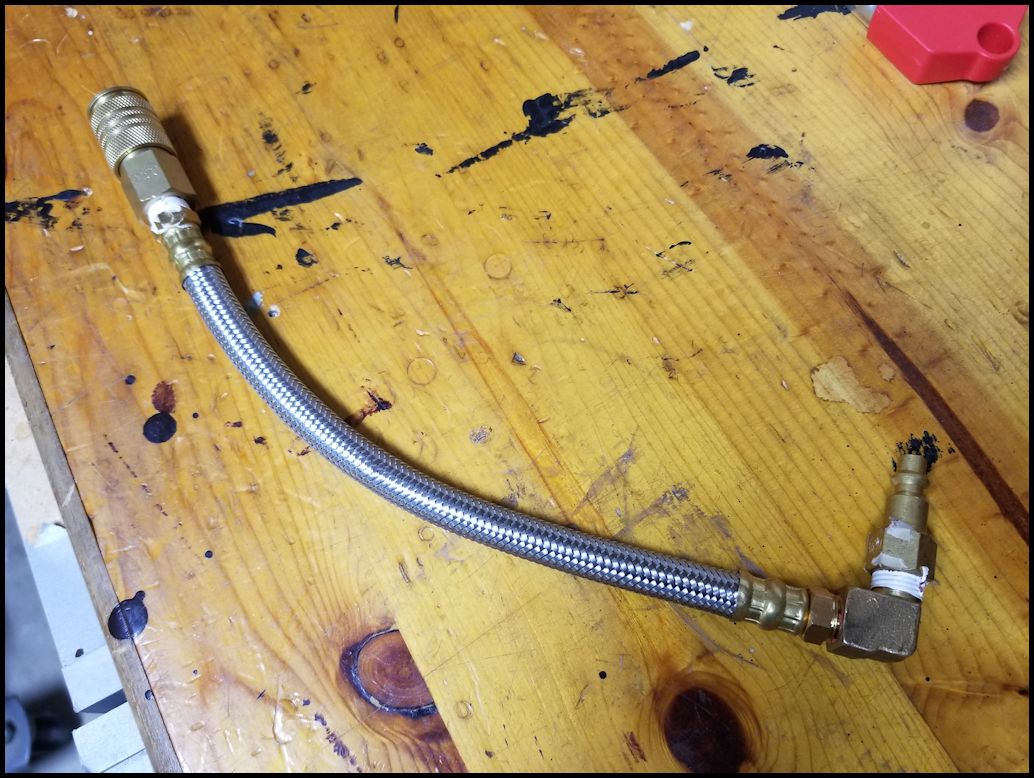
| Completed extension hose. |
 |
|
| Air Manifold Assembly: |
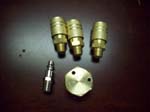
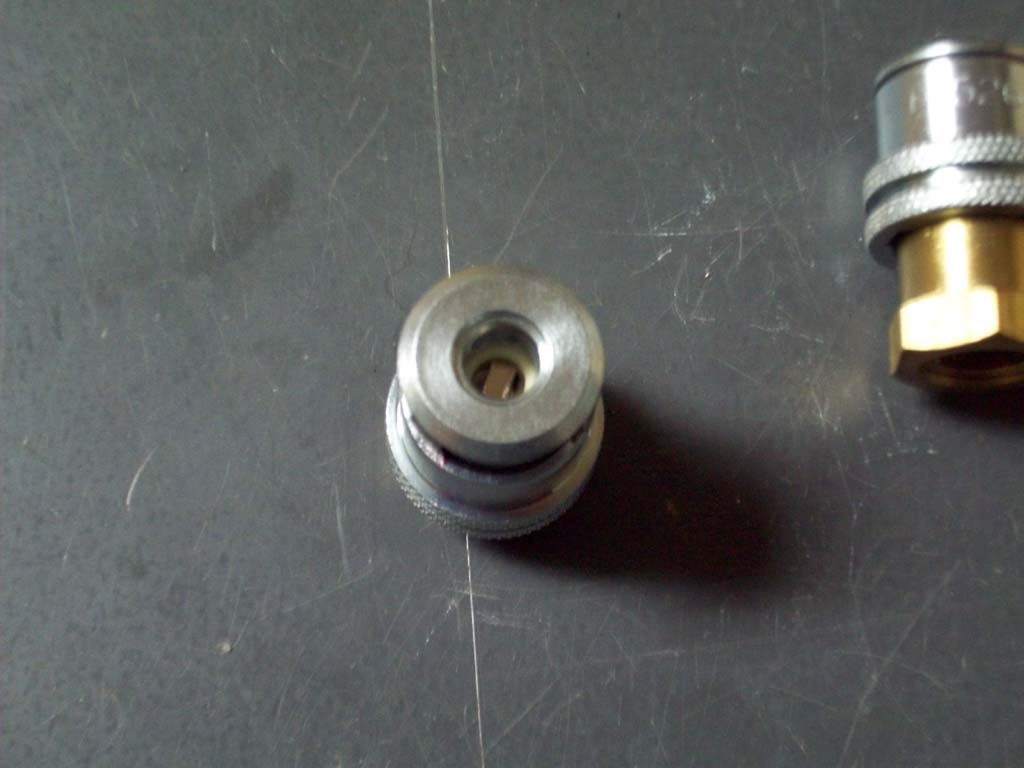
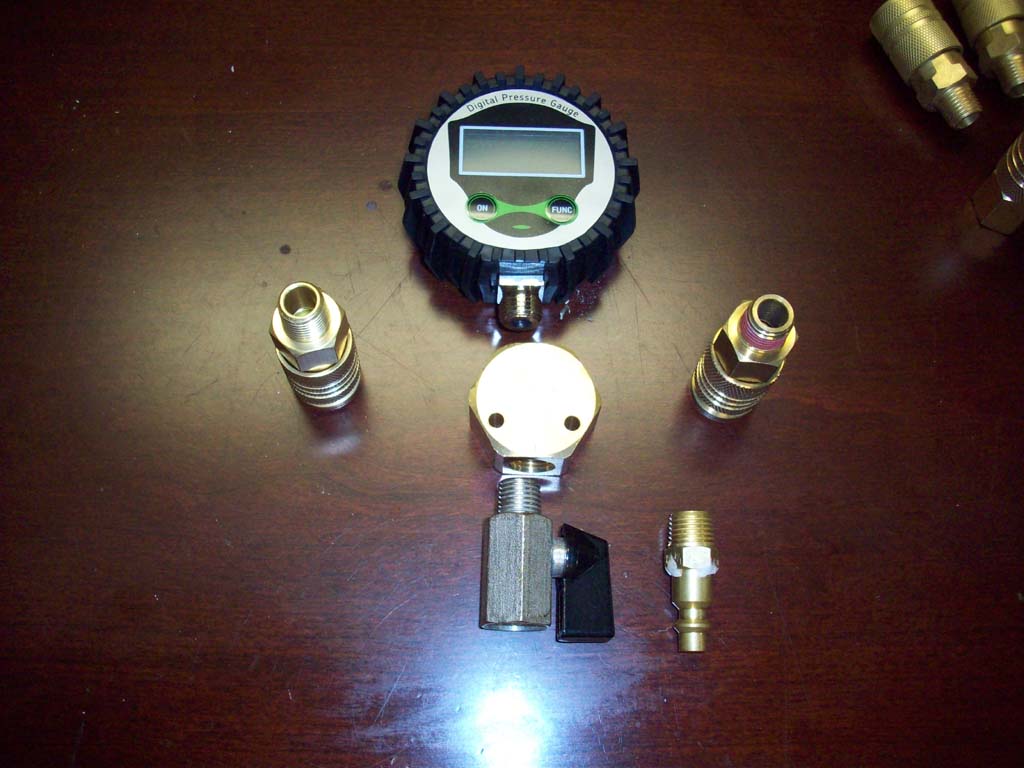
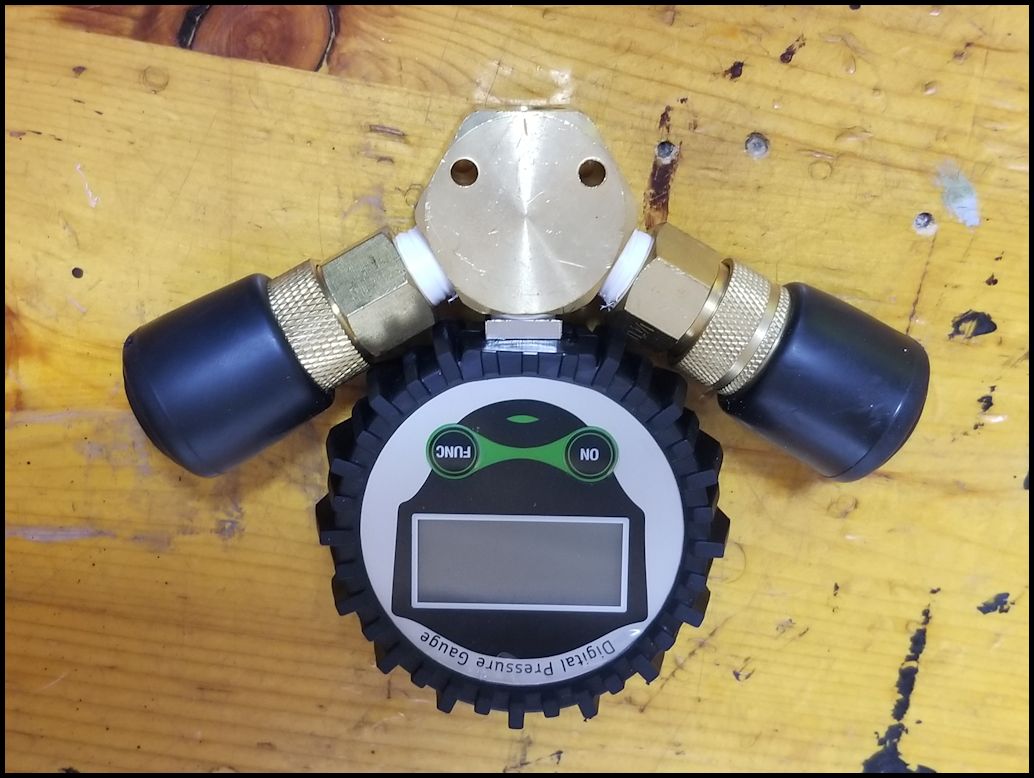
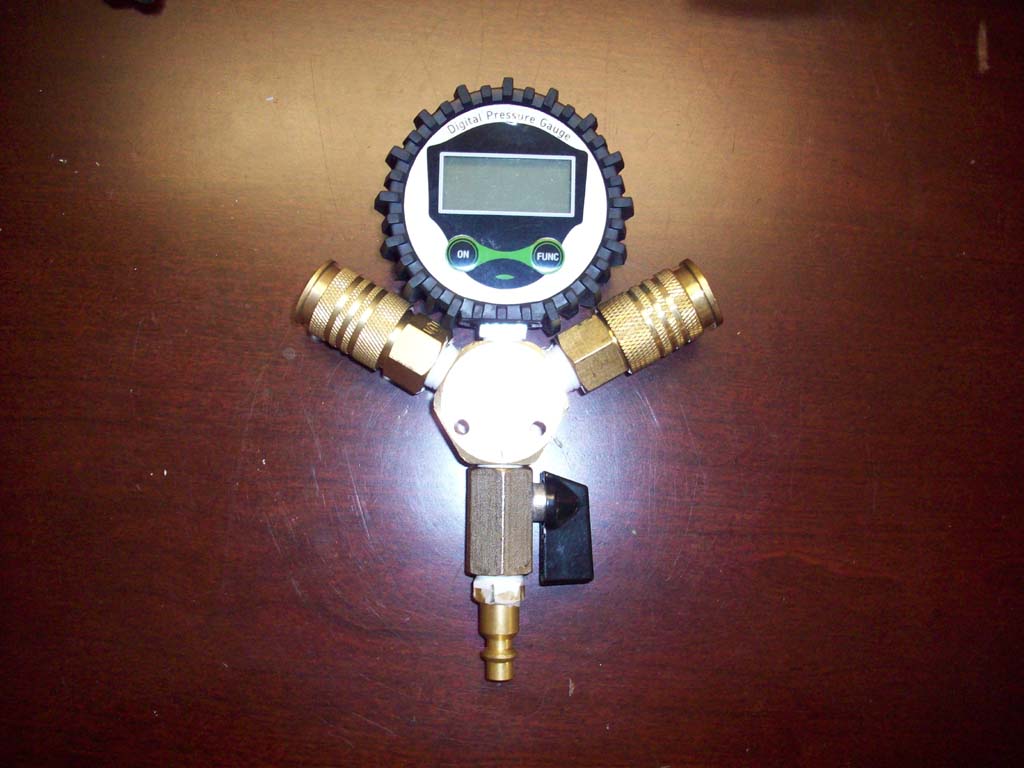
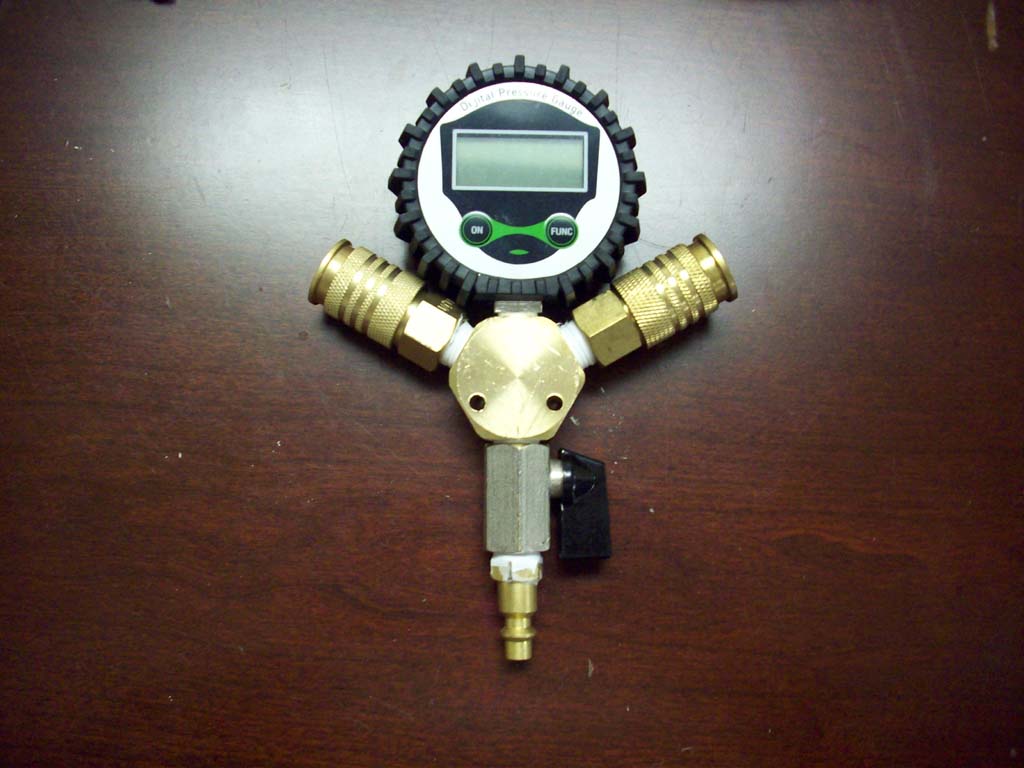
You will need the valve from the air tank drain extension hose, 2 universal quick disconnect couplers with male threads, one 1/4" MPT brass plug connector, air gauge, and 1 four way brass air manifold.
Note: Taisher 3-Way 1/4 Inch NPT Hex Style Air Manifold with 3 Pieces Brass Industrial Coupler and Plug. The kit that I purchased came with 3 universal quick disconnect couplers, the manifold, and a steel plug connector. I didn't use the steel plug connector and 1 quick disconnect. |
 |
 |
|
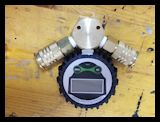
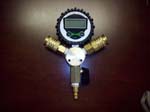
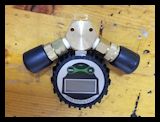
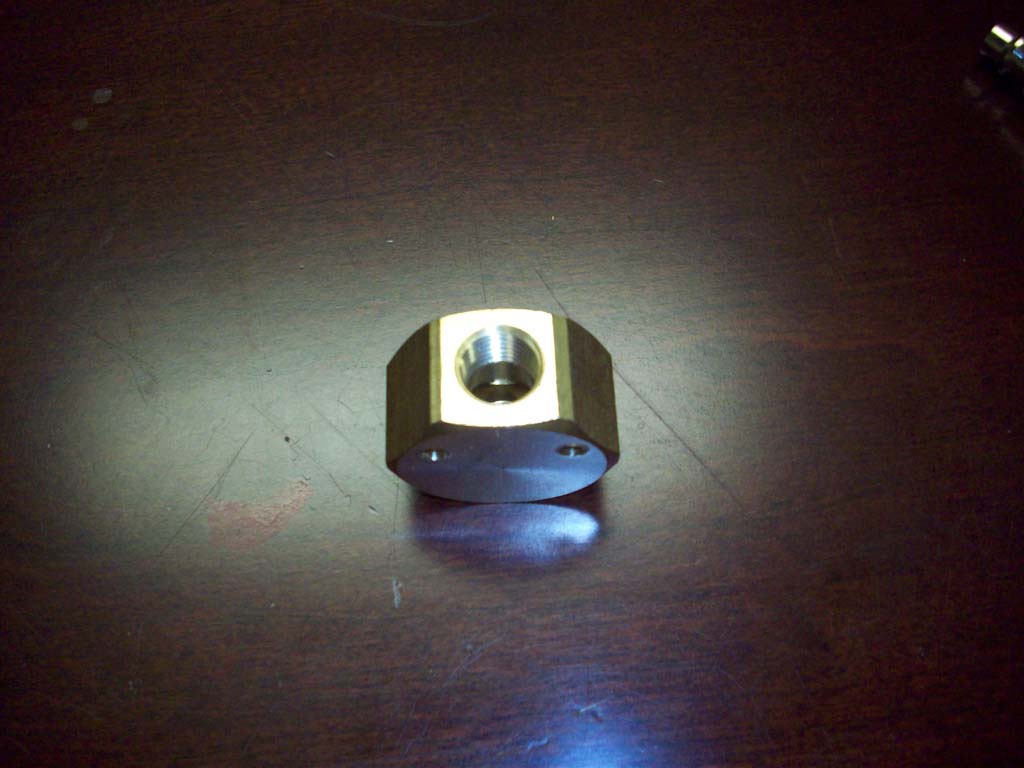
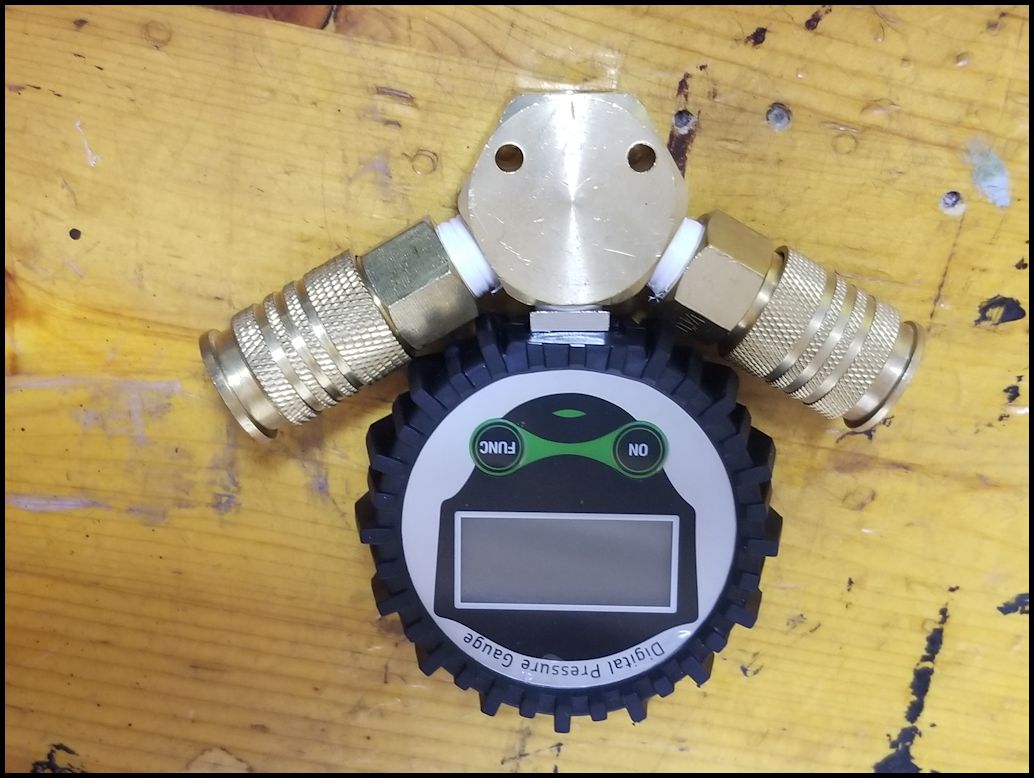
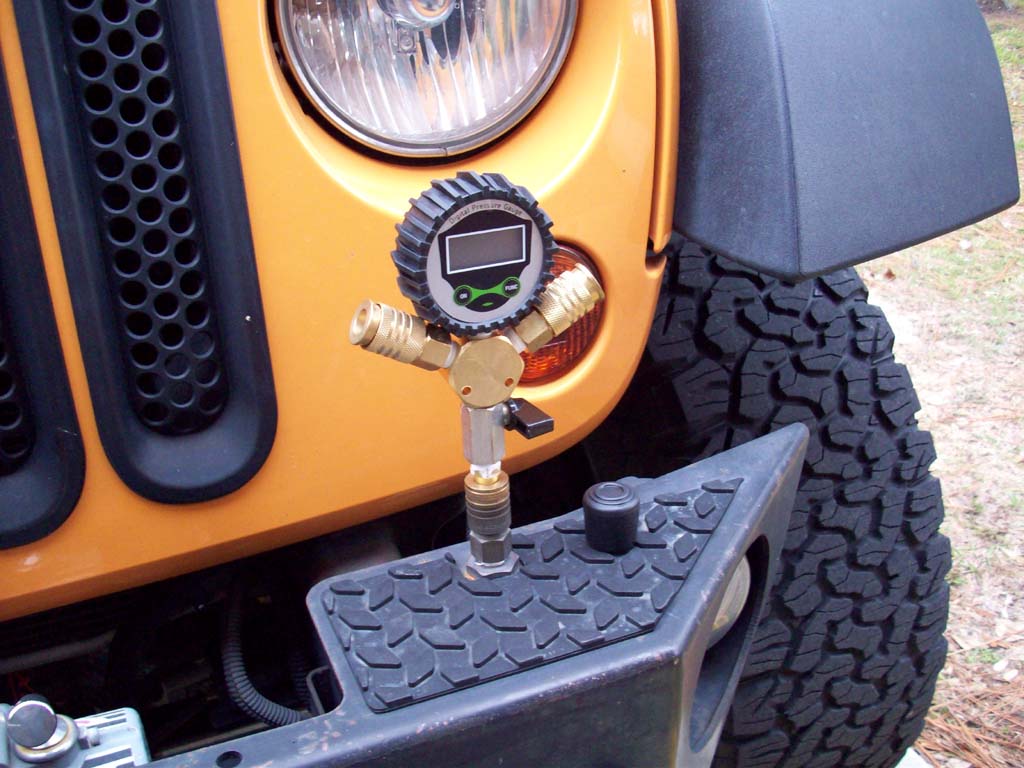
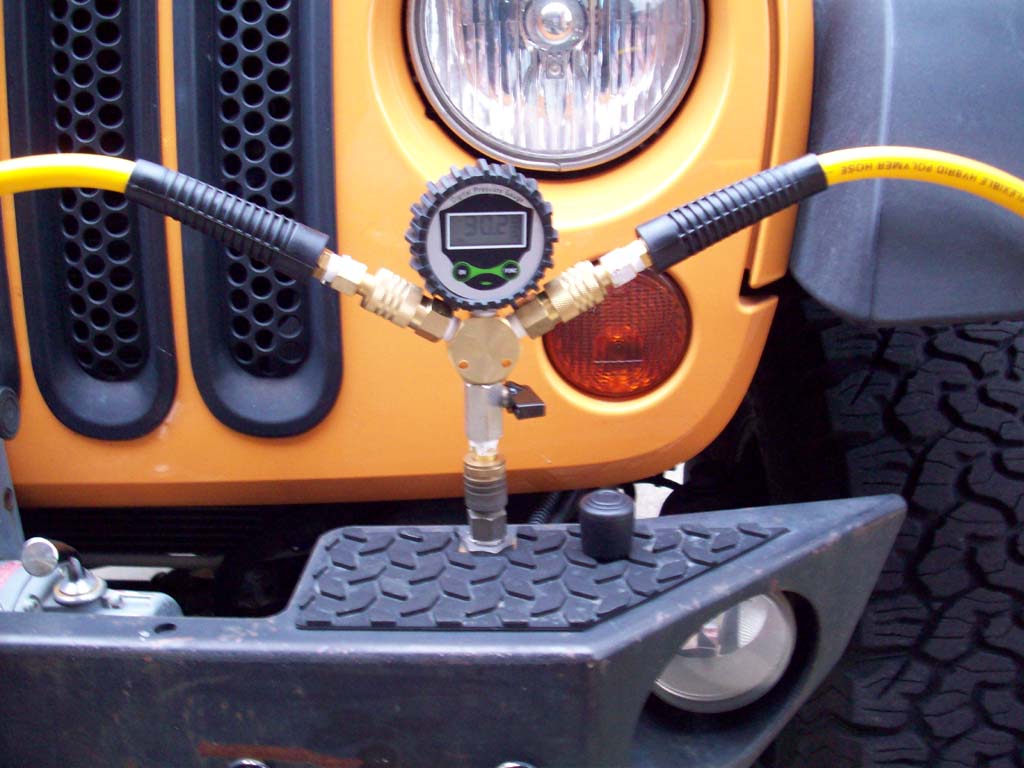
| The brass manifold has 3 threaded 1/4" FPT openings on the top, and 1 threaded 1/4" FPT opening on the opposite side. The top 3 will be used for the quick disconnect couplings and the air gauge, while the bottom will be used the valve and air coupling. |
 |
 |
| 2. Use teflon tape on all the threaded fittings prior to installation into the mainfold. Install the air gauge in the center top fitting first. Then install the two quick disconnect air couplings on either side of the air gauge. Then install the valve and 1/4" MPT brass plug connector. You will need a 3/4" combo wrench for the valve, a 9/16" combo wrench for the 1/4" MPT brass plug connector, a 1/2" combo wrench for the gauge (I needed one with a thin head due to the rubber housing of the gauge) and a 3/4" combo wrench for the two quick disconnect air couplings. |
 |
 |
 |
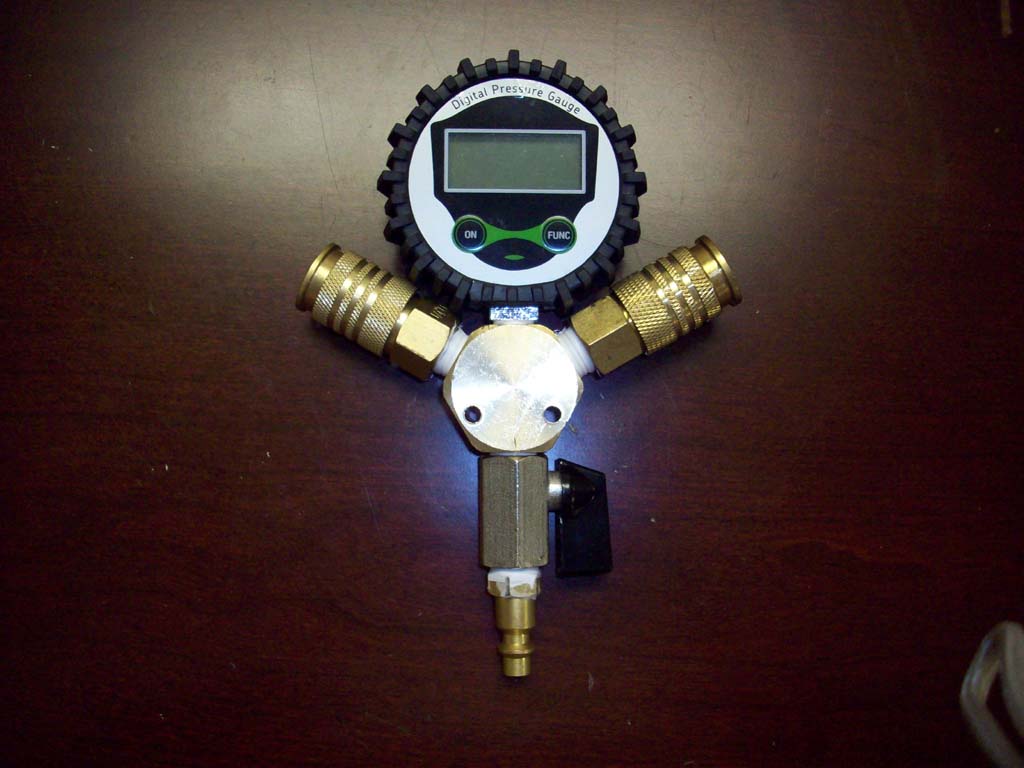
| Assembled Manifold. As you can see the quick disconnect air couplings sit very close to the air guage. |
 |
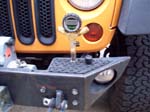
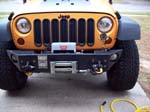
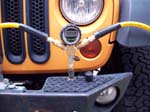
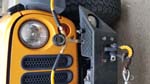
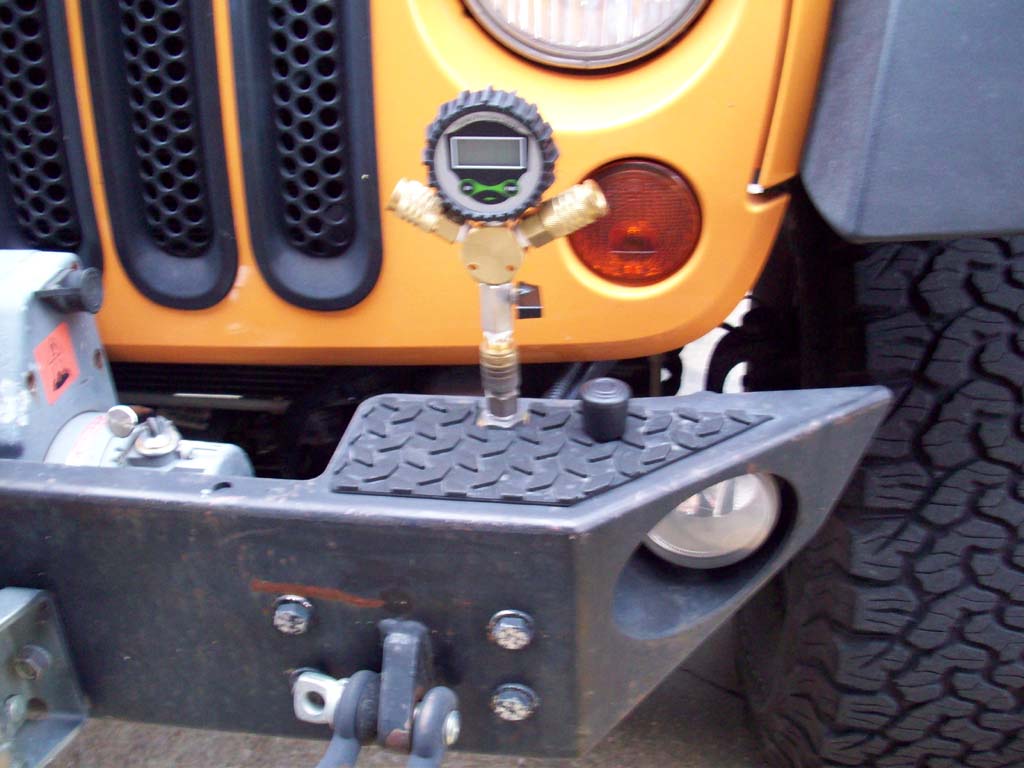
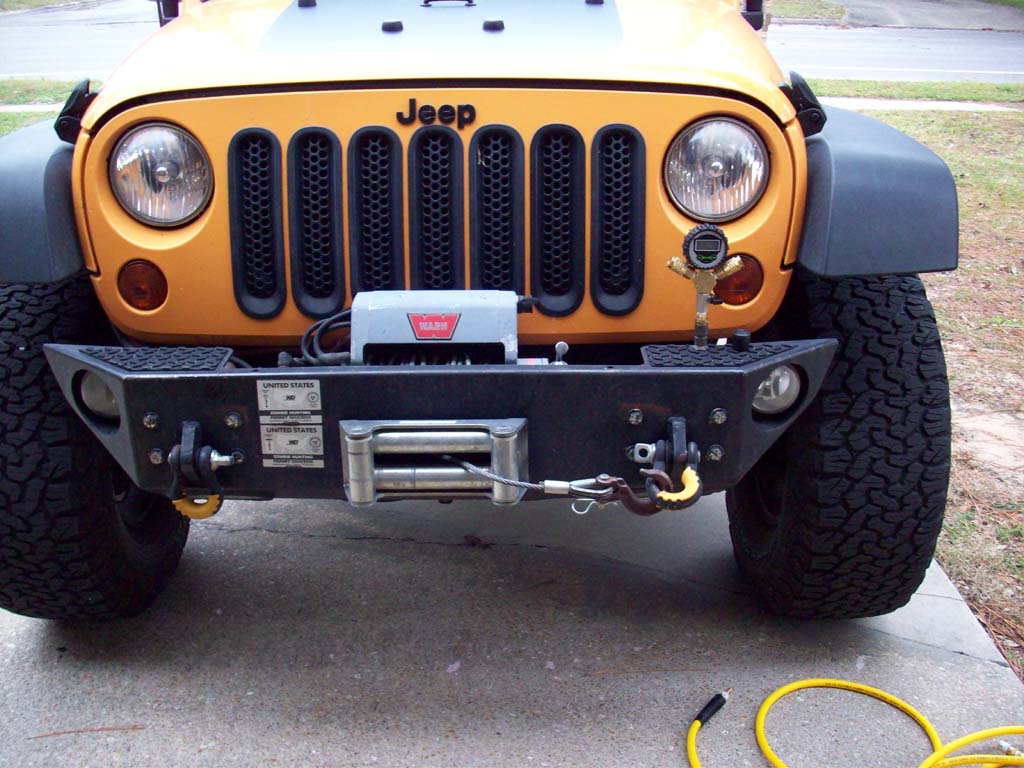
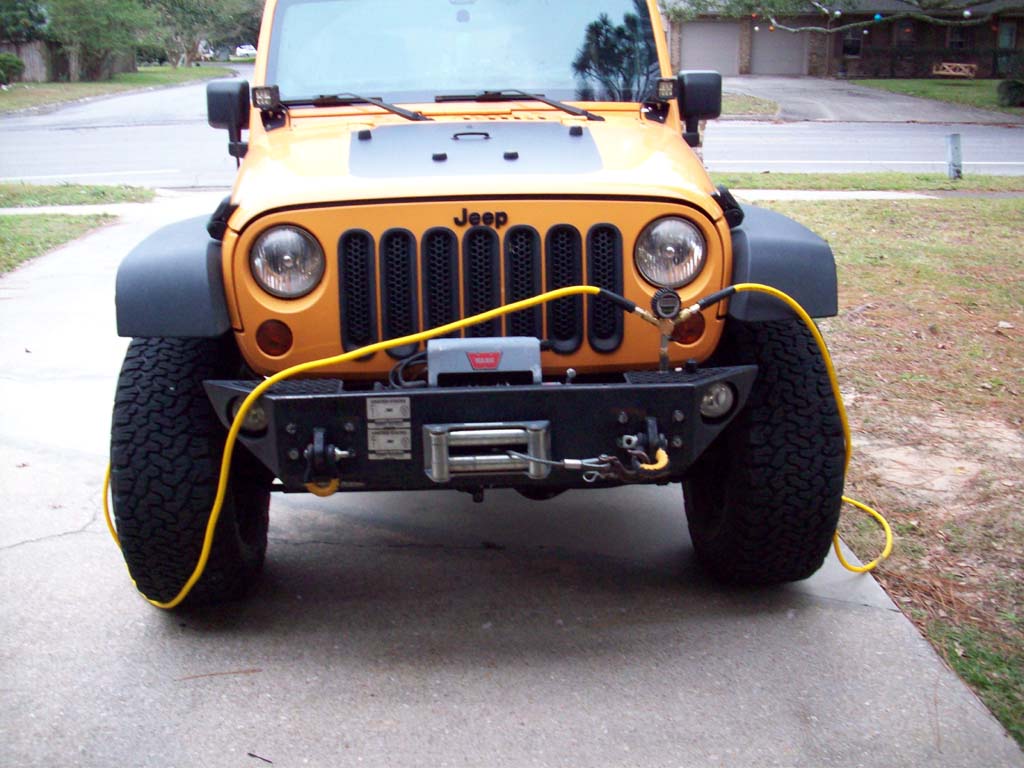
| Manifold installed on the vehicle air connection. |
 |
 |
 |
| |
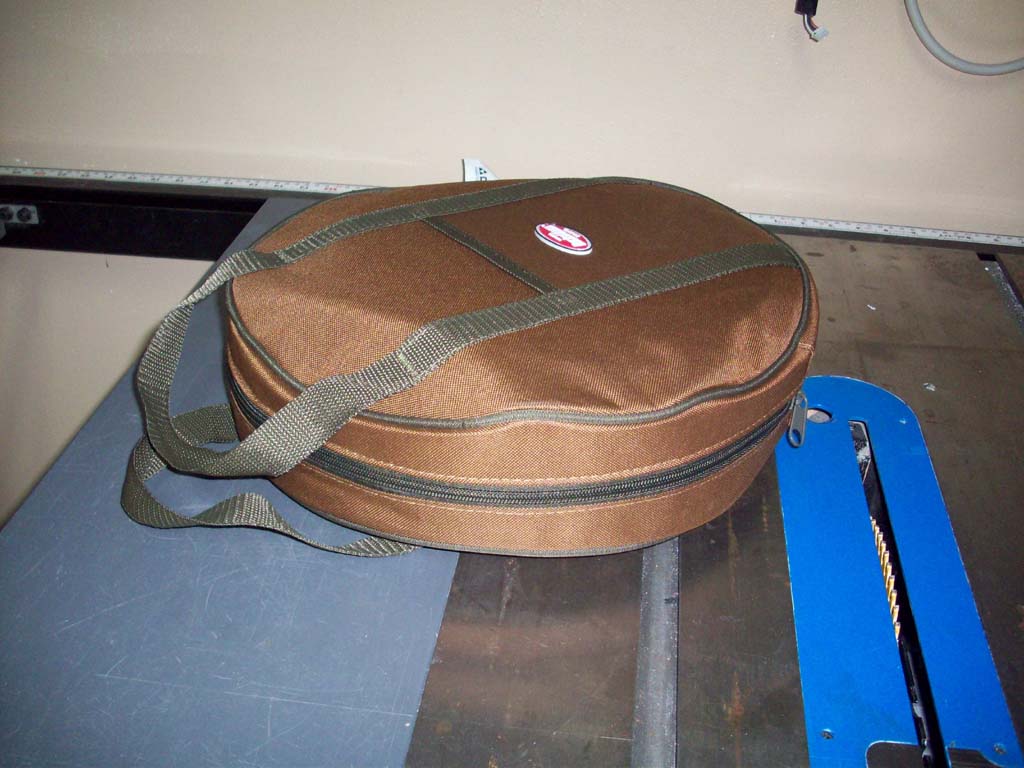
| Storage/Carry Bag: |
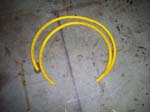
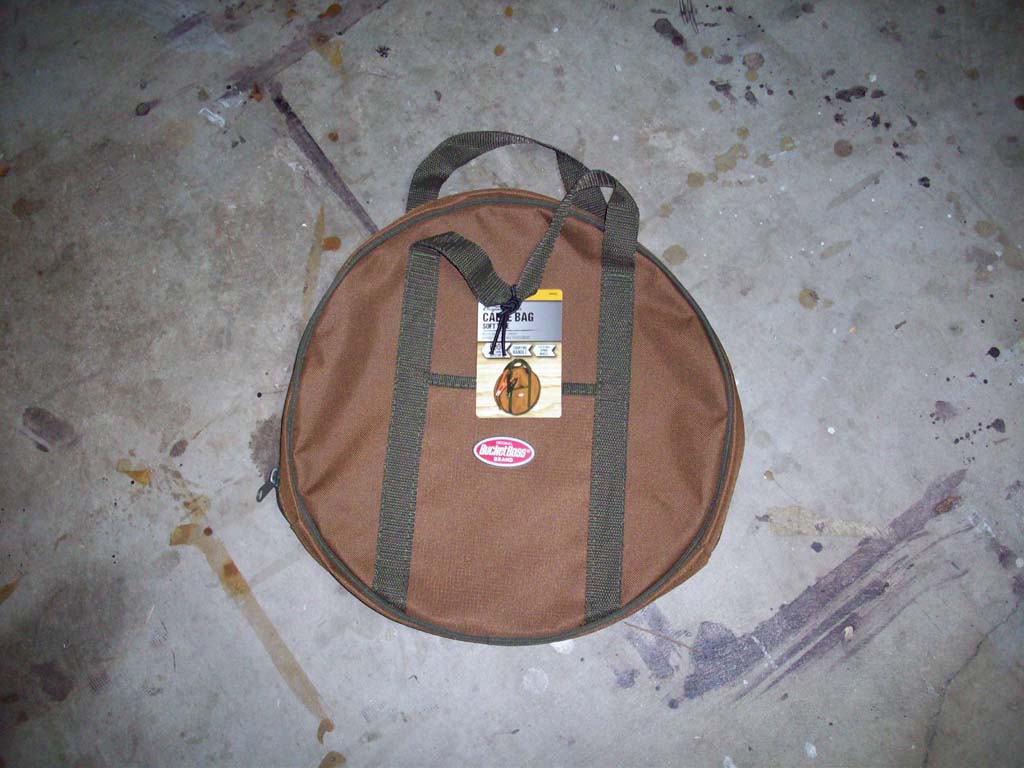
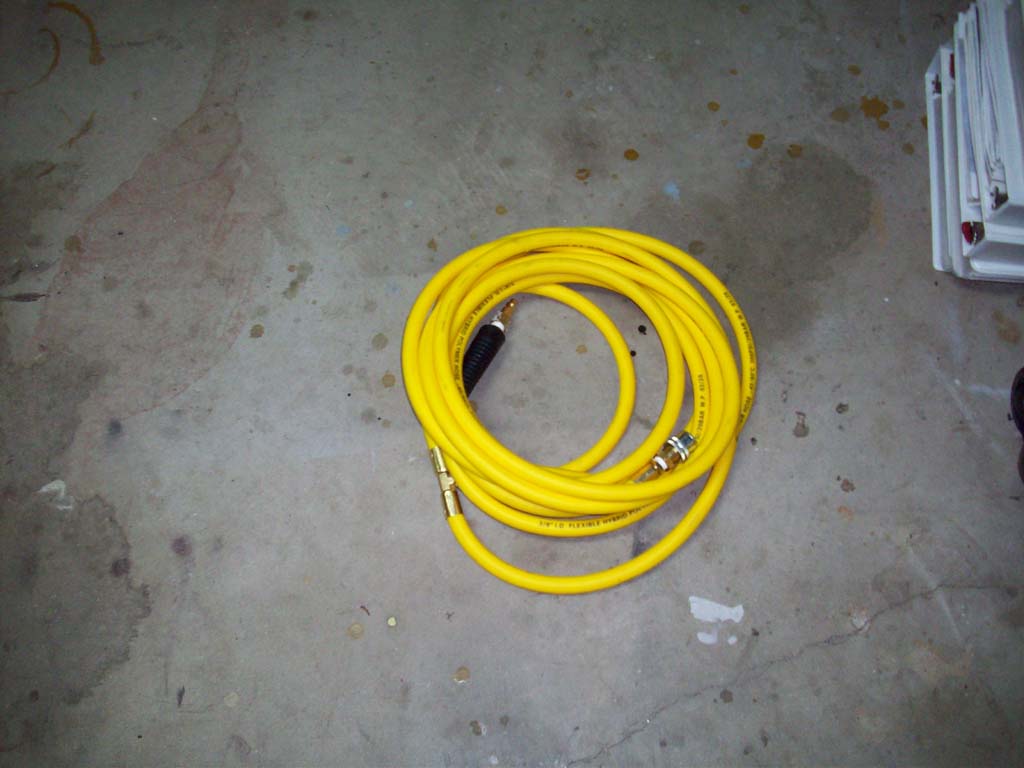
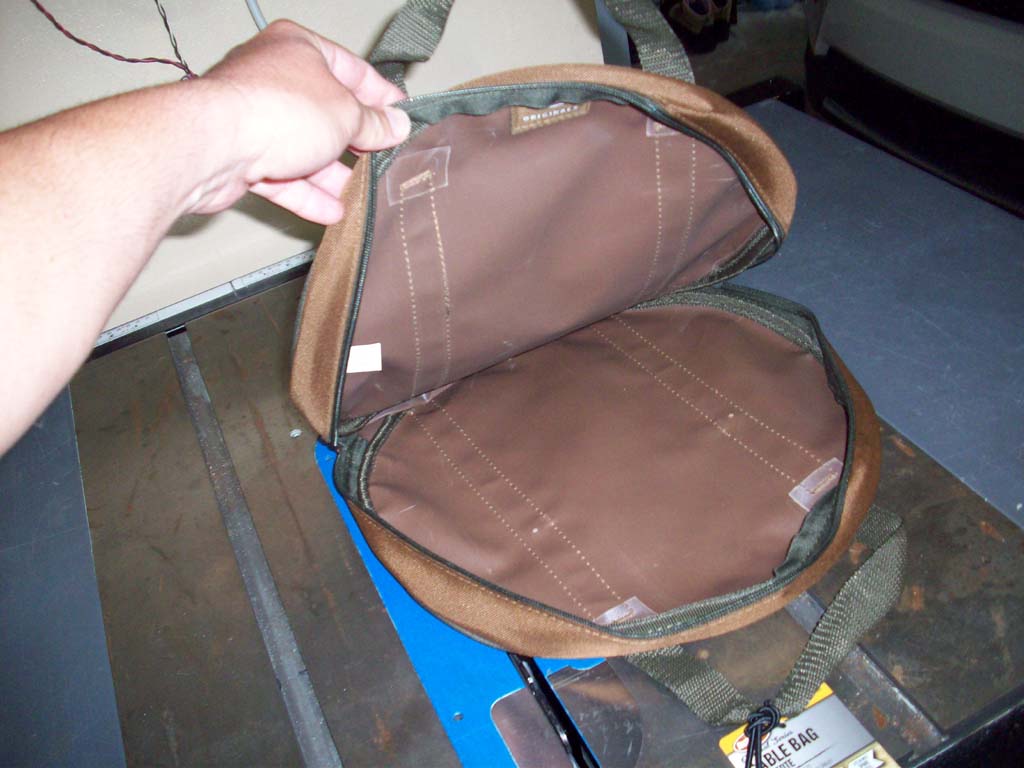
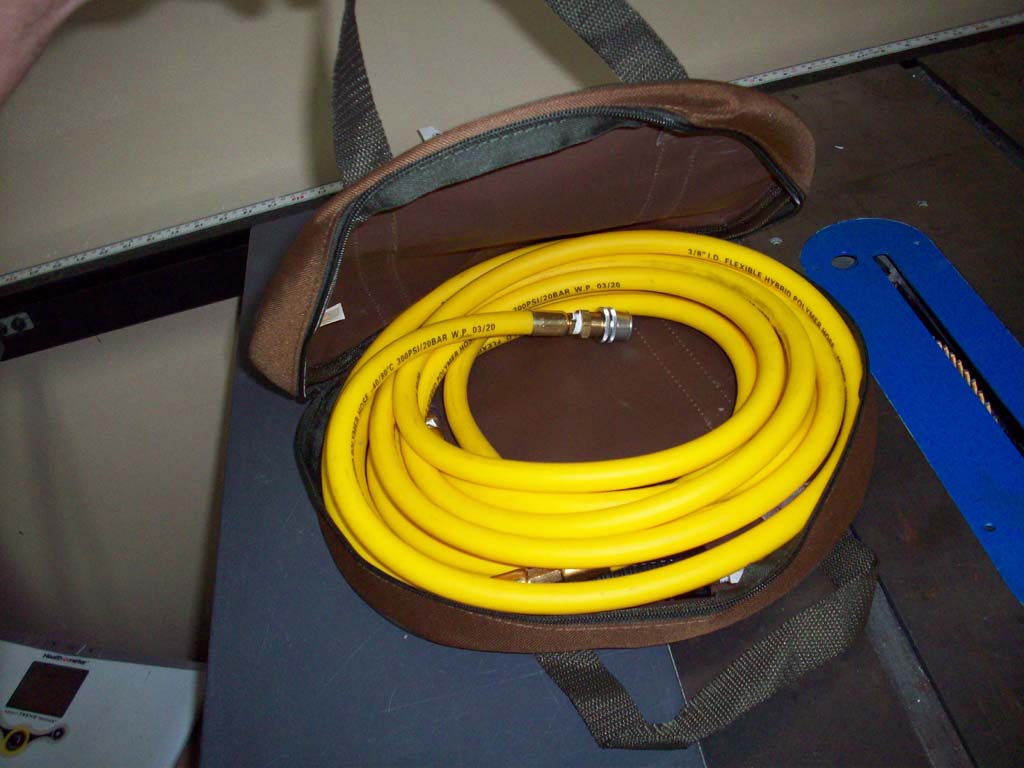
| I picked up this cable bag from Amazon. It was designed for a set of jumper cables, but easily holds the coiled air hoses, air manifold and extension hose. This makes it east to grab off the shelf and throw in the back of the Jeep before you go wheeling. Simply coil both air hoses into a loop about 12" in diameter and set them inside the bag. Place the manifold and extension hose in the center and pull the lips of the bag up so that you can zip it closed. |
|
 |
 |
 |
 |
 |
| |
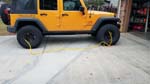
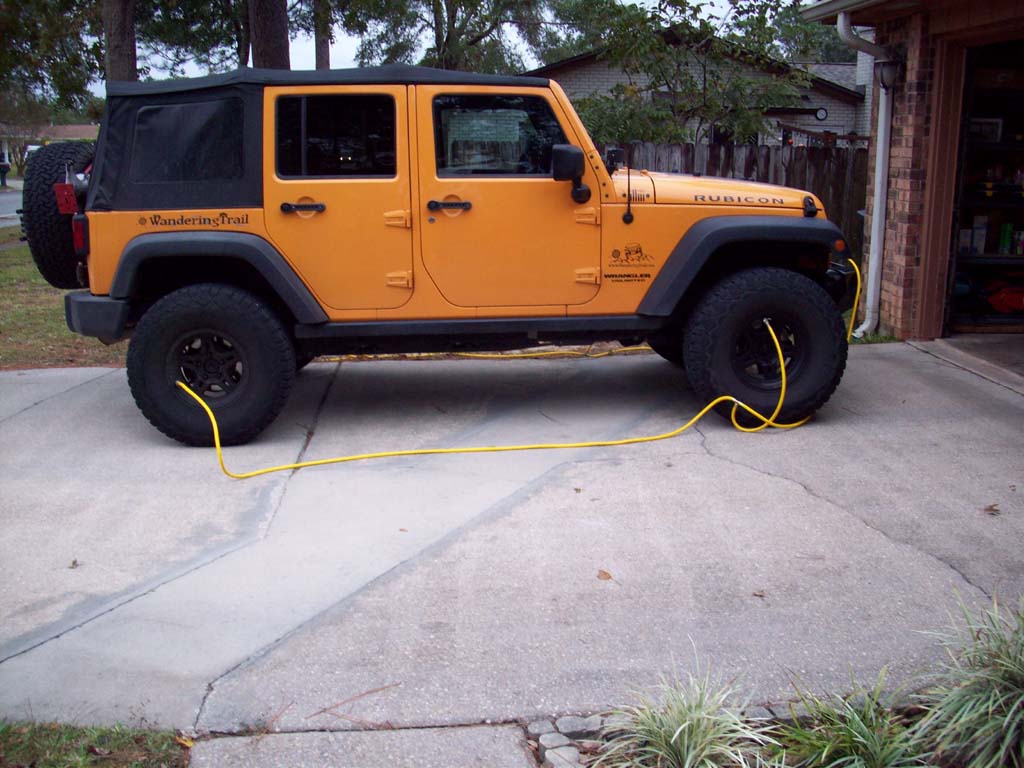
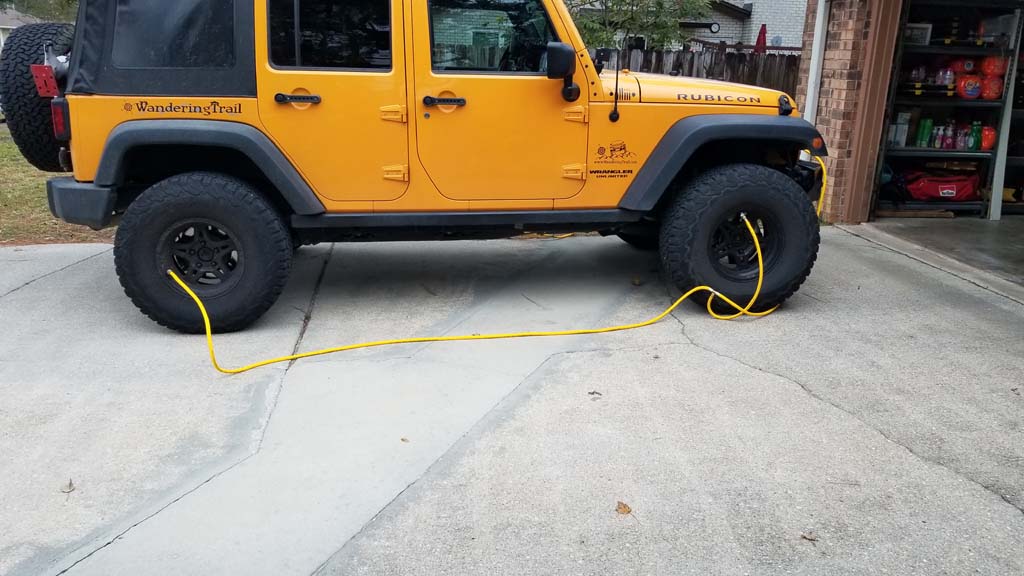
| Airing up/Airing down: |
| The only difference between airing up and airing down the tires is having the manifold connected to the quick disconnect air coupling on the vehicle. You will need to time how long it takes to air down to your desired pressure. |
 |
 |
 |
 |
 |
 |
 |
 |
| |
| Protection: |
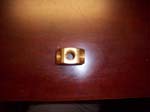
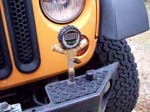
| The quick disconnnects have small ball bearing inside and are generally open to the atmosphere so the possiblility of dirt and debris getting into the top of the opening is very high. I found that some 7/8" rubber chair tips work well to cover up the opening and fit snug around the collar of the quick disconnect. You can pick these up at almost every hardware store and I have seen them at Wal-Mart also. I have had one on the front air coupler on my Jeep for nearly 10 years and the brass underneath the cap is still shiny and the quick disconnect works perfect. Florida wheeling involves a lot of sandy water and the quick disconnect on the front bumper has been buried in this water more than a few times over the years. |
|
 |
| |
| Thoughts on using coiled hoses: |
I was asked recently why I don't use the coiled polyurethane hose system that XXX makes. While I don't have anything against this setup/company, I from experience using a similar type of hose and associated fittings at work don't like them. I also like to build things.
Hose Rot: Most of the problems I have seen come from the hose rotting away. I've had coiled hoses just sitting in a box or bag inside a vehicle and when we went to pull them out to air up a tire they were brittle and rotted. This was from Florida heat and humidity. Additionally I have had them rot away from hydraulic fluid, brake fluid, gasoline, and oils getting and remaining on them for periods of time. Mechanics don't always wipe down all their tools before they get put away.
Hose Diameters: These hoses also have a smaller inside diameter than the air hose that I am using above. I don't really believe that this would make much of a difference on air up or air down speeds.
Suspending the hose vice laying it on the ground: Truly the only important parts of the hose are the ends that you don't want to get dirt and debris in. Just wipe the dirt off the hose. The ones I have at work see the dirt, grease and grubby hands all day long. The yellow is discolored, but typically just wiping them off with a rag removes most of the dirt and surface oil. They are a lot easier to clean they trying to clean a tightly coiled air line. Besides if the valve stem is close to the ground on the tire, the coiled hose is probably going to be on the dirt also, though not as much.
Valve stem connectors: Why did I use the more expensive 4 jaw clamps vice the 1 jaw clamp? The 4 jaw clamp grips the valve stem more evenly and can remain attached to the valve stem if the angle is out of alignment. I have had the the single jaw connectors fly off because they had a pull to the side of the valve stem and the jaw depressed slightly and the connector simply blew off the valve, or started to leak. I wanted to be able to connect them and not have to go back and try to get them to seal just because they were at an angle. This goes back to the coiled hose pulling at the valve stem while it is suspended between the tires. I have used two different types of 1 jaw clamp connectors, the 90 degree, and the inline. The inline is much better at staying on the valve then the 90 degree, but they 4 jaw is superior.
Amount of space/weight: The coiled hose system can be compacted into a smaller bag if you really try hard, but it's really not that much smaller. I typically just throw the cable bag in the back where the wheel well slopes into the back seat. The round bag sits well there. If I have my bag with the coiled hoses in it, I just throw it in the same spot. The coiled air hose are definetly lighter, so if you really need to lose a few pounds. |
| |


