One of the things that needed to be addressed with lifting a vehicle is the front trackbar. The factory bar is a fixed length and once you start lifting the Jeep, the front axle starts to move over more to the drivers side. The effects the front driveshaft, control arms, steering drag link, turn radius, and where you tire stuffs into the wheel well during articulation. There are plenty of adjustable track bars and track bar brackets out there to address this issue. I picked up a JKS trackbar during a sale and decided to finally fix my off center front axle. JKS says the adjustable track bar will work with lifts from 1" - 6" lifts. Last time I checked with JKS they were already at Gen 4 on their trackbar. The Gen 4 is supposed to fit with the new steering sector shaft brace, the older ones will not.
Additional
Parts:
Tools
Needed:
21 mm Socket
21 mm Combo Wrench
Ratchet
A friend, or really strong legs.
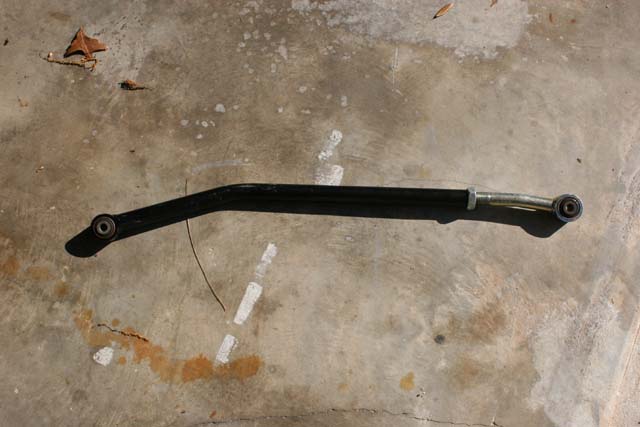
The JKS bar comes complete by itself, no extra parts needed, you will reuse your stock bolts and nuts.
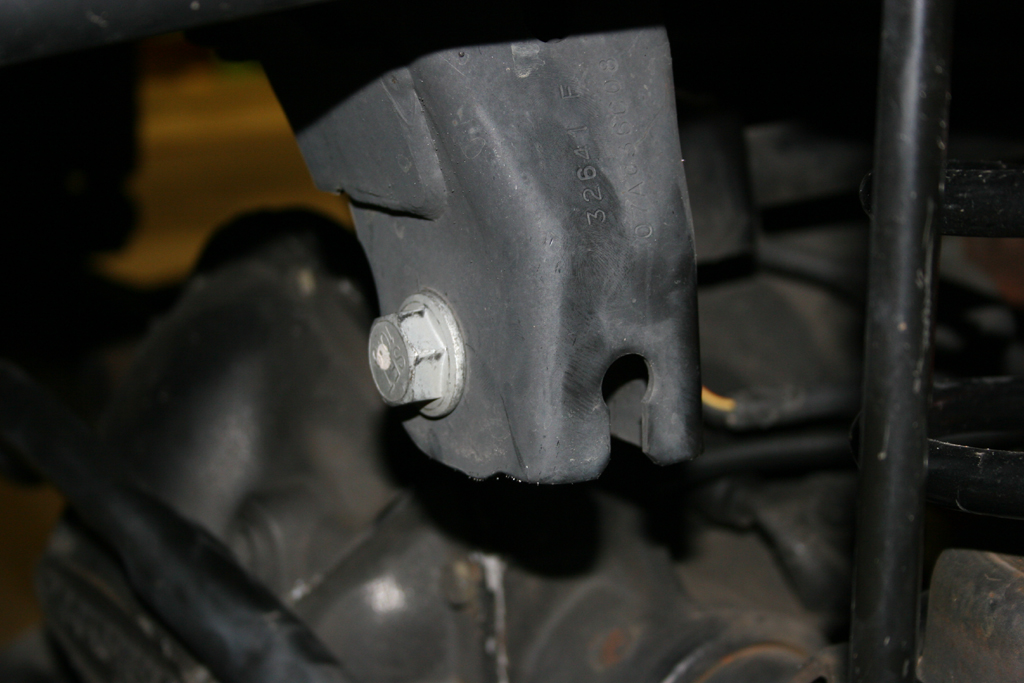
1. Remove the stock track bar bolt from the frame with a 21mm socket and combo wrench. This is really tight, so be careful with your hands.
2. Remove the stock track bar bolt from the axle with a 17mm socket. There is a blind nut on the back side that will fall out once you remove the bolt. Remove the stock trackbar.
Quick comparison shot.
3. Now measure to see where you front axle is sitting in relation ship to the frame. Take the difference between the measurements and divide by two, this is how far over you will need to move the axle. My axle was 3/4" over on the drivers side so I needed to move mine over 3/8".
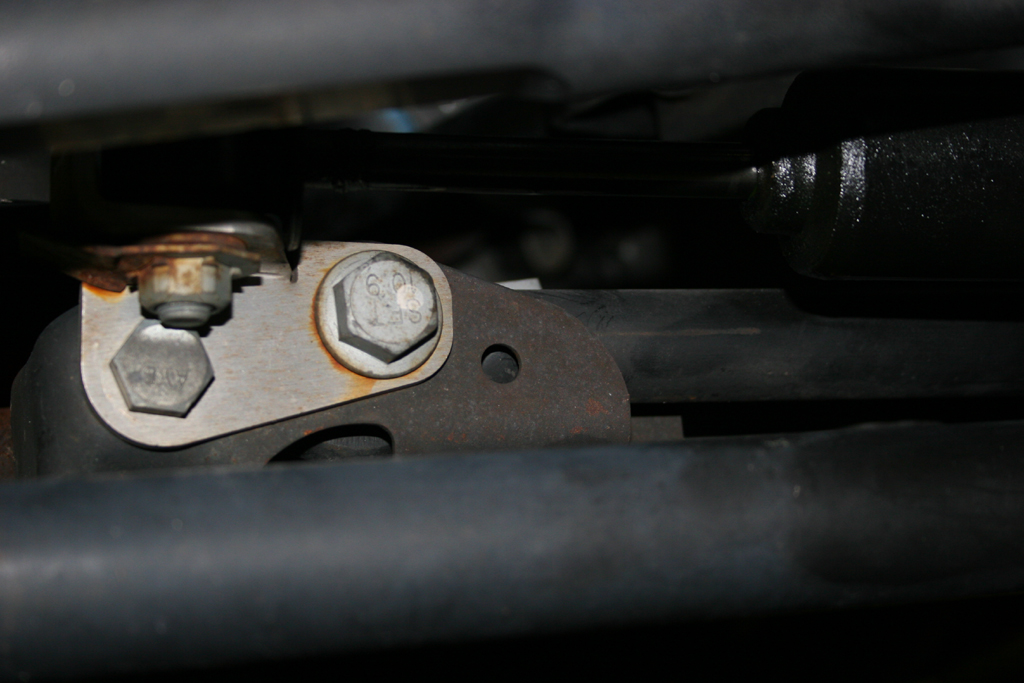
4. Install the frame side of the JKS track bar into the axle bracket on the Jeep. Do not torque this bolt down yet, I did snug it up to keep it from twisting in the bracket. The factory fit is a little sloppy.
5. Now adjust the JKS track bar out until you have the about the correct length that you need to adjust the axle over. I needed to move mine over 3/8", so I just extended the trackbar until the hole in the trackbar was 3/8" further than the hole in the axle bracket. The bar is adjustable in 1/32" increments.
6. Install the bolt in the axle bracket for the trackbar. Here is where a friend or really strong legs come in handy. Believe me friend is easier. My 4 year old helped me with this one.Turning the steering wheel will cause the body and frame on the Jeep to move over, doesn't take a lot to get the holes to line up.
NOTE: I do not suggest Starting the Jeep, just unlock the steering wheel and do it manually. Something about laying underneath a running vehicle. Watch where your hands are in relationship to all moving parts, and maintain a good communication with your assistant. You can alternatly use (I don't recommend) a ratchet strap to move the frame, but don't use one of the cheap little straps, they are generally only rated for 200lbs and can snap under tension, and you will be right in line with the hooks and ratchet.
7. Torque the trackbar axle bolt and the trackbar frame bolt. Make sure you get these torqued properly. Loose bolts on the trackbar is a leading cause of Death Wobble.
8. Take it for a drive and recheck the axle to frame position measurements. You may need to make a second adjustment. Recheck the torque on the axle and frame bolts.