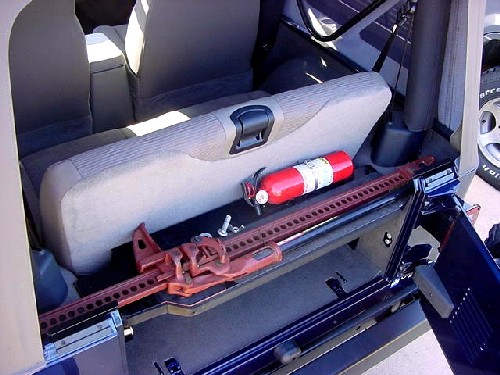
I have 48" Hi-Lift Jack and spent sometime trying to
figure out a good secure location. Now I have seen the mounted to
the bumper, tire carrier, under the hood, and to the roll bar. All
of these left the jack either open to the elements, to theft, submerged
in the water, or pinned between the bumper and a rock. Since I had
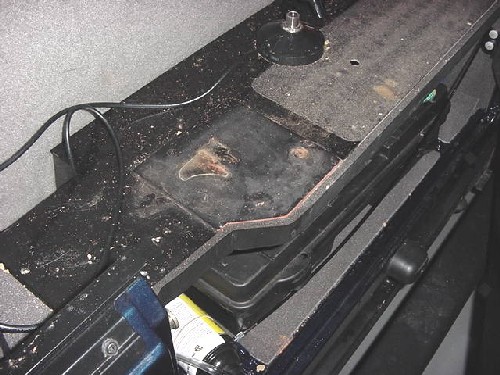
the Insta-Trunk installed I realized that I had a nice flat surface that
the jack could lie on. I did have to take off the base to install
it here, but I just threw it in with the rest of my recover gear.
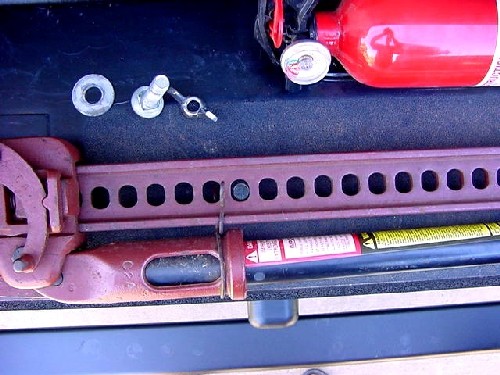
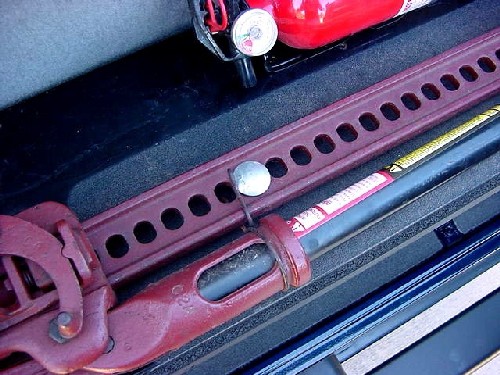
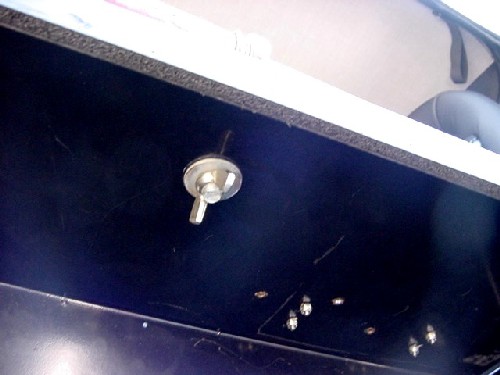
I also saw that I could run a 1/2" x 2" Carriage bolt down through
the jack and the top of the Insta-Trunk. I secured it below with
a wing nut. The carriage bolt catch the edge of the holes in the
jack bar, instant theft deterrent. Now I could lock the trunk and
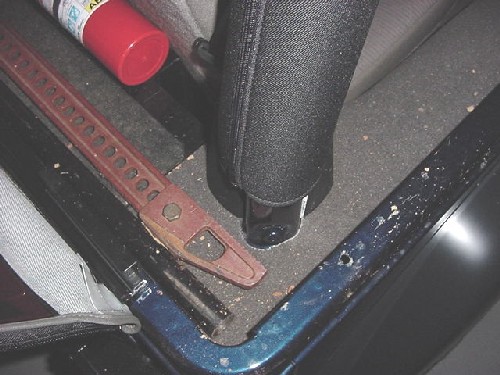
leave the jack right where it was. I did find that you need a rubber
pad under the head to keep it from rattling to much, and another on the
roll bar where the top clevis is close to just to prevent scratches on
the roll bar. I do need to make a cover for the head to protect
the back of the seat and the head from the elements. I always carry
a rebuild kit with the rest of my gear, because you never know when you
might have a problem with it.
Additional
Parts:
Rubber pad
Glue
1/2" x 2" Stainless Carriage bolt
1/2" washer
1/2" Wing nut
Tools
Needed:
Drill
Installation:
1. Remove the jack foot and place the Jack on the top of the Insta-trunk
and position the head so that it is just inside the bevel of the door
lock assembly.
2. The bar should be about equal distance from the edge of the body on
both sides.
3. Mark a spot in about the center of the jack and drill a 1/2"
hole. I touched up the hole with a little bit of paint to prevent
rust.
4. Insert the 1/2" carriage bolt through the top.
5. Install the washer and tighten up the Wing nut.
6. Now all you need to do is find a place for the foot to go. I
found that it fit inside my recover box, but you could also place
it under the passenger seat by the factory jack, or underneath the
insta-trunk in this case.