A friend of mine was originally going
to install the Tri-County Gear flat skid and engine skid. This required
a new drive shaft, Motor Mount Lift and Body Lift. After waiting
quite a while for them to ship his stuff he finally managed to convince
them to at least send the Body Lift and Motor Mount Lift. I helped
him install these on his Rubicon. Here is my write up on the Body
Lift. The spacers were nicely machined, but I of course worry about
putting aluminum spacers in with steel parts. I have seen way to
much dissimilar metal corrosion in my career. Especially since I
know that these will be exposed to salt.
Additional
Parts:
Anti-seize
Tools
Needed:
16mm socket
10mm socket
7/16" socket
7/16" combo wrench
Floor Jack/ wood and a spacer
A couple of notes before you begin this.
The Gas Tank filler hose will be stretched even with the body back down
on these mounts, so be careful as to how high you lift the rear of the
Jeep. On the other side with the 2003's is the charcoal canister
with it myriad of plastic hoses, these don't stretch, so once again you
have something to be concerned with. The transfer case shifter lever
spacer may or may not be needed. We did TCG's 1 1/2" Motor
Mount Lift at the same time so didn't really need to put it in.
You will also need to disconnect the Fog Lights. The wiring is to
short for it to remain in the stock location. What I did was just
pull the clip out of the hole under the fender and leave it hang.
There is an extension for these Extension part # W82203245.
Installation:
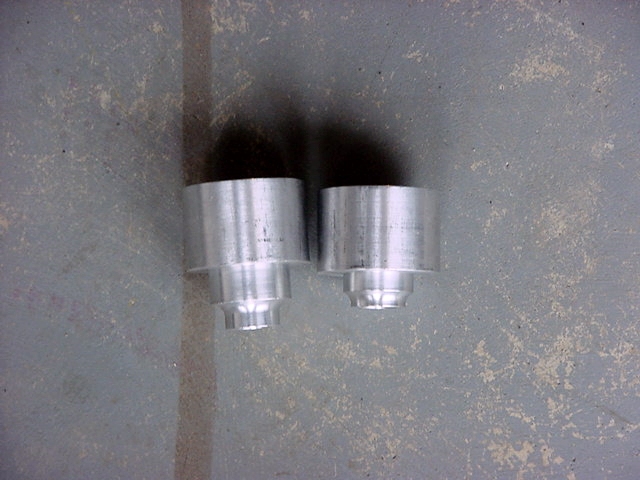
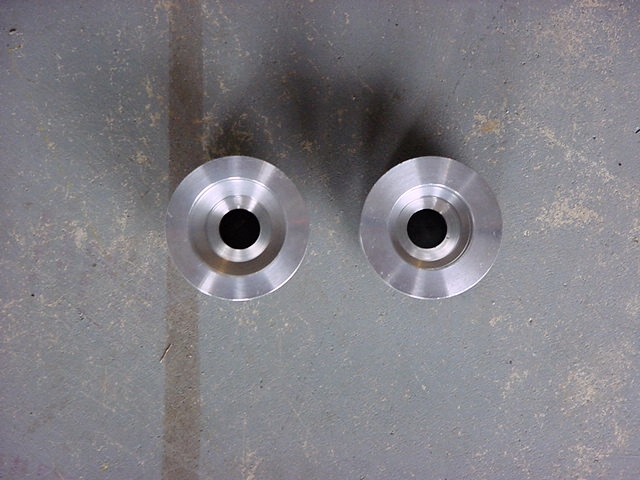
This is what the
spacers look like.
1. I used a floor jack to lift the body. I needed to use a cinder
block on top of the jack to get enough distance to actually lift the
body. I could have probably done this with a big chunk of wood,
but I didn't have any of that. I did put a piece of wood between
the body and the block. I positioned the jack near the rear
part of the door so that I could try to lift the body evenly.
2. I loosened all of the body mount bolts. There are 6 underneath
the doors, 1 underneath the front grill, 2 up above the rear axle
in front of the gas tank, and 2 more under the rear corners of the
Jeep.
3. I laid out all the pieces of the kit so that i could get easy access
to them. I then removed the 5 body bolts from the driver side
and the 1 bolt holding the grill in position. The grill moved
forwards on me as soon as I took this bolt out. This caused
a little concern, but I could push on the grill and it moved easy
enough so I figured I could get it back in.
4. I then lifted up the body just enough to clear the new mounts.
Be careful how far you lift it. The gas fill tube will be stretched
on the driver side and over on the passenger side you have to be careful
about the plastic lines going to the vapor recovery system.
5. One at a time I pulled the old mounts apart and inserted the spacers
in between the pieces and then reinstalled them. I did need
to clean out a couple of the frame mounting brackets to get the spacers
back in.
6. Once you get all the body mounts in, slowly lower the body back
down on them and loosely install all of the bolts. You may have
some problems with the rear 2 bolts because the nuts are in a channel
and move around. A Philips screwdriver or something else small
will help you get them back in alignment.
7. Now repeat the same over on the other side. This time make
certain that you install the front grill support. This gave
me the hardest time lining back up. Another person would have
been helpful, but I was able to get it. Now tighten all the
bolts down to the factory specs.
NOTE: One interesting item of note is that these did not come with any extended
length front snubbers for the grill, or an insert to take up the space
to the factory snubbers. Additionally since this is designed
to work with the MML, and the belly up skid plate Tri-county gear
did/ does not include any shifter bracket.